
What Is Developmental Psychology?
Developmental psychology is a subfield of psychology that focuses on the study of how individuals develop and change over their lifetime, from infancy through old age. It is concerned with examining the biological, cognitive, social, and emotional changes that occur across the lifespan, and how these changes influence behavior and interactions with the environment. Developmental psychologists study a range of topics, including language acquisition, cognitive development, socialization, personality development, emotional development, and moral reasoning. They seek to understand how individuals’ experiences, interactions, and environmental factors shape their development over time. Some of the key theories in developmental psychology include: 1. Piaget’s theory of cognitive development: This theory proposes that children go through four distinct stages of cognitive development, each marked by different abilities and ways of thinking. 2. Erikson’s theory of psychosocial development: This theory proposes that individuals go through eight distinct stages of psychosocial development, each marked by a different conflict or challenge that must be resolved in order to develop a healthy sense of self. 3. Vygotsky’s sociocultural theory: This theory proposes that cognitive development is shaped by social interactions and cultural context, and that language and communication play a crucial role in this process. 4. Bowlby’s attachment theory: This theory proposes that early experiences with caregivers shape the development of attachment styles, which in turn influence relationships and social interactions throughout the lifespan. Overall, developmental psychology seeks to understand how individuals grow and change over time, and how these changes influence behavior and interactions with the world around them.
Animal Yoga for Kids
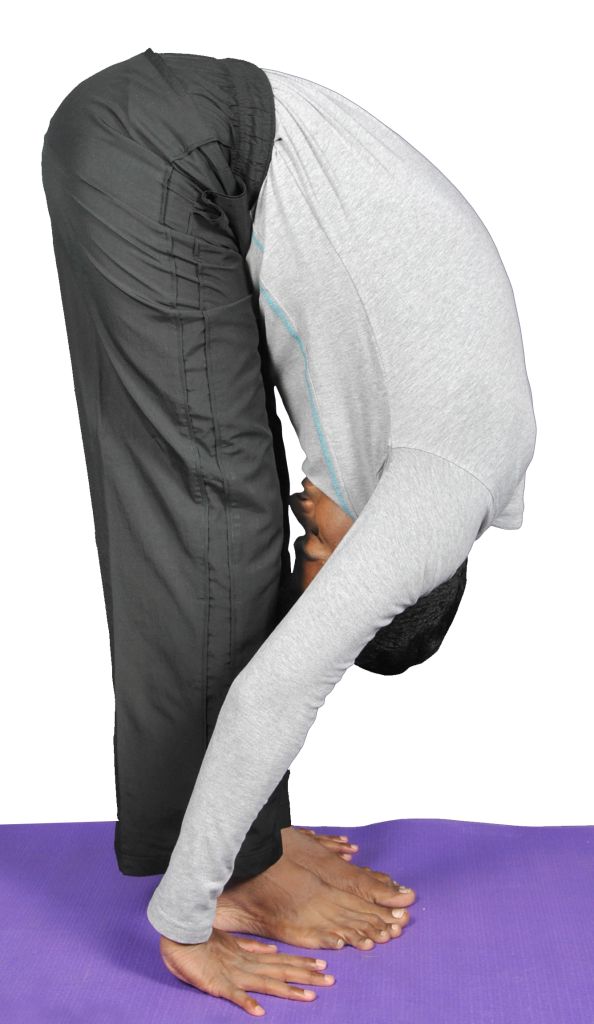
Animal yoga, also known as “zoo yoga,” “creature yoga,” or “jungle yoga,” is a form of yoga that draws inspiration from the natural movements and behaviors of animals. It is a playful and imaginative approach to yoga that uses animal poses to tap into the animal instincts within us. In animal yoga, practitioners mimic the movements and postures of animals, such as the downward dog, cat-cow stretch, cobra, lion’s pose, and many more. The goal is to connect with the animal world, find inner strength and balance, and develop a deeper sense of mindfulness and awareness. Animal yoga can be practiced by people of all ages and abilities and is especially popular among children. It is a fun and engaging way to introduce children to yoga and encourage them to explore their creativity and imagination. Animal yoga can also be a great way to reduce stress, improve flexibility, and enhance overall well-being.
What is Ananda Yoga?
Ananda Yoga is a style of yoga that aims to harmonize the body, mind, and spirit through the integration of physical postures, pranayama (breathing exercises), meditation, and affirmations. It was developed by Swami Kriyananda, a direct disciple of Paramhansa Yogananda, who is widely known for his book Autobiography of a Yogi. Ananda Yoga emphasizes the use of silent affirmations, or positive statements, during the practice of each posture. These affirmations are intended to help practitioners deepen their awareness of the connection between their physical body and their inner self, and to cultivate a more positive outlook on life. The physical practice of Ananda Yoga is based on traditional Hatha Yoga postures, with a focus on the smooth flow of movement and breath. The practice is designed to be accessible to all levels of practitioners, with modifications offered to suit individual needs and abilities. Ananda Yoga classes typically begin with a period of centering and meditation, followed by a warm-up sequence of gentle movements and stretches. The main portion of the class consists of a sequence of standing, seated, and reclining postures, each held for several breaths. The practice ends with a period of deep relaxation, known as Savasana, and a closing meditation. Overall, Ananda Yoga aims to help practitioners experience a sense of inner peace and joy, and to deepen their connection to their true self.
What is the difference between aerobic and anaerobic exercise?
Aerobic and anaerobic exercises are two types of physical activities that differ in terms of the way they use energy in the body. Aerobic exercise is an activity that requires a steady supply of oxygen to the muscles in order to sustain physical activity over a prolonged period of time. This type of exercise typically involves rhythmic and repetitive movements that can be sustained for a long period of time without causing undue fatigue. Examples of aerobic exercises include running, cycling, swimming, dancing, and brisk walking. Anaerobic exercise, on the other hand, is a short and intense activity that does not rely on oxygen to fuel muscle contractions. This type of exercise involves high-intensity bursts of energy that can only be sustained for a short period of time before the muscles become fatigued. Examples of anaerobic exercises include weightlifting, sprinting, and jumping. During aerobic exercise, the body uses oxygen to produce energy through a process called cellular respiration. This process involves breaking down glucose and other molecules to produce ATP, which is the primary source of energy for the body’s cells. In contrast, during anaerobic exercise, the body relies on other sources of energy, such as creatine phosphate and glycogen stored in the muscles, to produce energy. Both aerobic and anaerobic exercise are important for maintaining good health and fitness. Aerobic exercise can improve cardiovascular health, help with weight loss, and reduce the risk of chronic diseases such as diabetes and heart disease. Anaerobic exercise, on the other hand, can help build muscle mass and strength, increase bone density, and improve overall physical performance.
What is Acroyoga?
Acro yoga is a type of yoga that combines acrobatics, yoga, and Thai massage. It is a partner practice that involves one person (the base) supporting another person (the flyer) in various poses and movements. The practice emphasizes trust, communication, and connection between partners. Acro yoga is often performed in groups and can involve multiple flyers and bases, making it a social and interactive form of yoga. It is a challenging practice that requires strength, flexibility, and coordination, but it can also be a lot of fun and can help build community and relationships.
Principles of Asana practice

The principles of asana, or yoga postures, are rooted in the ancient Indian text known as the Yoga Sutras of Patanjali. These principles guide practitioners to cultivate a safe, mindful, and effective asana practice. Here are some of the key principles of asana: Here are some general do’s and don’ts of asana practice: Do’s: 1. Practice under the guidance of a qualified teacher. 2. Warm up your body before starting your asana practice. 3. Listen to your body and avoid overexertion. 4. Breathe deeply and mindfully throughout your practice. 5. Stay focused and present in the moment. 6. Practice consistently to see progress over time. 7. Respect your body’s limitations and do not push beyond them. Don’ts: 1. Do not force yourself into poses that are beyond your ability. 2. Do not hold your breath or strain to achieve a pose. 3. Do not compare yourself to others in the class. 4. Do not practice on a full stomach or when feeling unwell. 5. Do not practice in a way that causes pain or discomfort. 6. Do not use props in a way that compromises your alignment or safety. 7. Do not neglect the importance of relaxation and savasana at the end of your practice. 8. Alignment: Proper alignment ensures that the body is in a safe and stable position in each pose. This helps prevent injury and allows for the correct distribution of weight and tension throughout the body. 9. Breath: The breath is an integral part of the asana practice. Practitioners are encouraged to breathe deeply and smoothly, using the breath to bring awareness to the body and to help release tension. 10. Intention: Each asana is practiced with a specific intention or focus, which helps to cultivate mindfulness and connection with the present moment. 11. Balance: Asana practice should include a balance of strength and flexibility, as well as a balance of effort and ease. Practitioners should avoid overexertion or pushing too hard, as well as excessive relaxation or lack of engagement. 12. Progression: Asana practice should be progressive, building on the foundation of simpler poses to more complex poses. Practitioners should listen to their bodies and avoid forcing themselves into poses that are not yet accessible. 13. Respect: Asana practice should be approached with a sense of respect for oneself, one’s body, and the practice itself. Practitioners should avoid comparing themselves to others or seeking validation from external sources. By following these principles, practitioners can cultivate a safe, mindful, and transformative asana practice that supports physical, mental, and spiritual well-being.
Bio-mechanics of Stretching
Biomechanics refers to the study of how the body moves and the mechanical principles that govern that movement. In the case of stretching, biomechanics is concerned with the forces and movements that occur in the body during the stretching process. When a muscle is stretched, several biomechanical factors come into play, including: 1. Elasticity: Muscles and tendons have elastic properties that allow them to stretch and return to their original shape. This is why a muscle will spring back to its original length when released from a stretch. 2. Viscoelasticity: This refers to the time-dependent properties of soft tissues. When a muscle is stretched slowly, the collagen fibers within the muscle and tendons will slowly elongate, allowing for a greater range of motion. 3. Plasticity: This refers to the ability of soft tissues to deform permanently when subjected to a prolonged stretch. Over time, regular stretching can lead to changes in the length and elasticity of muscles and tendons. 4. Muscle activation: When a muscle is stretched, the muscle spindles within the muscle are activated, sending signals to the spinal cord and brain to resist the stretch. This is known as the stretch reflex and is a protective mechanism designed to prevent injury. Overall, the biomechanics of stretching are complex and involve a variety of factors, including the type of stretch, the duration of the stretch, and the intensity of the stretch. By understanding these biomechanical principles, we can optimize our stretching routines to achieve maximum flexibility and reduce the risk of injury.
Basic arc structure of yin yoga class
Definition of yin yoga Yin Yoga is a slow-paced, meditative style of yoga that focuses on stretching and targeting the connective tissues of the body, such as ligaments, tendons, and fascia. Unlike more dynamic styles of yoga that focus on building strength and flexibility through movement and muscular engagement, Yin Yoga involves holding passive stretches for several minutes at a time, allowing the body to relax and release tension. The practice is based on the principles of Chinese medicine and the concept of yin and yang, with the yin aspects of the body being targeted in the practice. Yin Yoga is often used as a complementary practice to more active forms of exercise and is known for its calming and grounding effects on both the body and mind. Basic arc structure of yin yoga class The basic arc structure of a yin yoga practice typically includes the following components: 1. Centering: The class begins with a centering practice, which may include some gentle movements, breathe work, or meditation to help students settle into their bodies and focus their minds. 2. Warm-up: This is followed by a gentle warm-up sequence that prepares the body for the deeper, longer holds of the yin poses. The warm-up may include movements to mobilize the joints, gentle stretches, or simple sun salutations. 3. Yin Poses: The main part of the practice consists of a series of yin poses, which are typically held for 3-5 minutes each. These poses focus on stretching the connective tissues of the body, as well as stimulating the flow of energy through the meridians. 4. Cool-down: After the yin poses, the class moves into a cool-down sequence that includes gentle stretches and movements to release any tension or tightness in the body. 5. Savasana: The practice ends with a final relaxation pose, typically savasana, where students lie down on their backs and relax completely for a few minutes. This allows the body to integrate the benefits of the practice and helps to calm the mind and reduce stress. Throughout the practice, the focus is on cultivating mindfulness, awareness, and presence in the body and mind. Students are encouraged to listen to their bodies and modify the poses as needed to suit their individual needs and limitations.
The Art of observing and adjusting asana
Developing practice teaching visual observation skills is essential for a yoga teacher to provide effective guidance to students. Here are some tips on how to develop these skills: 1. Practice with a mentor: Working with a mentor can provide invaluable feedback on your teaching style and help you identify areas for improvement. Ask your mentor to observe you while teaching and provide constructive criticism on your cues, sequencing, and adjustments. 2. Practice with a small group: Teaching a small group of students can help you develop observation skills as you have the opportunity to give individual feedback to each student. You can observe their alignment, breath, and overall practice and offer suggestions for improvement. 3. Develop your own practice: Cultivating a consistent personal yoga practice can help you become more familiar with the postures and transitions, which in turn will help you become more observant of your students’ practices. 4. Attend workshops and trainings: Attending workshops and trainings on teaching methodology can provide you with new teaching tools and techniques to refine your observation skills. You can learn how to cue and adjust students more effectively, and how to observe students in a non-judgmental way. 5. Film yourself teaching: Recording yourself teaching can help you observe your own teaching style and catch areas for improvement. You can also share the video with a mentor or colleague for feedback. 6. Attend classes taught by experienced teachers: Observing how experienced teachers give instructions, corrections, and adjustments to their students can be a great way to improve your own teaching skills. Take note of their verbal cues, body language, and sequencing. 7. Practice teaching with peers: Practicing teaching with your peers can help you gain confidence and refine your verbal cues and instructions. You can give each other feedback and work on improving your teaching skills together. 8. Use mirrors: Mirrors can be useful for observing students’ alignment and form during asana practice. Make sure to position yourself in a way that allows you to see everyone in the class and use the mirror to check alignment. 9. Focus on individual students: Paying attention to individual students can help you observe their progress, areas of strength, and limitations. Observe how students move, breathe, and hold poses, and use this information to give individualized feedback and guidance. 10. Record your classes: Recording your classes can be a helpful way to review your teaching and observe your students. Watch the recording and take note of areas where you can improve your verbal cues, instructions, and sequencing. In summary, developing practice teaching visual observation skills involves practice, feedback, and continuous learning. By honing these skills, you can become a more effective yoga teacher and provide better guidance to your students. By consistently practicing and refining your teaching and observation skills, you can become a more effective and confident yoga teacher.
Ethics in teaching and touching in asana adjustment

As a yoga teacher, it is important to use touch appropriately and mindfully while teaching asanas to students. Here are some guidelines on how to touch students in a safe and respectful way: 1. Always ask for permission: Before touching a student, ask for their permission. Some students may prefer not to be touched or may have injuries or medical conditions that require a specific approach. 2. Use light touch: When touching a student, use a light and gentle touch. Avoid using force or pressure, especially in sensitive areas such as the neck, back, and joints. 3. Focus on alignment: Use touch to guide a student’s alignment in a pose. Place your hands on their shoulders, hips, or other areas to gently guide them into proper alignment. 4. Respect personal space: Be aware of personal space and avoid touching students in inappropriate or uncomfortable ways. 5. Avoid touching areas that are sensitive or private: Avoid touching areas that are sensitive or private, such as the chest, groin, or buttocks. 6. Communicate clearly: When touching a student, communicate clearly about what you are doing and why. Use verbal cues to guide the student’s movement and help them understand the purpose of the touch. 7. Ask for permission: Before touching a student, ask for their permission. Some students may not be comfortable with touch, so it is important to respect their boundaries. 8. Focus on safety: When adjusting a student’s alignment or providing physical assistance, focus on safety. Only make adjustments that will help the student achieve proper alignment and avoid injury. 9. Be gentle: Use a gentle touch when adjusting students. Avoid using too much pressure or force, as this can cause discomfort or injury. 10. Avoid sensitive areas: Avoid touching sensitive areas such as the chest, stomach, or groin. Stick to adjusting the student’s limbs or back. 11. Be aware of cultural differences: Be aware that some cultures may have different attitudes towards touch. Be respectful of these differences and adjust your teaching accordingly. 12. Use language: Use language to guide students into correct alignment, rather than relying solely on touch. This will help students develop their own body awareness and avoid becoming dependent on physical adjustments. 13. Observe and listen: Observe students’ body language and listen to their verbal cues. If a student seems uncomfortable or resists your touch, stop immediately and adjust your approach. In summary, touching students should always be done with the intention of helping them achieve proper alignment and avoid injury. By following these guidelines, you can create a safe and respectful learning environment for your students. Overall, touching students during yoga classes should be done mindfully and with respect for each individual’s boundaries and needs.