
Acceptance Mudrā

Acceptance Mudrā Introduction Acceptance Mudrā is a contemporary yogic hand gesture designed to cultivate a sense of surrender, openness, and peace with life’s flow. Unlike many classical mudrās rooted in Vedic and tantric scriptures, Acceptance Mudrā is recognized primarily in modern yoga therapy and mindfulness traditions. It emphasizes letting go of resistance and embracing experiences—pleasant or unpleasant—with equanimity. This mudrā is particularly useful for those dealing with stress, grief, change, or self-judgment, and serves as a tool for emotional healing and resilience. Meaning Etymology: Acceptance = willingness to receive and embrace reality as it is. Mudrā = seal, gesture, or symbolic hand posture. Philosophical Meaning: Acceptance Mudrā symbolizes surrender to the present moment, removing inner conflict between “what is” and “what should be.” Symbolism: The open hands in this mudrā reflect receptivity, humility, and trust in universal flow. How to Perform Practice Posture: Sit comfortably in Sukhasana, Padmāsana, or on a chair with spine upright. The index finger is folded into the space between thumb and this finger, so that the nail touches the fold. The outer lower corner of the thumb’s nail touches the inner lower corner of the small finger’s nail. Awareness: Focus on breath and silently affirm: I accept myself. I accept this moment. I am open to life. Breathwork: Slow, deep abdominal breathing; exhale with a sense of release. Duration: Begin with 5–10 minutes, extending gradually to 20–30 minutes in meditation or relaxation. Benefits Physical Benefits Relaxes muscles of shoulders, arms, and chest. Helps reduce stress-related hypertension. Promotes deep, diaphragmatic breathing. Mental & Emotional Benefits Reduces resistance, worry, and self-criticism. Encourages self-acceptance and forgiveness. Helps manage grief, anxiety, and emotional pain. Improves adaptability to life changes. Spiritual Benefits Enhances surrender (Ishvara Pranidhana) in yogic philosophy. Promotes mindfulness and non-attachment. Deepens meditation by calming restless thoughts. Contraindications No major contraindications. Individuals with trauma history may experience emotional release; guided practice is recommended. Should not replace medical or psychological treatment but can complement it. Anatomy & Physiology Organs Affected: Heart, lungs, diaphragm, nervous system. Systems Influenced: Respiratory, circulatory, autonomic nervous system. Physiological Effects: Expands chest cavity for fuller breathing. Reduces cortisol and stress response. Promotes parasympathetic activation (relaxation response). Kinesiology Hands and forearms remain in a relaxed supinated position (palms facing up). Gentle isometric engagement of finger flexors and extensors to keep palms open. Shoulder girdle naturally relaxes downward, reducing tension in trapezius and neck. Neurology Stimulates sensory cortex regions associated with open palms and receptivity. Engages the vagus nerve through calm breathing, improving emotional regulation. Induces alpha brainwave activity → mindfulness and meditative calm. Encourages neural rewiring by pairing gesture with positive affirmations. Duration of Mudra Beginners: 5–10 minutes daily. Intermediate: 15–20 minutes twice daily. Advanced: 30 minutes in meditation, mindfulness, or yoga nidra practice. Can be practiced briefly (1–2 minutes) during stressful moments for grounding. Counter Mudra Hakini Mudrā (enhances focus and mental clarity when acceptance leads to passivity). Anjali Mudrā (prayer gesture, for centering and gratitude). Apana Vayu Mudrā (for grounding when emotions feel overwhelming). Conclusion Acceptance Mudrā is a simple yet profound hand gesture that helps cultivate peace, openness, and surrender. While it is not a classical mudrā from ancient yoga texts, it has significant therapeutic value in modern mindfulness and yoga therapy practices. It calms the nervous system, encourages emotional release, and fosters a compassionate relationship with oneself and others. By practicing this mudrā regularly, one develops the inner strength to face challenges with grace and acceptance. FAQ Q1. Is Acceptance Mudrā traditional or modern?It is primarily a modern therapeutic mudrā inspired by yogic and meditative principles of surrender. Q2. Can this mudrā help with anxiety?Yes, it relaxes the nervous system and reduces resistance, which helps ease anxiety. Q3. Can I practice it while lying down?Yes, especially in Yoga Nidra or Shavasana, palms open to the ceiling. Q4. How soon will I feel benefits?Often within a few minutes, as relaxation deepens and resistance softens. References Joseph & Lilian Lepage – Mudras for Healing and Transformation. Swami Satyananda Saraswati – Asana, Pranayama, Mudra, Bandha. T.K.V. Desikachar – The Heart of Yoga. B.K.S. Iyengar – Light on Yoga. Contemporary Yoga Therapy resources on mindfulness-based mudra practices.
Ācamana Mudrā

Ācamana Mudrā Introduction Ācamana Mudrā (often spelled Aachaman Mudra) is a yogic hand gesture rooted in Vedic rituals and yogic traditions. The word Ācamana refers to the act of “sipping water” or “purification by sipping,” which is a ritualistic practice in Hinduism, Ayurveda, and yoga. Symbolically, this mudrā represents purification of the body, speech, and mind. In yogic therapy, it is used as a subtle energy gesture that invokes inner cleansing, self-awareness, and alignment of the five elements (Pancha Mahābhūtas). Meaning Etymology: Derived from Sanskrit: Ā = towards, Camana = sipping, purifying by sipping water. Philosophical Meaning: Symbolizes purification of body, prāṇa (life energy), and consciousness. It is an inner preparation before engaging in higher yogic or spiritual practices. Mudra Significance: Through the hand gesture, it channels prāṇic currents that aid in detoxification and calming the nervous system. How to Perform Practice Seated Posture: Sit comfortably in Padmāsana (Lotus), Sukhasana, or Vajrasana. Make a bowl with your palm, by bringing all the fingers together as shown in the image. Awareness: Focus on the solar plexus (Manipura chakra) and heart center while holding the mudrā. Breathing: Practice slow, rhythmic breathing (preferably Ujjayi or natural deep breathing). Duration: Hold for 5–15 minutes, gradually extending up to 30 minutes in meditation or pranayama sessions. Benefits Physical Benefits: Aids digestion and assimilation of nutrients. Helps in balancing water element (Jala Mahābhūta). Improves hydration and body fluid regulation. Mental & Emotional Benefits: Brings mental clarity and inner purification. Reduces irritability, anger, and restlessness. Induces a sense of ritualistic sanctity before yoga or meditation. Spiritual Benefits: Cleanses karmic impressions (samskāras). Prepares the subtle body for mantra, meditation, and dhyāna. Enhances sattvic (pure) vibrations. Contraindications Should be avoided if experiencing severe dehydration, diarrhea, or fluid imbalance disorders. Not recommended during high fever or acute gastrointestinal infections. People with kidney failure or fluid retention disorders (edema, ascites) should practice only under guidance. Anatomy & Physiology Elemental Association: Water element (Jala tattva). Organs Influenced: Stomach, intestines, kidneys, bladder. Systems: Digestive system, excretory system, and circulatory balance. Physiological Effect: Enhances parasympathetic nervous system response → calming, restorative state. Kinesiology Involves isometric contraction of small intrinsic hand muscles to hold the mudrā. Activates neuromuscular circuits linked to fine motor control, improving hand-brain coordination. Gentle engagement of tendons of ring and little fingers connects with meridians related to water metabolism. Neurology Stimulates parasympathetic vagal pathways, aiding digestion and relaxation. Activates somatosensory cortex areas related to finger mapping (thumb, ring, little finger). Induces calm brainwave activity (alpha & theta states) beneficial for meditation and stress reduction. Duration of Mudra Beginners: 5 minutes per session. Regular practice: 15–30 minutes daily (can be divided into 2–3 sessions). Advanced: During meditation, pranayama, or japa (mantra chanting). Counter Mudra Prithvi Mudra (thumb + ring finger) – balances the earth element when excessive water imbalance occurs. Chin Mudra – restores grounding and balances energy if over-relaxation or drowsiness arises. Conclusion Ācamana Mudrā is a gesture of purification, balance, and inner sanctity. Rooted in ancient Vedic rituals, it aligns water element, regulates digestion, calms the mind, and prepares practitioners for deeper yogic practices. Beyond physical benefits, it serves as a spiritual tool to purify thoughts and elevate consciousness. FAQ Q1. Is Ācamana Mudrā only a ritual gesture or also therapeutic?It is both — traditionally ritualistic, but therapeutically it balances water element and calms the nervous system. Q2. Can it be practiced without actual water sipping?Yes, the mudrā itself symbolically represents purification, even without water. Q3. When should I practice this mudrā?Morning, before meditation or pranayama, or before meals for digestive benefits. Q4. Can it be combined with mantra chanting?Yes, it enhances focus and sanctity in mantra sadhana. References Swami Satyananda Saraswati – Asana, Pranayama, Mudra, Bandha. G. Kumar – Mudras for Healing and Transformation. Hatha Yoga Pradipika & Vedic ritual texts (Ācamana practice). Light on Yoga – B.K.S. Iyengar. Ayurveda classics – Charaka Samhita (references to water purification rituals).
Abhaya Mudrā

Abhaya Mudrā Introduction Abhaya Mudrā is one of the most ancient and universally recognized gestures in yoga, Hinduism, Buddhism, and Jainism. The term Abhaya means fearlessness, protection, and reassurance. This mudrā is frequently depicted in sacred art, where deities, Buddhas, or enlightened masters are shown with the right hand raised, palm facing outward, symbolizing peace and safety. It is not just a symbolic gesture but also a therapeutic yogic mudrā that influences the nervous system, emotional stability, and overall confidence. Meaning Etymology: Abhaya = fearlessness, safety, protection. Mudrā = seal, gesture, mark. Philosophical Meaning: Symbolizes protection, benevolence, and freedom from fear. It represents trust in higher consciousness and the assurance of divine support. Symbolism: When the palm faces outward, it acts as an energy shield, preventing fear, negativity, and mental disturbances from entering the practitioner’s aura. How to Perform Practice Posture: Sit in Padmāsana, Sukhasana, or even stand in Tadasana. Hand Gesture: Raise the right hand up to shoulder or chest level. Palm faces outward, all five fingers together extended upward towards the sky. The left hand can rest on the lap, in Jnana Mudrā or relaxed. Awareness: Focus on the heart or third eye center. Mentally affirm: “I am fearless. I am protected. I am safe.” Breath: Practice calm, deep breathing. You may combine it with chanting of Om or protective mantras. Duration: Hold for 5–15 minutes initially, extendable to 30 minutes in meditation or healing sessions. Benefits Physical Benefits Calms the heartbeat and stabilizes blood pressure during fear or anxiety. Relaxes involuntary tension in muscles caused by stress. Supports respiratory balance, reducing breathlessness linked to fear. Mental & Emotional Benefits Removes fear, phobias, and insecurity. Promotes confidence, courage, and inner strength. Creates a sense of safety and emotional grounding. Spiritual Benefits Acts as a protective shield in meditation or energy practices. Invokes divine grace and assurance of guidance. Enhances compassion, peace, and aura purification. Contraindications No major contraindications. Those with severe trauma or PTSD may need to practice under guidance, as suppressed emotions may surface. Should not be used as a substitute for medical or psychological treatment but as complementary support. Anatomy & Physiology Organs Affected: Heart, lungs, adrenal glands (stress response system). Systems Influenced: Circulatory, respiratory, and autonomic nervous system. Physiological Effect: Reduces sympathetic (“fight or flight”) activity and enhances parasympathetic calming response. Kinesiology Involves extension of the wrist and fingers, engaging extensor muscles of the forearm. The upright palm posture naturally opens the chest and shoulders, improving posture and lung capacity. Energy flow through palm chakras (hasta marma) creates a bio-energetic shield effect. Neurology Activates sensory-motor cortex regions mapped to the palm and fingers. Stimulates the vagus nerve (through deep breathing and calming posture), reducing anxiety. Encourages brainwave transition from beta (stress) to alpha-theta (relaxed, meditative states). Duration of Mudra Beginners: 5–10 minutes during meditation or stressful moments. Intermediate: 15–20 minutes daily practice. Advanced: Up to 30–45 minutes in prolonged meditative or healing sessions. Can also be practiced briefly during anxiety attacks or moments of fear. Counter Mudra Varada Mudrā (gesture of giving/compassion) – complements Abhaya Mudrā by balancing fearlessness with generosity. Chin Mudrā – helps ground excess energy if the practitioner feels over-stimulated. Conclusion Abhaya Mudrā is the gesture of fearlessness, protection, and reassurance, universally recognized across spiritual traditions. It strengthens the nervous system, removes fear, builds courage, and enhances spiritual confidence. Beyond symbolism, its physiological and neurological effects help balance stress, regulate breathing, and calm the heart. Practiced regularly, it empowers the practitioner to walk life’s path with inner peace and strength. FAQ Q1. Is Abhaya Mudrā only symbolic, or does it have real effects?It is both symbolic and therapeutic. The posture of the palm influences the nervous system and energy field, reducing fear and promoting calmness. Q2. Can it be practiced in public without drawing attention?Yes, it can be subtly practiced with the palm facing outward at chest level, even while standing. Q3. Can children practice Abhaya Mudrā?Yes, it is especially useful for children experiencing fear, nightmares, or insecurity. Q4. Can I combine Abhaya Mudrā with mantra?Yes, chanting Om Shanti or protective mantras (like Maha Mrityunjaya Mantra) enhances its effect. References Swami Satyananda Saraswati – Asana, Pranayama, Mudra, Bandha. T.K.V. Desikachar – The Heart of Yoga. B.K.S. Iyengar – Light on Yoga. Zimmer, Heinrich – Philosophies of India (discussion on mudrā symbolism). G. Kumar – Mudras for Healing and Transformation. Iconography references from Buddhist and Hindu scriptures (depictions of Buddha and Shiva in Abhaya Mudrā).
Abhaya Hridaya Mudrā
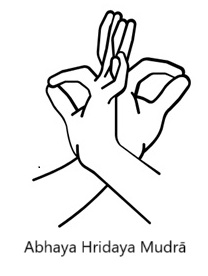
Abhaya Hridaya Mudrā Introduction Abhaya Hridaya Mudrā is a powerful yogic hand gesture that integrates the symbolism of fearlessness (Abhaya) with the seat of compassion and love (Hridaya – the heart). This mudrā represents the courageous and open heart, free from fear, anxiety, and attachment. Unlike the simple Abhaya Mudrā (raised palm), Abhaya Hridaya Mudrā is a meditative hand posture performed in front of the chest, engaging both hands in a symbolic crossing over the heart. It is mentioned in tantric and yogic traditions as a practice to dissolve emotional blocks, release fear, and strengthen the practitioner’s heart center (Anāhata Chakra). Meaning Etymology: Abhaya = fearlessness, protection, safety. Hridaya = heart, seat of compassion, emotional center. Mudrā = gesture, seal. Philosophical Meaning: The mudrā represents fearless love — the courage to open the heart without fear of vulnerability. Symbolism: Crossing the hands at the heart symbolizes surrender of ego, unity of left (moon, intuition) and right (sun, action) channels, and protection of the spiritual heart. How to Perform Practice Posture: Sit comfortably in Padmāsana, Sukhasana, or Vajrasana. Keep the spine erect and shoulders relaxed. Join your palms together as in the Indian form of salutation ‘Namaste’. Now cross the palms at your wrist, with the back of the palms facing each other and the wrist of the right hand closer to the body. Interlock the Index, Middle and Little fingers at the tips. Join the tips of the Ring fingers and the Thumbs as shown in the image. Duration: Begin with 5–10 minutes, extend gradually up to 20–30 minutes. Benefits Physical Benefits Strengthens heart and circulatory health. Improves lung capacity and breath regulation. Reduces palpitations and stress-induced cardiovascular imbalance. Mental & Emotional Benefits Releases fear, grief, and emotional pain. Encourages forgiveness, love, and compassion. Promotes emotional resilience and confidence. Spiritual Benefits Activates and harmonizes the Anāhata Chakra. Helps dissolve ego barriers, enhancing divine connection. Encourages surrender, devotion (bhakti), and openness to universal love. Contraindications People with acute cardiac conditions (heart attack, unstable angina) should avoid unless guided by a yoga therapist. Those with severe depression or trauma should practice gently and under guidance, as it may surface repressed emotions. Not to be done immediately after heavy meals (pressure on chest region). Anatomy & Physiology Organs Affected: Heart, lungs, thymus gland (immune support), arms and chest muscles. Systems Influenced: Circulatory system, respiratory system, and autonomic nervous system. Physiological Effects: Opens chest cavity, increases oxygen flow, reduces stress hormones, and promotes parasympathetic dominance (calm-rest state). Kinesiology Engages pectoral muscles (crossing arms), intrinsic hand muscles (interlacing fingers), and deltoids (arm lifting). Promotes chest expansion and better alignment of the thoracic spine. The triangular hand formation directs pranic flow toward the heart center. Neurology Stimulates cardiac plexus nerves near the heart, influencing emotional regulation. Enhances vagal tone → lowers stress, induces calmness. Activates limbic system pathways (emotional brain), aiding in emotional release and resilience. Encourages alpha-theta brainwave activity → deep meditative, healing state. Duration of Mudra Beginners: 5–10 minutes once daily. Intermediate: 15–20 minutes, can be done twice daily. Advanced: Up to 30 minutes in meditation, mantra chanting, or heart-healing practices. Counter Mudra Hridaya Mudrā (Heart Mudra) – supportive and calming if Abhaya Hridaya stirs up too much emotional release. Anjali Mudrā (Prayer gesture) – grounds and centers energy after practice. Conclusion Abhaya Hridaya Mudrā is the gesture of the fearless heart, merging courage with compassion. It calms the mind, strengthens the heart, and opens emotional pathways for love, forgiveness, and healing. Beyond symbolism, it physiologically benefits the heart and nervous system, while spiritually it awakens the heart center and cultivates fearlessness rooted in compassion. Regular practice supports emotional freedom, heart health, and spiritual awakening. FAQ Q1. Is Abhaya Hridaya Mudrā the same as Hridaya Mudrā?No. Hridaya Mudrā supports the physical heart and circulation, while Abhaya Hridaya Mudrā specifically symbolizes fearlessness and spiritual heart opening. Q2. Can this mudrā heal a broken heart or grief?Yes, it is traditionally recommended for releasing grief, pain, and loss by opening the heart chakra. Q3. Can it be practiced lying down?It is best practiced seated with erect spine, but in relaxation (Shavasana) it can be adapted gently. Q4. Is it useful for public speaking anxiety or fear?Yes, practicing beforehand enhances courage, calmness, and self-confidence. References Swami Satyananda Saraswati – Asana, Pranayama, Mudra, Bandha. T.K.V. Desikachar – The Heart of Yoga. Joseph & Lilian Lepage – Mudras for Healing and Transformation. B.K.S. Iyengar – Light on Yoga (mudrā references and chest opening practices). Tantra & Bhakti texts describing Hridaya practices in relation to Anāhata Chakra.
The Ultimate Guide to Yin Yoga: History, Archetypes, Benefits & More
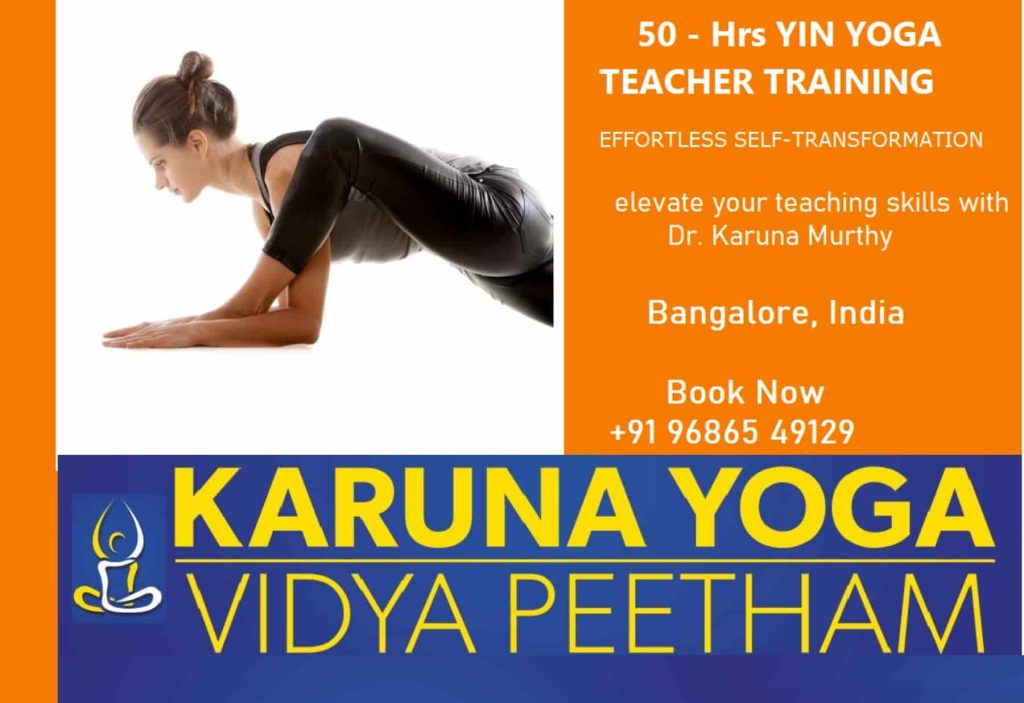
The Ultimate Guide to Yin Yoga: History, Archetypes, Benefits & More Yin Yoga is a slow, meditative practice that targets the deep connective tissues of the body, such as fascia, ligaments, and joints. It focuses on long-held, passive poses and encourages stillness, mindfulness, and deep relaxation. 📜 History & Origins of Yin Yoga Yin Yoga has roots in both traditional Hatha Yoga and Taoist practices. It was popularized in the West by Paul Grilley in the 1990s, inspired by the teachings of Taoist yoga master Paulie Zink. The practice integrates principles of: ✔ Taoism & Chinese Medicine → Emphasizing meridian lines & energy flow.✔ Buddhist Meditation → Encouraging stillness and mindfulness.✔ Traditional Yoga Asanas → Held for extended periods to release deep tension. 🧘 What Makes Yin Yoga Unique? ✔ Slow & Passive: Poses are held for 3-5 minutes (or longer).✔ Deep Stretching: Targets fascia, ligaments, joints, and bones.✔ Stillness & Meditation: Encourages mindfulness & inner awareness.✔ Energy Flow: Works with meridians & chi (qi) from Chinese medicine. 🆚 Yin vs. Yang Yoga: Yin Yogais passive, slow, and focused on deep tissue & relaxation. Yang Yoga(Vinyasa, Ashtanga, Hatha) is active, dynamic, and muscular. 🌿 5 Archetypal Poses in Yin Yoga Yin Yoga poses are adaptable to different body types & flexibility levels. The five main pose archetypes serve as templates for many Yin variations. 1. Shoelace (Hip Compression) ✅ Stretches the hips & glutes.🔹 Variations: Square Pose, Thread the Needle. 2. Caterpillar (Forward Fold) ✅ Stretches the spine & hamstrings.🔹 Variations: Butterfly, Snail Pose. 3. Dragon (Hip Opener) ✅ Opens the hip flexors & groin.🔹 Variations: Lizard, Crescent Lunge. 4. Saddle (Backbend & Quad Stretch) ✅ Stretches the front body & quads.🔹 Variations: Half Saddle, Supta Virasana. 5. Spinal Twist (Detox & Release) ✅ Improves spinal mobility & digestion.🔹 Variations: Supine Twist, Twisted Roots. 💡 Benefits of Yin Yoga 🦴 Physical Benefits ✔ Improves joint mobility & flexibility.✔ Enhances fascia health & hydration.✔ Reduces tension & stiffness.✔ Supports injury recovery. 🧠 Mental & Emotional Benefits ✔ Lowers stress & anxiety.✔ Encourages deep relaxation & stillness.✔ Enhances mindfulness & self-awareness.✔ Improves sleep & nervous system balance. 🌿 Energetic Benefits (Traditional Chinese Medicine – TCM) ✔ Stimulates meridians (energy channels).✔ Balances chi (qi) flow in the body.✔ Releases stagnant emotional energy. ⚠️ Safety & Precautions in Yin Yoga 🚫 Avoid forcing deep stretches – Find your “edge” & stay comfortable.🚫 Do not practice if you have hypermobility without support.🚫 Be cautious with injuries (use props like bolsters & blocks). Yin Yoga is NOT about pushing limits; it’s about surrendering into stillness. 🔄 How to Practice Yin Yoga Mindfully ✔ Find stillness – Once in a pose, relax completely.✔ Use props – Blocks, bolsters, blankets support longer holds.✔ Breathe deeply – Use slow, steady breaths to relax muscles & mind.✔ Hold poses for 3-5 minutes – Let gravity do the work.✔ Come out slowly – Move mindfully between poses.
Nauli Kriya: How to Do, Precautions & Benefits
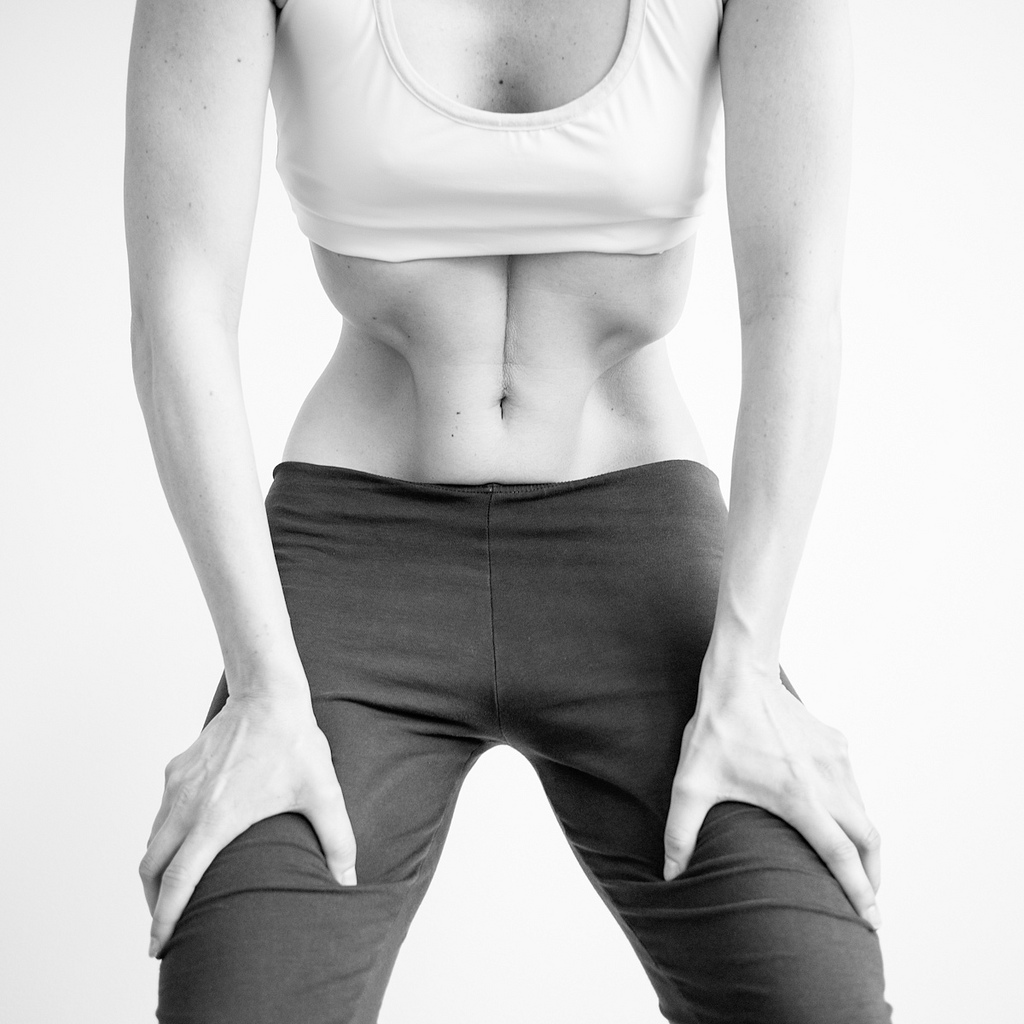
Nauli Kriya: How to Do, Precautions & Benefits What is Nauli Kriya? Nauli Kriya is an advanced yogic cleansing technique (Shatkarma) that involves massaging the abdominal organs by isolating and rotating the abdominal muscles. It is one of the most powerful practices for detoxifying the digestive system and stimulating the solar plexus (Manipura Chakra). This kriya is best practiced on an empty stomach and is known to enhance digestion, metabolism, and overall vitality. 📖 Ancient Reference: Hatha Yoga Pradipika (2.34)“The Nauli process stimulates the digestive fire, removing all diseases and increasing bodily heat.” How to Perform Nauli Kriya (Step-by-Step Guide) Preparation: ✅ Best Time: Early morning on an empty stomach✅ Position: Stand with feet shoulder-width apart, bend slightly forward✅ Prerequisite: Learn Uddiyana Bandha (Abdominal Lock) first Steps: 1️⃣ Uddiyana Bandha (Preparation Step):✔️ Take a deep inhale and exhale completely✔️ Hold the breath out and draw the abdomen inward (toward the spine)✔️ This creates a vacuum effect in the abdominal cavity 2️⃣ Madhyama Nauli (Central Isolation):✔️ From Uddiyana Bandha, contract the rectus abdominis (central abdominal muscles)✔️ Hold for a few seconds, then release 3️⃣ Vama Nauli (Left Isolation):✔️ Shift the contraction to the left side of the abdomen✔️ Hold briefly and then release 4️⃣ Dakshina Nauli (Right Isolation):✔️ Shift the contraction to the right side of the abdomen✔️ Hold and then release 5️⃣ Nauli Chalan (Full Rotation):✔️ Move the abdominal muscles in a circular motion (left → center → right → center)✔️ Perform this several times, increasing speed gradually 📌 Duration: 5–10 rounds (start slow and increase gradually)📌 Breathing: Always hold breath out while performing Nauli Kriya Benefits of Nauli Kriya 1️⃣ Enhances Digestion & Gut Health ✔️ Stimulates the digestive fire (Agni)✔️ Relieves constipation, bloating, and indigestion 2️⃣ Strengthens Core Muscles ✔️ Activates deep abdominal muscles✔️ Tones the stomach and improves metabolism 3️⃣ Detoxifies Internal Organs ✔️ Flushes out toxins from the intestines and liver✔️ Supports kidney and pancreas function 4️⃣ Balances the Solar Plexus Chakra (Manipura Chakra) ✔️ Boosts confidence, willpower, and self-esteem✔️ Increases energy levels and vitality 5️⃣ Stimulates the Nervous & Endocrine System ✔️ Activates vagus nerve for better stress management✔️ Regulates hormonal balance Precautions & Contraindications ⚠️ Do NOT practice Nauli Kriya if you have:❌ High blood pressure or heart disease❌ Ulcers, hernia, or recent abdominal surgery❌ Pregnancy or menstruation❌ Severe digestive disorders like Crohn’s disease 🔹 Safety Tips:✔️ Always learn from a trained yoga teacher first✔️ Perform slowly and gently—do not strain✔️ Practice on an empty stomach for best results Final Thoughts Nauli Kriya is a powerful detox and energy-boosting technique that cleanses the digestive system, strengthens core muscles, and enhances vitality. However, it requires proper guidance and gradual practice to master.
Yoga for Diabetes – Can Yoga Help Control & Cure Diabetes?
Yoga for Diabetes – Can Yoga Help Control & Cure Diabetes? Diabetes is a chronic condition that affects blood sugar levels and insulin function. While yoga cannot “cure” diabetes, it can help control blood sugar, improve insulin sensitivity, and reduce stress, making it a valuable part of diabetes management. 🔬 How Yoga Helps with Diabetes 1. Lowers Blood Sugar Levels ✔ Gentle movement and deep breathing help regulate glucose metabolism.✔ Studies show yoga can lower fasting blood sugar and HbA1c levels. 2. Improves Insulin Sensitivity ✔ Helps the body use insulin more efficiently, reducing insulin resistance.✔ Especially beneficial for people with Type 2 diabetes and prediabetes. 3. Reduces Stress & Cortisol Levels ✔ High stress triggers the release of cortisol, which raises blood sugar.✔ Yoga activates the parasympathetic nervous system, promoting relaxation. 4. Supports Weight Management ✔ Helps reduce visceral fat, which is linked to insulin resistance.✔ Encourages mindful eating and healthy lifestyle habits. 5. Improves Circulation & Prevents Complications ✔ Increases blood flow to extremities, reducing the risk of diabetic neuropathy.✔ Supports heart health and lowers blood pressure. 🧘 Best Yoga Poses for Diabetes Management 1. Seated Forward Fold (Paschimottanasana) ✅ Stimulates the pancreas and supports insulin production.✅ Improves digestion and metabolism. 2. Cobra Pose (Bhujangasana) ✅ Stimulates the abdominal organs, including the pancreas.✅ Relieves stress and fatigue. 3. Bow Pose (Dhanurasana) ✅ Strengthens the pancreas and digestive organs.✅ Enhances metabolism and insulin regulation. 4. Legs Up the Wall (Viparita Karani) ✅ Balances blood sugar levels by improving circulation.✅ Promotes relaxation and stress reduction. 5. Supine Spinal Twist (Supta Matsyendrasana) ✅ Stimulates the digestive system and pancreas.✅ Supports detoxification and gut health. 🌬️ Pranayama (Breathing Exercises) for Diabetes 1. Kapalabhati (Skull Shining Breath) ⚡ ✅ Boosts metabolism and pancreatic function.🚫 Avoid if you have high blood pressure or heart issues. 2. Anulom Vilom (Alternate Nostril Breathing) 🌿 ✅ Balances the nervous system and reduces stress-induced sugar spikes.✅ Improves oxygen circulation and mental clarity. 3. Bhramari (Humming Bee Breath) 🎶 ✅ Lowers cortisol and stress levels, preventing sugar imbalances.✅ Promotes deep relaxation and emotional balance. ⚠️ Precautions for Practicing Yoga with Diabetes 🚫 Avoid intense or fast-paced yoga if you have low blood sugar.🚫 Stay hydrated and monitor glucose levels before & after practice.🚫 Use props or modifications if experiencing neuropathy or joint pain.
Kids Yoga for ADHD: Benefits & Best Practices
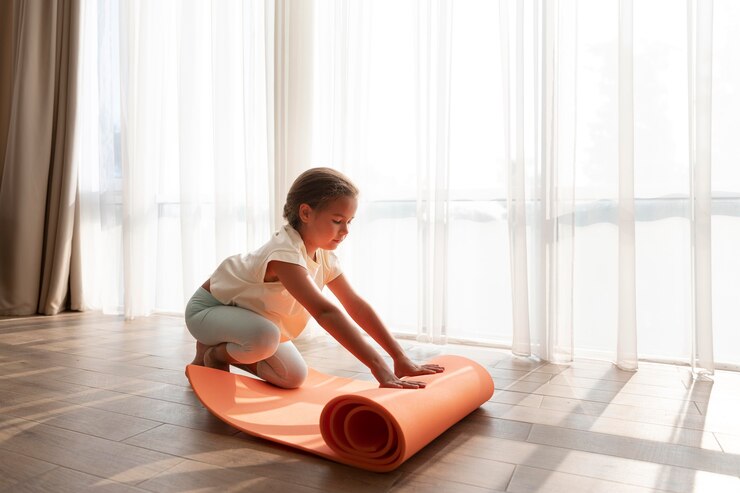
Kids Yoga for ADHD: Benefits & Best Practices Yoga can be an effective, natural tool to help kids with ADHD (Attention Deficit Hyperactivity Disorder) improve focus, self-regulation, and emotional balance. The combination of movement, breathwork, and mindfulness supports their nervous system, helping to reduce hyperactivity, impulsivity, and anxiety. How Yoga Helps Kids with ADHD ✅ Improves Focus & Attention – Mindful breathing and poses encourage concentration.✅ Regulates Energy Levels – Balancing active and calming poses helps manage hyperactivity.✅ Develops Self-Control – Holding poses and practicing stillness enhances impulse control.✅ Reduces Anxiety & Stress – Deep breathing and relaxation techniques calm the nervous system.✅ Enhances Body Awareness – Yoga helps kids recognize and manage their emotions and energy. Best Yoga Practices for ADHD 🧘 1. Start with Breathwork (Pranayama)Simple breathing exercises help calm the mind and prepare the body for movement. Balloon Breath– Inhale deeply, expanding the belly like a balloon; exhale, deflating it. Bumblebee Breath (Bhramari)– Humming while exhaling to soothe the nervous system. Lion’s Breath– Inhale deeply, then exhale with a loud “haaa” and stick out the tongue. 🦸 2. Active Yoga Poses for Energy ReleaseThese poses engage the body and improve focus. Jumping Jacks or Sun Salutations (Surya Namaskar)– Energizing warm-up. Warrior Poses (Virabhadrasana I & II)– Builds strength and focus. Tree Pose (Vrikshasana)– Improves balance and concentration. Frog Pose (Malasana Jumps)– Releases pent-up energy playfully. 🌿 3. Calming & Grounding PosesThese poses help kids transition from activity to relaxation. Child’s Pose (Balasana)– Encourages deep breathing and self-soothing. Butterfly Pose (Baddha Konasana)– Relaxes the body while engaging attention. Legs-Up-The-Wall (Viparita Karani)– Soothes anxiety and promotes relaxation. Cobra Pose (Bhujangasana)– Opens the chest and enhances mood. 🎭 4. Fun & Playful Yoga TechniquesEngage kids by making yoga interactive and imaginative. Storytelling Yoga– Create a story using yoga poses (e.g., jungle adventure, outer space). Animal Poses– Encourage kids to “become” the animals in poses (lion, cat, dog, butterfly). Yoga Games– Try “Freeze Yoga” (hold a pose when the music stops) or “Mirror Yoga” (copy a partner). 🌙 5. End with Relaxation & MeditationHelp kids slow down and integrate their practice. Guided Imagery– Use a calming story (e.g., “floating on a cloud” or “lying in a peaceful garden”). Body Scan Relaxation– Gently guide attention through different body parts. Gratitude Practice– Encourage them to share one happy moment from their day. Creating a Kid-Friendly ADHD Yoga Routine 🔹 Keep sessions short (10-20 minutes).🔹 Use music, storytelling, and props (yoga mats, stuffed animals, or scarves).🔹 Encourage participation, not perfection.🔹 Make it consistent—daily or 3-4 times a week for the best results.
Spine Flexion: A Fundamental Instrument of Well-Being in Yoga
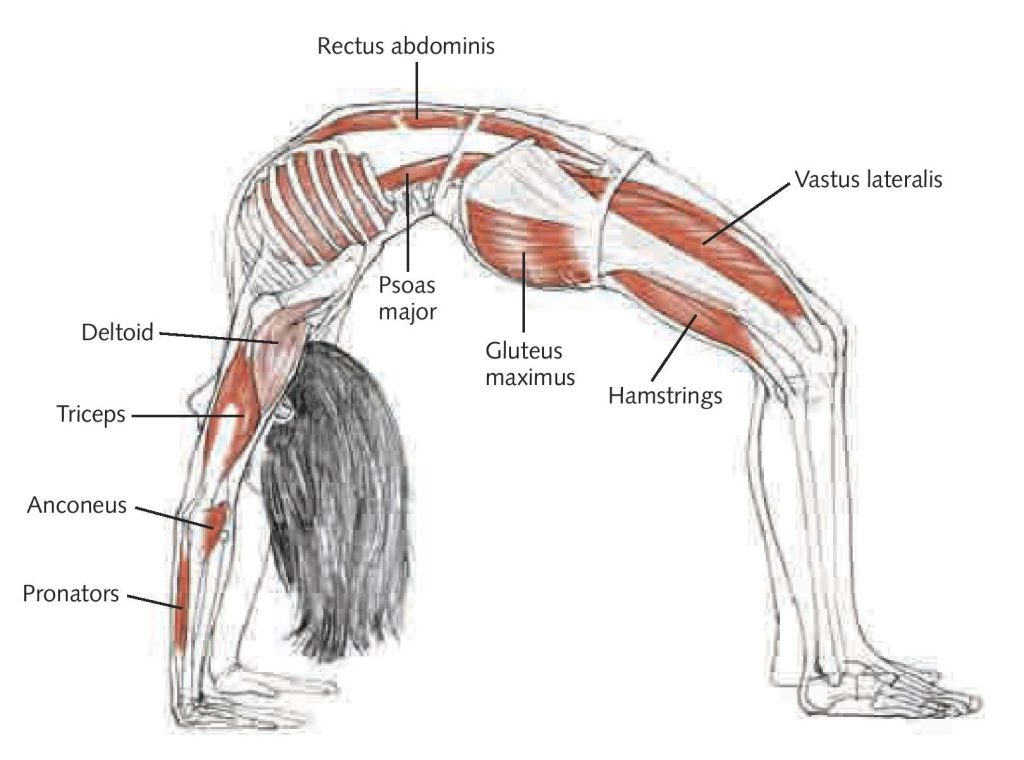
Spine Flexion: A Fundamental Instrument of Well-Being in Yoga Spine flexion refers to the forward bending movement of the spine, where the upper body bends forward towards the thighs, with the spine rounding. It is a common movement in yoga, often seen in forward folds, seated stretches, and various poses. Spine flexion is essential not only for increasing flexibility but also for promoting overall well-being by improving posture, enhancing digestion, relieving tension, and calming the nervous system. Let’s explore why spine flexion is so beneficial in yoga and how it contributes to physical health and mental well-being: 1. Improves Flexibility and Mobility of the Spine Spine flexion helps to stretch the muscles along the back, especially the erector spinae(muscles running along the spine), and the hamstrings, which are key muscles in the posterior chain of the body. Regular practice of spine flexion in yoga improves the mobilityof the spine and helps prevent stiffness and rigidity, especially for people who sit for long periods or have sedentary lifestyles. A more flexible spine also supports better posture and can prevent lower back pain or discomfort caused by tight muscles. 2. Relieves Tension and Stress Flexing the spine, especially in forward bends, promotes muscle relaxationalong the back and neck. By folding forward and releasing tension in the back, yoga helps alleviate the physical manifestations of stress and muscle tightness. The deep forward folding poses(such as Paschimottanasana and Uttanasana) also encourage a release of emotional stress by triggering the body’s parasympathetic nervous system (the “rest and digest” system), which promotes a sense of calm and relaxation. 3. Stimulates the Digestive System Spine flexion compresses and massages the internal organs, particularly in poses that involve deep forward bends. This compression and release action improves the flow of blood and energyto the digestive system, stimulating better digestion and metabolism. Poses like Paschimottanasana, Seated Forward Bend, and Child’s Posehelp with the peristalsis process (the wave-like contractions of the intestines) and improve gut health by activating the vagus nerve, which regulates digestion. 4. Improves Posture Regular spine flexion helps counteract the effects of poor posture, especially the forward head posture and slouching common in people who spend time hunched over computers or phones. It creates balance between the front and back of the body, helping to lengthenthe spine and open up the chest. Spine flexion encourages an alignment where the spine stays elongatedand upright, reducing the tendency to slouch and promoting better posture throughout the day. 5. Enhances Mental Clarity and Calmness The deep, mindful forward bends in yoga encourage a state of meditationand mindfulness, helping clear the mind and calm the thoughts. In forward-folding poses, the act of bowing the head toward the knees or the ground symbolizes an invitation to surrender, relax, and release unnecessary mental clutter. Mindful breathingduring spine flexion poses helps to slow down the heart rate and deepen the breath, facilitating a sense of calm and focus. This can be incredibly useful for managing stress, anxiety, and mental fatigue. 6. Promotes Emotional Health and Letting Go Spine flexionis often linked with emotional release in yoga practice. Forward bending poses are thought to help access and release deep-seated emotions, particularly those associated with the root chakra (Muladhara), which is connected to safety, stability, and grounding. In addition, these poses create space in the body for emotional healing, offering a safe environment to process emotionssuch as grief, sadness, or fear. It’s not uncommon for practitioners to feel an emotional release when performing spine flexion poses in yoga. 7. Stimulates the Central Nervous System The action of folding forward and rounding the spine helps stimulate the central nervous system(CNS), improving its efficiency in processing sensory and motor information. This stimulation helps in balancing the autonomic nervous system, promoting relaxation and reducing the effects of chronic stress. Moreover, activating the vagus nerve through spine flexion supports overall well-being and strengthens the connection between the brain and the body. Common Yoga Poses Involving Spine Flexion: Uttanasana (Standing Forward Bend): A classic forward bend that stretches the entire back and hamstrings, helping to relieve tension and improve flexibility. Focuses on grounding and lengthening the spine, encouraging mental clarity. Paschimottanasana (Seated Forward Bend): A seated forward fold that deepens the stretch along the spine and hamstrings while also offering a calming effect on the mind. It also stimulates the digestive system and reduces lower back pain. Child’s Pose (Balasana): A gentle forward bend that provides rest and helps release tension from the back and neck. Known for its calming effect, it is often used as a restorative pose in yoga practice. Cat-Cow Pose (Marjaryasana-Bitilasana): While Cat pose (spine flexion) is a rounding of the spine, Cow pose (spine extension) provides a gentle way to alternate between flexion and extension. This dynamic movement increases spinal mobility and promotes fluid movement between the vertebrae. Reclining Forward Bend (Supta Paschimottanasana): A variation of Paschimottanasana done lying down. It allows for a deeper stretch while offering support to the lower back. This modification helps release stress and tension while focusing on the breath. Seated Forward Fold with a Twist (Parivrtta Paschimottanasana): A combination of forward folding and twisting that adds a layer of complexity while stretching the spine and stimulating the digestive system. Forward Fold with Block (Setu Bandhasana with Block): A gentle variation of forward bending with the support of a yoga block, allowing for deeper release and relaxation in the spine. Conclusion: Spine flexion in yoga is a powerful tool for promoting spinal health, mental well-being, and emotional release. By engaging in forward bends and spine flexion poses, yoga practitioners can increase flexibility, reduce stress, improve posture, and foster a sense of peace and calm. The act of folding forward also encourages a deeper connection between mind and body, helping to release tension and promote overall vitality. Regular practice of spine flexion enhances the body’s ability to let go of physical and emotional blocks, leading to a sense of well-being and balance.
The Power of Hatha Yoga: A Complete Guide
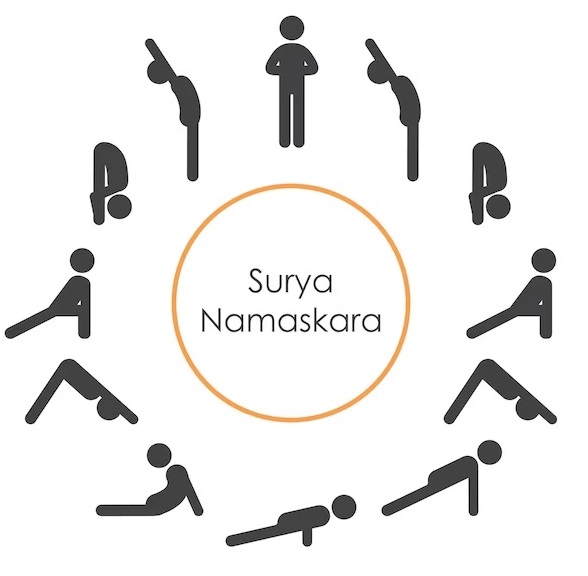
The Power of Hatha Yoga: A Complete Guide Hatha Yoga is the foundation of most modern yoga styles. It focuses on physical postures (āsanas), breath control (prāṇāyāma), and meditation to create balance between body, mind, and energy. Whether you’re a beginner or an advanced practitioner, understanding Hatha Yoga can deepen your practice and enhance well-being. 1. What is Hatha Yoga? “Hatha” comes from Sanskrit: “Ha” (Sun)– Represents masculine, active energy. “Tha” (Moon)– Represents feminine, passive energy. Hatha Yoga balances these energiesthrough movement, breathwork, and mindfulness. It is often considered the preparatory stagefor deeper meditative practices. 2. Benefits of Hatha Yoga Physical Benefits ✅ Improves flexibility & strength✅ Enhances posture & balance✅ Supports joint health & mobility✅ Boosts digestion & metabolism Mental & Emotional Benefits ✅ Reduces stress & anxiety✅ Enhances focus & mental clarity✅ Promotes emotional balance✅ Supports better sleep & relaxation Energetic Benefits ✅ Activates the chakras (energy centers)✅ Aligns breath & movement for harmony✅ Prepares the body for higher states of consciousness 3. Key Elements of Hatha Yoga 1. Āsanas (Yoga Postures) Hatha Yoga includes classic postures that build strength, flexibility, and awareness. Some key āsanas: Tādāsana (Mountain Pose)– Foundation for alignment Adho Mukha Śvānāsana (Downward Dog)– Stretches & strengthens Vīrabhadrāsana (Warrior Poses)– Builds focus & endurance Paścimottānāsana (Seated Forward Fold)– Calms the mind Śavāsana (Corpse Pose)– Deep relaxation 2. Prāṇāyāma (Breath Control) Breathwork is central to Hatha Yoga. Some common techniques: Nāḍī Śodhana (Alternate Nostril Breathing)– Balances energy Kapalabhāti (Skull-Shining Breath)– Energizes & detoxifies Bhrāmarī (Bee Breath)– Reduces stress & calms the mind 3. Bandhas (Energy Locks) Engaging muscular contractions to direct prāṇa (life force): Mūla Bandha– Pelvic floor lock (root energy) Uḍḍīyāna Bandha– Abdominal lock (solar plexus activation) Jālandhara Bandha– Throat lock (mental clarity) 4. Dhyāna (Meditation) Hatha Yoga prepares the body for meditation by removing restlessness. Common meditation techniques include: Mindfulness meditation– Observing breath & thoughts Mantra meditation– Chanting sacred sounds (e.g., “Om”) Visualization– Focusing on energy centers (chakras) 4. A Simple Hatha Yoga Sequence for Balance Beginner-Friendly Hatha Flow (15-20 min) Tādāsana (Mountain Pose)– 1 min Adho Mukha Śvānāsana (Downward Dog)– 5 breaths Vīrabhadrāsana I & II (Warrior I & II)– 5 breaths each side Paścimottānāsana (Seated Forward Fold)– 5 breaths Śavāsana (Final Relaxation)– 5-10 min 💡 Tip: End with 5 minutes of prāṇāyāma or meditation for a complete practice. 5. How to Start a Hatha Yoga Practice ✅ Start Slow – Focus on alignment & breath awareness.✅ Be Consistent – Practice at least 3-4 times a week.✅ Listen to Your Body – Avoid forcing flexibility or strength.✅ Use Props – Blocks, straps, and cushions help with alignment.✅ Combine Movement & Stillness – Balance active poses with relaxation. Final Thoughts Hatha Yoga is a powerful practice that builds physical strength, mental clarity, and inner peace. Whether you’re seeking stress relief, better health, or spiritual growth, Hatha Yoga provides a solid foundation for holistic well-being.