How to Find Your Best Position for Meditation
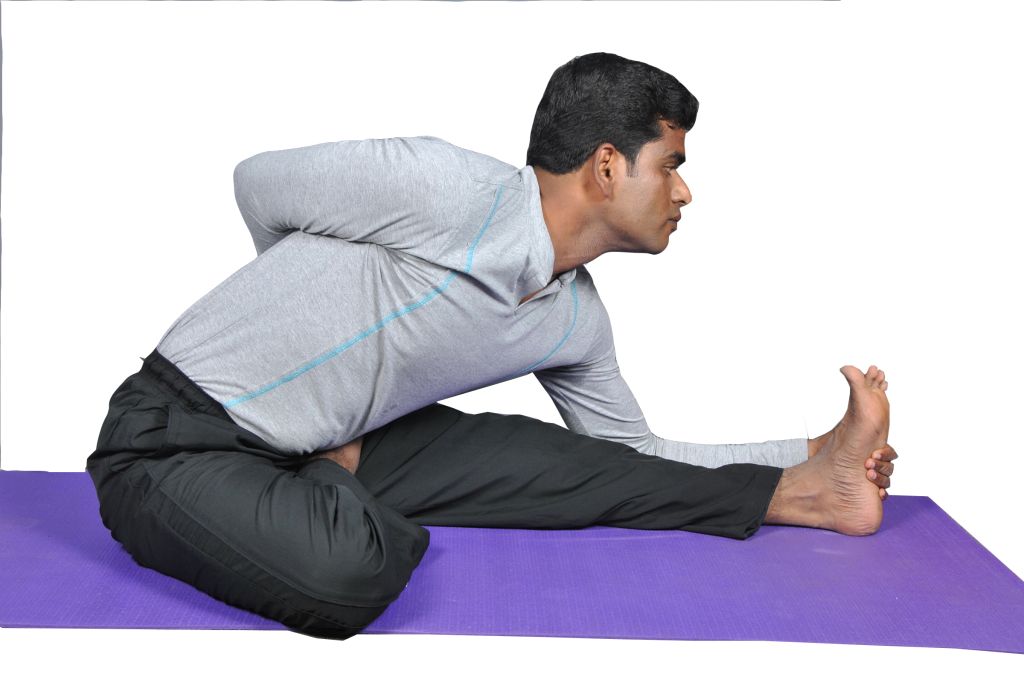
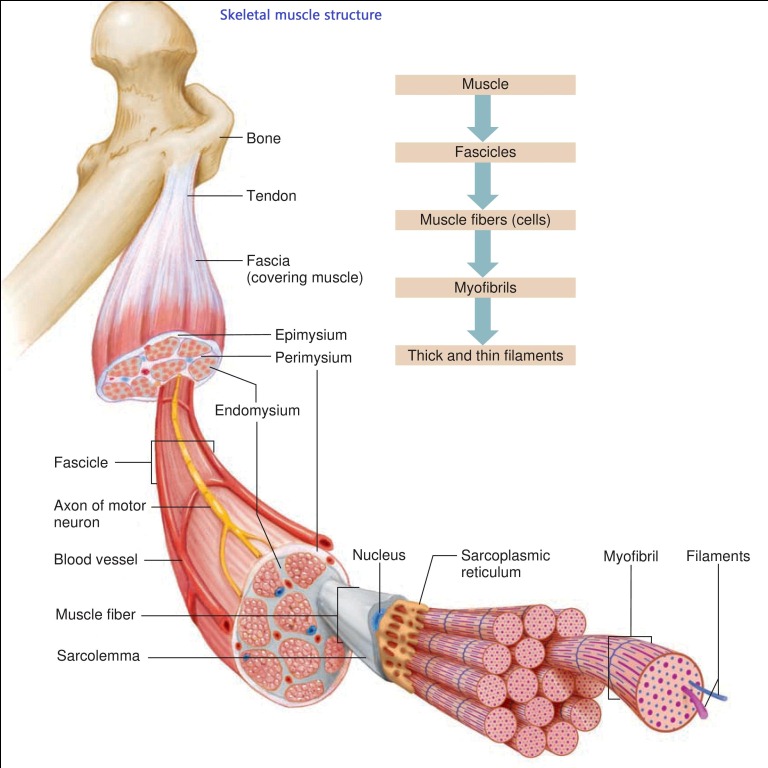
Fascia & Yoga: Why Every Teacher and Practitioner Should Know About It Fascia is one of the most important yet overlooked components of the human body. As a yoga teacher or practitioner, understanding fascia can enhance your practice, prevent injuries, and deepen your knowledge of movement and flexibility. This guide will explain what fascia is, why it matters, and how to optimize it through yoga. 1. What is Fascia? Fascia is a continuous web of connective tissue that surrounds and interconnects every muscle, bone, organ, and nerve in the body. It provides support, structure, and communication between different body parts. Key Characteristics of Fascia: Elastic & Flexible– It adapts to movement and stress. Highly Innervated– It contains sensory receptors, making it responsive to touch, pressure, and movement. Hydration-Dependent– It needs proper hydration to remain pliable. Stores Tension & Trauma– Fascia can hold physical and emotional tension over time. The Three Layers of Fascia: Superficial Fascia– Just beneath the skin, storing fat and allowing skin movement. Deep Fascia– Surrounds and penetrates muscles, tendons, and bones. Visceral Fascia– Wraps around organs, supporting their position and function. 2. Why Fascia Matters in Yoga A. Flexibility & Mobility Traditional stretching only targets muscles, but fascia must also be releasedto improve mobility. Tight fascia can restrict movementand create muscle imbalances. Slow, sustained stretches(like in Yin and Restorative Yoga) are most effective for fascia release. B. Injury Prevention & Healing Fascia supports the entire musculoskeletal system—if it’s tight or dehydrated, it increases the risk of injury. Proper hydration and movement keep fascia supple and resilient. Myofascial release (self-massage techniques) can help heal injuriesand chronic pain. C. Posture & Alignment Fascia holds tension from daily activities, emotions, and past injuries. Poor posture and repetitive movement patterns can lead to fascial adhesions(tight, stuck areas). Yoga poses that encourage length and space(such as spinal twists and heart openers) can realign the fascia. D. The Mind-Body Connection Fascia is highly sensitive to stress and emotions. Unresolved tension (from trauma, stress, or posture habits) gets stored in the fascia. Practices like Restorative Yoga, deep breathing, and somatic movementhelp release emotional and physical holding patterns. 3. How Yoga Supports Fascia Health A. Slow, Sustained Stretching (Yin Yoga & Restorative Yoga) Long-held poses (2-5 minutes) allow fascia to slowly release. Helps hydratethe fascia, making it more pliable. Best poses: Dragon Pose, Butterfly, Reclined Twist, Supported Fish Pose. B. Dynamic & Fluid Movements (Vinyasa & Somatic Yoga) Smooth, flowing movements keep fascia hydrated and resilient. Helps prevent adhesions and stiffness. Best practices: Sun Salutations, spinal undulations, free-flowing movement. C. Myofascial Release (Self-Massage Techniques) Uses props (tennis balls, foam rollers) to release tight, restricted fascia. Best for trigger points, deep knots, and chronic pain. Common techniques: Rolling on a therapy ball, deep tissue release with foam rollers. D. Breathwork & Hydration Deep, diaphragmatic breathingoxygenates fascia and promotes relaxation. Staying hydrated keeps fascia lubricated and flexible. 4. Best Yoga Practices for Fascia Release 1. Yin Yoga & Long-Held Poses Butterfly Pose(targets lower back & hips) Sphinx Pose(opens the front body) Twisted Roots Pose(releases spine tension) 2. Myofascial Release Techniques Tennis ball under feet(for plantar fascia release) Foam roller on IT band(for hip & knee mobility) Ball under shoulder blades(for upper back release) 3. Gentle Somatic Movements Rolling & spiraling movementsto rehydrate fascia. Cat-Cow with slow spinal wavesfor fascial fluidity. 5. Final Thoughts: Why Every Yoga Teacher Should Learn About Fascia Enhances your teaching– Understanding fascia helps you cue more effectively. Supports student flexibility & injury prevention– You can offer fascial-focused stretches and techniques. Deepens personal practice– Incorporating fascial work can lead to greater mobility, ease, and body awareness.
Heart Space Meditation (Hridayakasha Dharana): A Technique to Harmonize Emotions
Heart Space Meditation (Hridayakasha Dharana): A Technique to Harmonize Emotions Heart Space Meditation (Hridayakasha Dharana) is a profound meditation technique that focuses on harmonizing emotions and cultivating a sense of inner peace and love. The term Hridayakasha comes from Sanskrit, where Hridaya means heart, and Akasha means space or ether. This practice involves centering your awareness in the heart space and exploring the emotional energy that resides there, with the aim to connect with feelings of compassion, love, and harmony. How to Practice Heart Space Meditation: 1. Find a Quiet Space: Choose a calm and quiet place where you can sit undisturbed for the duration of the meditation. This allows you to fully immerse yourself in the experience without distractions. 2. Comfortable Posture: Sit in a comfortable position with your spine straight. You can sit cross-legged, on a cushion, or on a chair with your feet flat on the ground. Ensure that your posture is relaxed yet alert. 3. Focus on Your Breath: Begin by taking deep, slow breaths. Inhale deeply through your nose, filling your lungs, and exhale gently through your mouth. Focus on your breath as it moves in and out of your body, letting go of any tension with each exhale. 4. Bring Awareness to the Heart Space: Now, gently bring your attention to the area around your physical heart, in the center of your chest. Imagine this space as an expansive, open area, like a vast, infinite sky. You can visualize it as glowing with a soft, warm light. 5. Cultivate Positive Emotions: Begin to focus on positive emotions like love, gratitude, compassion, and kindness. Let these feelings arise naturally within your heart space. You can visualize them as a warm light or energy expanding from your heart, radiating outward, filling your entire being. Optionally, use a mantra:You can silently chant a mantra like “I am love,” “I am peace,” or any phrase that resonates with the heart chakra (Anahata) to deepen your connection to these feelings. 6. Expand the Heart Space: As you feel the warmth and positivity growing in your heart, imagine it expanding beyond your body, filling the space around you. Feel the loving energy surrounding your being, connecting you with the world and all living beings. This helps open your heart to unconditional love and compassion for yourself and others. 7. Witness the Flow of Emotions: Allow yourself to witness any emotions that may arise without judgment. Whether they are positive or negative, acknowledge them without attachment. The goal is not to suppress emotions but to observe them with awareness and compassion. 8. Stay in the Heart Space: Stay with this feeling of expansive love and peace for as long as you can. If your mind wanders, gently bring it back to the heart space, focusing on your breath and the positive emotions within. 9. End the Meditation: When you feel complete with the meditation, slowly begin to bring your awareness back to your physical body. Gently wiggle your fingers and toes, stretch your arms, and gradually open your eyes. Take a few moments to notice how you feel after the practice. Benefits of Heart Space Meditation (Hridayakasha Dharana): Emotional Healing: It helps release stored negative emotions like fear, grief, and anger, replacing them with positive feelings of love, acceptance, and compassion. Balance and Harmony: By connecting with the heart, you can bring a sense of emotional balance, reducing stress, anxiety, and emotional turbulence. Enhanced Self-Love: This practice promotes self-love and acceptance, helping to foster a kind relationship with yourself. Stress Reduction: The calming effects of this meditation can activate the parasympathetic nervous system, promoting relaxation and reducing overall stress levels. Strengthened Empathy: Cultivating compassion and empathy towards yourself can naturally extend to others, improving your relationships and interactions. Heart Chakra Activation: This meditation directly activates the heart chakra (Anahata), which is associated with love, compassion, and emotional wellbeing. Increased Inner Peace: By focusing on the heart and cultivating feelings of love and gratitude, you can experience a profound sense of peace and contentment. Tips for Deepening the Practice: Daily Practice:Even just 5–10 minutes a day can help you develop a deeper connection to your heart space and emotional harmony. Use Music or Sound:Gentle music or chanting (like a singing bowl or heart chakra frequencies) can enhance the practice and deepen your experience. Journaling:After meditation, you might want to journal any thoughts or emotions that arose, as this can help you process them and deepen your emotional awareness. Heart Space Meditation is a beautiful practice that brings attention to the power of love and emotional healing. With regular practice, it can help you cultivate peace, balance, and compassion in all areas of your life.
Fascia & Yoga: Why Every Teacher and Practitioner Should Know About It
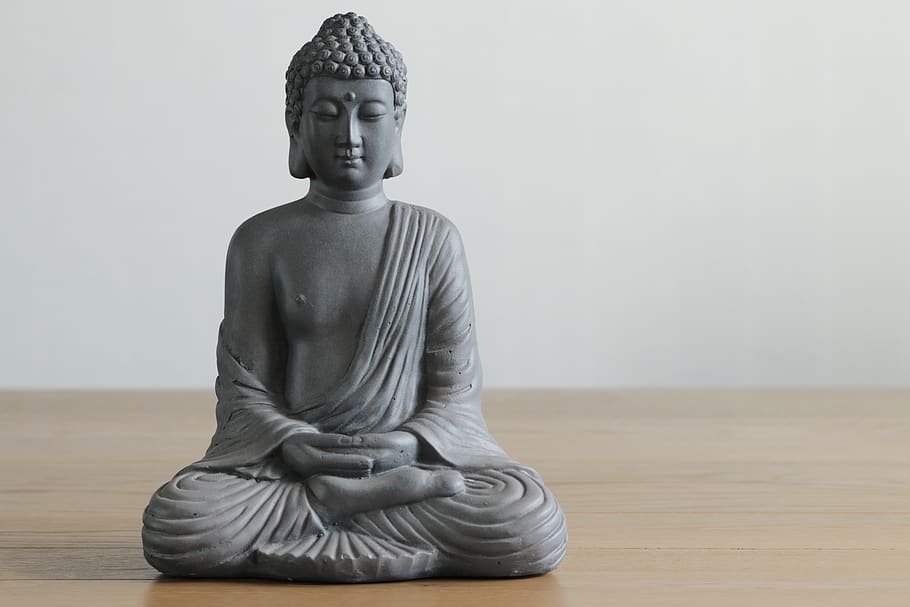
How to Find Your Best Position for Meditation Finding your best meditation position is a personal exploration that involves balancing comfort, stability, and alertness. Here are some practical guidelines to help you discover the posture that works best for you: 1. Experiment with Different Options Sitting on a Cushion or Mat:Many practitioners start with a cross-legged position (such as Sukhasana or half-lotus) on a firm cushion. This elevates your hips, helps maintain a straight spine, and minimizes slouching. Using a Chair:If sitting on the floor is uncomfortable, a chair with a straight back can be a great alternative. Sit with your feet flat on the ground, keeping your spine straight and your hands resting gently on your lap. Other Postures:Some people find lying down in Savasana or even a kneeling position (using a meditation bench) to be more comfortable. However, if you choose to lie down, be mindful that this might make you more prone to sleep if your goal is alert meditation. 2. Prioritize Alignment and Comfort Spine Alignment:Aim for an upright and naturally curved spine. Whether you’re sitting cross-legged or on a chair, imagine a string gently lifting the crown of your head to encourage a straight back without stiffness. Relaxation of Tension:Check in with your shoulders, neck, and jaw. They should be relaxed and not tensed up. This helps prevent distractions and supports a more meditative state. Use Props:Props like cushions, meditation benches, or folded blankets can help adjust the height and support your posture, ensuring you’re both comfortable and alert. 3. Listen to Your Body Start with Short Sessions:Begin with a few minutes of meditation in your chosen posture. Over time, you can extend the duration as your body adjusts. Adjust as Needed:If you experience discomfort or pain, try a different variation or modify your posture. Sometimes, even small changes—like adjusting the cushion height—can make a big difference. Mindful Awareness:As you explore different positions, observe how each one affects your body and mind. The best position is one where you feel both relaxed and focused. 4. Creating a Personal Routine Consistency:Once you find a comfortable position, try to practice in that posture regularly. Consistency helps your body adapt and makes it easier to slip into a meditative state. Be Open to Change:Your best position might change over time based on your physical condition, energy levels, or even the season. Periodically reassess your posture and make adjustments as needed. Final Thoughts Finding your ideal meditation position is not about following a one-size-fits-all rule—it’s about discovering what makes you feel centered, at ease, and alert. Experiment with various options, listen closely to your body’s feedback, and adjust your practice as you grow. Over time, you’ll develop a posture that supports both your physical comfort and your meditative depth.
Difference Between Pranayama and Breathing Exercises
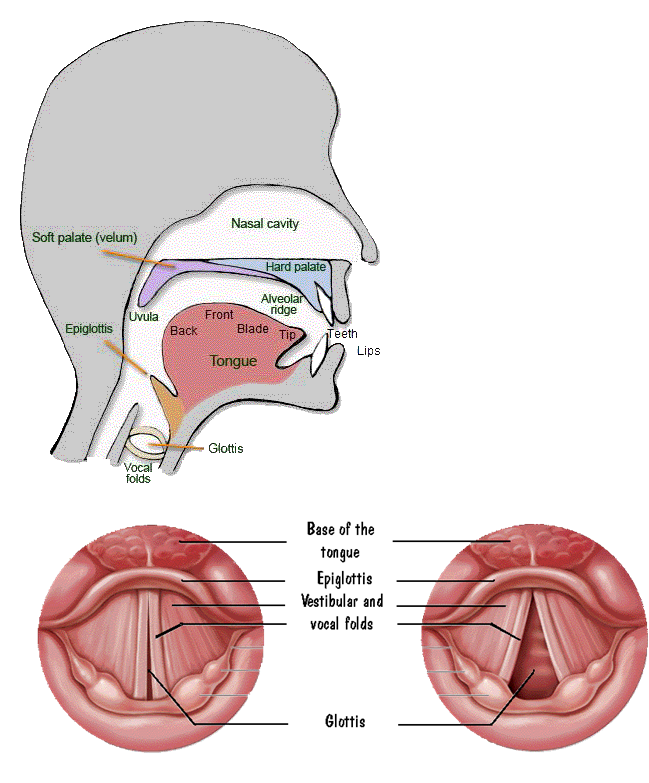
Difference Between Pranayama and Breathing Exercises While Pranayama and breathing exercises both involve the breath, they differ in purpose, technique, and depth. 1. What Is Pranayama? Pranayama is an ancient yogic practice that involves conscious control and regulation of breath to direct prana (life force energy) in the body. It is a structured practice deeply connected to yoga, meditation, and spiritual growth. ✅ Key Features of Pranayama: Comes from yogic philosophy(Patanjali’s Yoga Sutras, Hatha Yoga Pradipika). Regulates prana (life force), not just oxygen intake. Uses specific techniqueswith controlled inhalation, exhalation, and retention. Enhances mental clarity, meditation, and spiritual growth. Examples: Nadi Shodhana (Alternate Nostril), Bhastrika (Bellows Breath), Ujjayi (Ocean Breath). 2. What Are Breathing Exercises? Breathing exercises are general techniques designed to improve lung function, oxygen intake, and relaxation. They are commonly used in healthcare, fitness, and stress management but are not necessarily linked to yogic philosophy. ✅ Key Features of Breathing Exercises: Focuses on oxygenationand lung capacity. Used for stress relief, respiratory health, and athletic performance. Often simple and accessible, without strict breath control. Examples: Diaphragmatic Breathing, Box Breathing, 4-7-8 Breathing. 3. Key Differences: Pranayama vs. Breathing Exercises Aspect Pranayama Breathing Exercises Origin Yogic tradition (Yoga Sutras, Ayurveda) Modern health, fitness, and therapy Purpose Controls prana (life energy) for mental, emotional, and spiritual benefits Enhances oxygen flow, lung capacity, and relaxation Techniques Specific rhythmic control (e.g., retention, nostril switching) Basic inhalation and exhalation patterns Connection to Meditation Often a step toward meditation & self-awareness Used for stress relief & physical relaxation Examples Nadi Shodhana, Bhastrika, Kapalabhati Box Breathing, 4-7-8 Breathing, Deep Belly Breathing 4. Which One Should You Practice? If you seek spiritual growth, mental clarity, and energy balance, practice Pranayama. If you want better lung function, relaxation, or stress relief, try breathing exercises. You can combine both—breathing exercises to improve lung health, followed by Pranayama for deeper energy control.
How to Design and Structure Your Hatha Yoga Classes
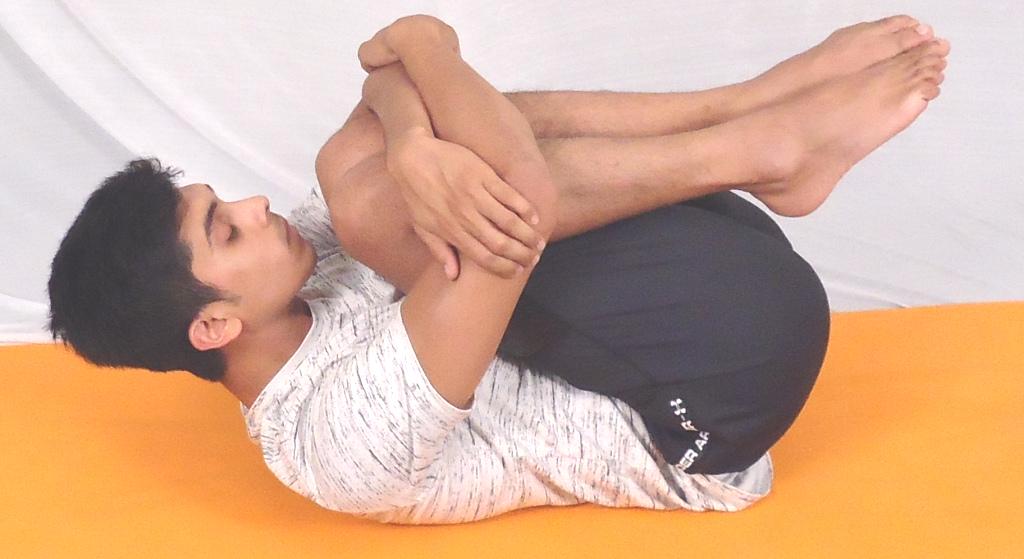
How to Design and Structure Your Hatha Yoga Classes Designing a Hatha Yoga class requires a balanced approach that incorporates asana (postures), pranayama (breathwork), relaxation, and meditation. A well-structured class ensures safety, flow, and maximum benefits for students of all levels. 1. Understanding the Key Elements of a Hatha Yoga Class A traditional Hatha Yoga class follows a progressive structure, moving from warm-up to deep relaxation. The key elements include:✔️ Centering & Breath Awareness – Calming the mind before movement.✔️ Warm-Up & Preparatory Poses – Loosening joints and activating muscles.✔️ Standing Postures – Strength, stability, and grounding.✔️ Seated & Supine Postures – Flexibility, balance, and relaxation.✔️ Pranayama (Breathwork) – Enhancing energy flow.✔️ Final Relaxation (Savasana) – Deep integration and restoration.✔️ Meditation or Closing Reflection – Ending with mindfulness. 2. Step-by-Step Guide to Structuring a Hatha Yoga Class 🔹 1. Centering & Breath Awareness (5-10 minutes) Start by helping students arrive on the mat with mindful breathing.✅ Objective: Grounding, relaxation, and connection to breath.✅ Practices: Sukhasana (Easy Pose) with breath observation. Anulom Vilom (Alternate Nostril Breathing). Gentle neck, shoulder, and wrist rolls. 🔹 2. Warm-Up & Preparatory Movements (10-15 minutes) Gradually prepare the body for deeper movements.✅ Objective: Loosen joints, activate the spine, and improve mobility.✅ Practices: Cat-Cow (Marjaryasana-Bitilasana)– Spinal warm-up. Child’s Pose (Balasana)– Gentle relaxation. Seated Twists– Mobilizing the spine. Dynamic Side Stretches– Awakening the body. 🔹 3. Standing Postures (15-20 minutes) Build strength, balance, and endurance through standing asanas.✅ Objective: Improve posture, stability, and energy flow.✅ Postures: Tadasana (Mountain Pose)– Foundation and alignment. Utkatasana (Chair Pose)– Strengthening legs and core. Virabhadrasana I & II (Warrior Poses I & II)– Strength and grounding. Trikonasana (Triangle Pose)– Side stretch and balance. 📌 Tip: Hold each pose for 5-10 breaths and focus on alignment. 🔹 4. Seated and Supine Postures (15-20 minutes) Promote flexibility, digestion, and relaxation through seated poses.✅ Objective: Deepen the stretch and encourage breath awareness.✅ Postures: Paschimottanasana (Seated Forward Bend)– Hamstring and back stretch. Ardha Matsyendrasana (Half Lord of the Fishes Twist)– Spinal detoxification. Bhujangasana (Cobra Pose)– Strengthening the back. Pavanamuktasana (Wind-Relieving Pose)– Aiding digestion. 📌 Tip: Encourage slow, deep breathing in each pose. 🔹 5. Pranayama (5-10 minutes) Introduce breath control techniques to enhance energy and relaxation.✅ Techniques: Ujjayi (Victorious Breath)– Focus and calmness. Bhramari (Bee Breath)– Mental relaxation. Nadi Shodhana (Alternate Nostril Breathing)– Balance and clarity. 📌 Tip: Guide students to keep their breath smooth and steady. 🔹 6. Final Relaxation – Savasana (5-10 minutes) Allow students to fully integrate the practice with deep relaxation.✅ Objective: Complete release of tension and deep rest.✅ Guided Relaxation Ideas: Full Body Scan– Relaxing each part of the body. Yoga Nidra (Yogic Sleep)– Conscious relaxation technique. 📌 Tip: Use soft background music or silence for deeper relaxation. 🔹 7. Closing & Meditation (5 minutes) End the class with gratitude and mindfulness.✅ Options: Short Guided Meditation– Silent awareness. Chanting ‘Om’ or a Mantra– Vibrational healing. Sharing a Positive Affirmation– Uplifting energy. 📌 Tip: Encourage students to take the calmness and awareness into daily life. 3. Additional Tips for Designing a Hatha Yoga Class ✔️ Consider Class Level – Adjust intensity for beginners, intermediate, or advanced students.✔️ Maintain a Balanced Flow – Include strength, flexibility, and relaxation.✔️ Use Simple & Clear Instructions – Guide with breath cues and modifications.✔️ Encourage Mindfulness – Keep students present in every movement.✔️ Respect Individual Limits – Offer variations and props when needed. Conclusion A well-structured Hatha Yoga class ensures a harmonious experience that nurtures the body, mind, and breath. By incorporating asana, pranayama, relaxation, and meditation, you can create a safe, enjoyable, and transformative practice for your students.
How to Practice Sitting Yoga Safely: Essential Guide
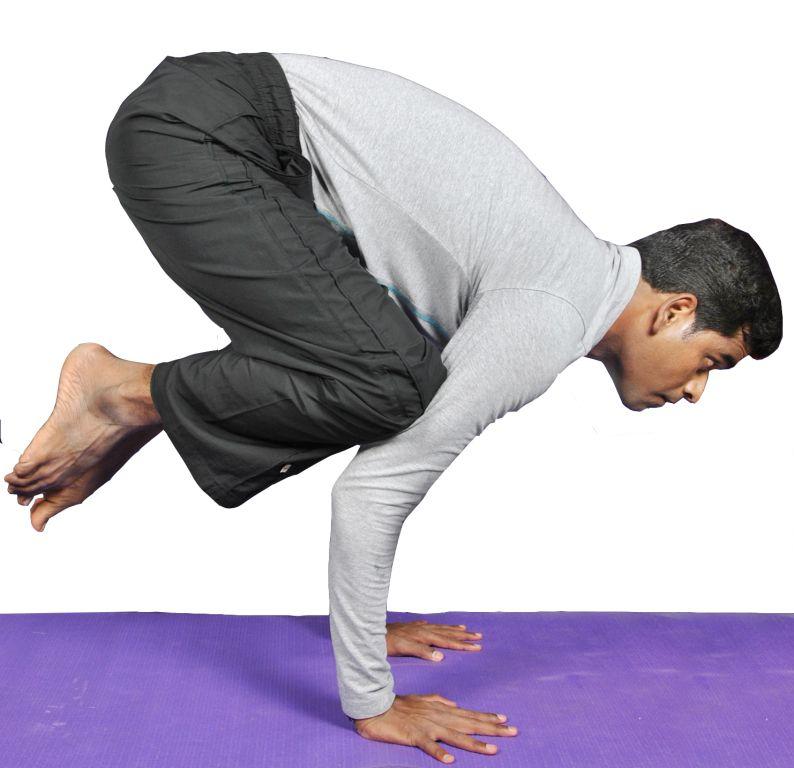
How to Practice Sitting Yoga Safely: Essential Guide Sitting yoga poses are foundational for flexibility, posture, and relaxation, but improper alignment can cause discomfort or strain. This guide will help you practice seated yoga safely while maximizing benefits. 1. Benefits of Sitting Yoga Poses ✅ Improves Flexibility – Stretches hips, hamstrings, and lower back.✅ Enhances Posture – Strengthens the spine and reduces slouching.✅ Calms the Mind – Encourages deep breathing and relaxation.✅ Increases Hip Mobility – Helps relieve tightness from prolonged sitting.✅ Supports Meditation & Breathwork – Creates a stable base for mindfulness. 2. Safety Tips for Sitting Yoga ✔ Sit on a Cushion or Block – Elevates the hips to prevent rounding the spine.✔ Keep Spine Long – Engage core muscles to support upright posture.✔ Avoid Overstretching – Move gradually and respect your limits.✔ Use Props – Blocks, straps, or blankets can improve alignment.✔ Breathe Deeply – Inhale to lengthen, exhale to deepen the stretch.✔ Modify If Needed – Bend knees or adjust positioning to avoid strain. 3. Best Sitting Yoga Poses & How to Practice Safely 🟢 Beginner-Friendly Seated Poses (Comfort & Stability) Easy Pose (Sukhasana) – Basic sitting posture for meditation.🔹 Sit on a cushion to lift hips above knees for comfort. Seated Forward Fold (Paschimottanasana) – Stretches hamstrings & spine.🔹 Keep knees slightly bent if hamstrings are tight. Butterfly Pose (Baddha Konasana) – Opens hips & inner thighs.🔹 Sit tall and avoid forcing knees toward the ground. 🟡 Intermediate Sitting Poses (More Flexibility & Strength) Half Lord of the Fishes (Ardha Matsyendrasana) – Seated spinal twist.🔹 Keep spine long before twisting and avoid forcing the movement. Cow Face Pose (Gomukhasana) – Stretches shoulders & hips.🔹 Use a strap if hands don’t reach behind your back. Hero Pose (Virasana) – Increases ankle & knee flexibility.🔹 Sit on a block if knees feel strained. 🔴 Advanced Sitting Poses (Deep Flexibility & Strength) Lotus Pose (Padmasana) – Traditional meditative seat.🔹 Warm up hips before attempting and avoid knee strain. Seated Straddle (Upavistha Konasana) – Deep inner thigh stretch.🔹 Keep back straight and avoid hunching forward. Fire Log Pose (Agnistambhasana) – Intense hip opener.🔹 Align shins parallel and use props for support. 4. How to Progress Safely Warm Up Hips & Hamstrings– Reduces tightness and strain. Use Support When Needed– Props improve posture and comfort. Avoid Rounding the Spine– Engage core for an upright position. Breathe & Relax– Eases tension and enhances flexibility. 5. Counterposes After Sitting Yoga To restore balance and prevent stiffness:🧘 Cat-Cow Stretch (Marjaryasana-Bitilasana) – Mobilizes the spine.🧘 Downward Dog (Adho Mukha Svanasana) – Stretches the back and legs.🧘 Standing Forward Fold (Uttanasana) – Releases tension from the lower back. Final Thoughts Sitting yoga poses promote flexibility, relaxation, and mindfulness when practiced correctly. Focus on alignment, comfort, and steady breath to ensure a safe and effective practice.
Demystifying the Different Styles of Yoga
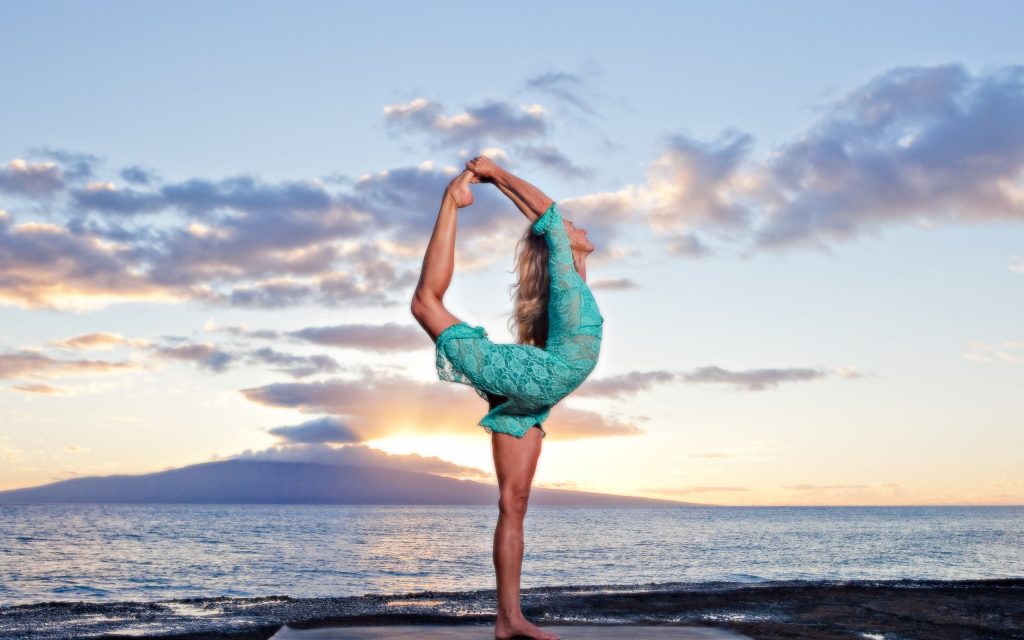
Demystifying the Different Styles of Yoga Introduction With so many styles of yoga available, it can be overwhelming to know which one is right for you. Some yoga classes focus on strength and movement, while others emphasize relaxation and meditation. Whether you’re a beginner or an experienced practitioner, understanding the different styles of yoga can help you choose a practice that aligns with your needs, goals, and preferences. This guide breaks down the most popular styles of yoga, their unique benefits, and who they’re best suited for. 1. Hatha Yoga – The Foundation of All Yoga What It Is: Hatha yoga is a general term for physical yoga practices (asana and pranayama). In modern yoga, Hatha classes are typically slower-paced and focus on basic postures, alignment, and breath control. Best For: Beginners looking for an introduction to yoga Those who prefer a slower, balanced practice Anyone seeking relaxation and improved flexibility What to Expect: A mix of standing and seated poses Gentle breathing exercises A calming, meditative approach 2. Vinyasa Yoga – Flowing and Dynamic What It Is: Vinyasa yoga is a fluid, movement-based practice where poses are linked together through breath. Often called “flow yoga,” it offers creative sequencing and continuous movement. Best For: Those who enjoy a dynamic, athletic practice People who like variety and creative sequences Anyone wanting to build endurance and flexibility What to Expect: Fast-paced movement synchronized with breath A variety of poses in each class Builds strength, flexibility, and cardiovascular fitness 3. Ashtanga Yoga – Structured and Physically Demanding What It Is: Ashtanga yoga follows a fixed sequence of poses in a precise order. It is a disciplined and physically intense practice with an emphasis on breath, bandhas (energy locks), and drishti (gaze). Best For: Dedicated practitioners who enjoy structure and discipline Those looking for a physically demanding practice People who want a self-led (Mysore-style) approach What to Expect: A set sequence repeated in every class Challenging transitions and postures A focus on personal progress and self-discipline 4. Power Yoga – Strength and Sweat What It Is: Power yoga is a modern, fitness-based approach to Vinyasa yoga, emphasizing strength, endurance, and flexibility. It often includes elements of Ashtanga but is more flexible in sequencing. Best For: Athletes and fitness enthusiasts Those looking for a high-energy, sweat-inducing practice People who enjoy strength training with yoga What to Expect: A vigorous, fast-paced flow Strength-building poses and core work Less focus on spirituality, more on physicality 5. Yin Yoga – Deep Stretching and Stillness What It Is: Yin yoga is a slow, meditative practice that targets deep connective tissues. Poses are held for 3-5 minutes, allowing muscles to relax and fascia to release. Best For: Those seeking deep relaxation and flexibility Anyone with tight muscles or joint stiffness People looking to balance a high-energy lifestyle What to Expect: Passive stretching with longer holds A meditative, introspective approach Deep physical and emotional release 6. Restorative Yoga – Ultimate Relaxation What It Is: Restorative yoga is a deeply relaxing practice that uses props like bolsters, blankets, and blocks to support the body in gentle, long-held poses. It is designed for stress relief and healing. Best For: Those recovering from injury or illness People dealing with stress, anxiety, or burnout Anyone seeking deep relaxation What to Expect: Minimal movement, deep rest Supported poses with props Focus on breath and mindfulness 7. Kundalini Yoga – Awakening Inner Energy What It Is: Kundalini yoga combines movement, breathwork, chanting, and meditation to awaken spiritual energy at the base of the spine. It is a deeply transformative practice that works on mental clarity and emotional healing. Best For: Those interested in energy work and spirituality People seeking mental and emotional breakthroughs Anyone wanting a dynamic mix of movement and meditation What to Expect: Repetitive movements (kriyas) and breathing techniques Chanting, mantras, and meditation Strong energetic shifts and emotional release 8. Iyengar Yoga – Precision and Alignment What It Is: Iyengar yoga is a detail-oriented practice that emphasizes proper alignment and uses props like blocks, straps, and chairs. It’s great for improving posture and preventing injuries. Best For: People with injuries or physical limitations Those who enjoy a structured and precise approach Anyone wanting to refine their alignment What to Expect: Slower pace with an emphasis on posture detail Use of props for support and depth Focus on breath control and mindfulness 9. Bikram Yoga (Hot Yoga) – Sweat and Detox What It Is: Bikram yoga is a specific style of hot yoga featuring a set sequence of 26 poses practiced in a room heated to around 105°F (40°C) with high humidity. Best For: Those who enjoy intense, heated workouts People looking for detoxification through sweat Those who prefer consistency in their practice What to Expect: A fixed sequence in every class High heat and sweating A strong emphasis on endurance and discipline (Note: Many studios now offer “hot yoga” classes that are not strictly Bikram but still take place in a heated room.) 10. Jivamukti Yoga – Spiritual and Ethical Practice What It Is: Jivamukti yoga is a modern yoga style that blends physical asana, music, chanting, meditation, and ethical teachings, often promoting environmental and social activism. Best For: Those looking for a deeper spiritual connection in yoga People interested in yoga philosophy and activism Anyone who enjoys dynamic movement with meaning What to Expect: Strong, flowing asana sequences Incorporation of music, chanting, and philosophy A blend of physical, mental, and ethical teachings Choosing the Right Yoga Style for You With so many styles to explore, how do you choose? Here are a few questions to guide you: Do you want an energetic or calming practice? Energetic: Vinyasa, Ashtanga, Power, Bikram Calming: Yin, Restorative, Hatha Are you interested in spirituality and meditation? Yes: Kundalini, Jivamukti, Hatha No: Power, Bikram Do you need injury-friendly options? Yes: Iyengar, Restorative, Yin Do you prefer structure or creativity? Structure: Ashtanga, Bikram, Iyengar Creativity: Vinyasa, Jivamukti Final Thoughts Yoga is a deeply personal journey, and
Chandra Bhedana Pranayama (Left Nostril Breathing)
Chandra Bhedana Pranayama (Left Nostril Breathing) Chandra Bhedana Pranayama is a cooling yogic breathing technique that activates the Ida Nadi (Moon Channel), which is associated with the parasympathetic nervous system, calmness, and mental relaxation. Chandra= Moon (Cool, Soothing Energy) Bhedana= Piercing or passing through Pranayama= Breath control By inhaling through the left nostril and exhaling through the right nostril, Chandra Bhedana promotes cooling, relaxation, and emotional balance. 🔹 Steps to Perform Chandra Bhedana Pranayama Preparation: ✔️ Sit comfortably in Padmasana (Lotus Pose) or Sukhasana (Easy Pose)✔️ Keep your back straight and hands in Chin Mudra✔️ Close your eyes and relax your breath Technique: 1️⃣ Close your right nostril with your right thumb (using Vishnu Mudra)2️⃣ Inhale slowly and deeply through the left nostril3️⃣ Close your left nostril with your ring finger4️⃣ Exhale slowly and completely through the right nostril5️⃣ Repeat this process for 5-10 minutes 💨 Breathing Ratio: 1:2 (If you inhale for 4 seconds, exhale for 8 seconds) 🌙 Best Time to Practice: Early morning or before bedtime During hot weather or when feeling stressed 🔹 Benefits of Chandra Bhedana Pranayama ✅ Calms the nervous system and reduces stress & anxiety✅ Balances Pitta Dosha (cooling effect)✅ Improves mental focus & clarity✅ Reduces body heat & hyperactivity✅ Enhances sleep quality (good for insomnia)✅ Lowers blood pressure and promotes relaxation✅ Activates the parasympathetic nervous system 🔹 Precautions & Contraindications ❌ Avoid if you have low blood pressure❌ Not suitable for those with respiratory issues like asthma❌ Avoid in extreme cold weather❌ Pregnant women should consult a doctor before practicing
Jnana Mudra (Gesture of Knowledge): Meaning, How to Do & Benefits
Jnana Mudra (Gesture of Knowledge): Meaning, How to Do & Benefits What is Jnana Mudra? Jnana Mudra, also known as the Gesture of Knowledge, is one of the most well-known and widely practiced mudras in yoga and meditation. It symbolizes wisdom, enlightenment, and inner awareness. The gesture represents the connection between the individual self (Jivatma) and the universal consciousness (Paramatma), making it a key practice for deep meditation and mental clarity. How to Do Jnana Mudra (Step-by-Step Guide) ✅ Step 1: Sit comfortably in a meditative posture (Padmasana, Sukhasana, or Vajrasana) with a straight spine.✅ Step 2: Rest your hands on your knees with palms facing upward.✅ Step 3: Touch the tip of the index finger to the tip of the thumb, forming a circle.✅ Step 4: Keep the other three fingers extended but relaxed.✅ Step 5: Close your eyes, take slow deep breaths, and focus on your breath or mantra.✅ Step 6: Hold this mudra for 10–30 minutes, preferably during meditation. 📌 Best Time to Practice: Early morning or before meditation📌 Recommended Duration: 10–30 minutes, daily📌 Optional: Can be combined with OM chanting or deep breathing exercises Meaning Behind Jnana Mudra The symbolism of Jnana Mudra lies in its hand position:✔️ Thumb (Divine Consciousness): Represents Brahman (universal consciousness)✔️ Index Finger (Individual Self): Symbolizes Jiva (ego or personal consciousness)✔️ Union of Fingers: Represents the dissolution of ego and merging with the universe✔️ Three Extended Fingers: Symbolize the three Gunas (Sattva – purity, Rajas – activity, and Tamas – inertia) By forming this mudra, a practitioner invokes higher knowledge, wisdom, and spiritual awareness. Benefits of Jnana Mudra 1️⃣ Enhances Focus & Mental Clarity ✔️ Improves concentration, memory, and learning ability✔️ Reduces brain fog, overthinking, and mental distractions 2️⃣ Promotes Deep Meditation & Spiritual Awakening ✔️ Helps in calming the mind and deepening meditation✔️ Connects with higher consciousness and self-realization 3️⃣ Reduces Stress, Anxiety & Negative Emotions ✔️ Balances the nervous system and emotions✔️ Increases inner peace and mindfulness 4️⃣ Improves Sleep & Relieves Insomnia ✔️ Induces relaxation and tranquility✔️ Helps in regulating sleep cycles and reducing restlessness 5️⃣ Boosts Brain Function & Nervous System Health ✔️ Activates the brain’s cognitive centers✔️ Helps in reducing symptoms of stress-related disorders Variations of Jnana Mudra 🔹 Chin Mudra (Gesture of Consciousness) – The same hand position but with palms facing downward (for grounding and inner stability). 🔹 Dhyana Mudra (Meditation Gesture) – Placing both hands in the lap with Jnana Mudra for deep contemplation and stillness. Precautions & Contraindications ✅ Safe for all age groups and can be practiced anywhere.⚠️ Avoid practicing if feeling overstimulated or hyperactive – reduce duration if needed. 🔹 Tip: Combine Jnana Mudra with deep breathing (Pranayama) or mantra chanting for amplified benefits. Final Thoughts Jnana Mudra is a powerful yet simple hand gesture that enhances wisdom, clarity, and spiritual awareness. With regular practice, it helps in calming the mind, improving focus, and deepening meditation.
10 Ways to Incorporate Meditation Into Your Daily Routine
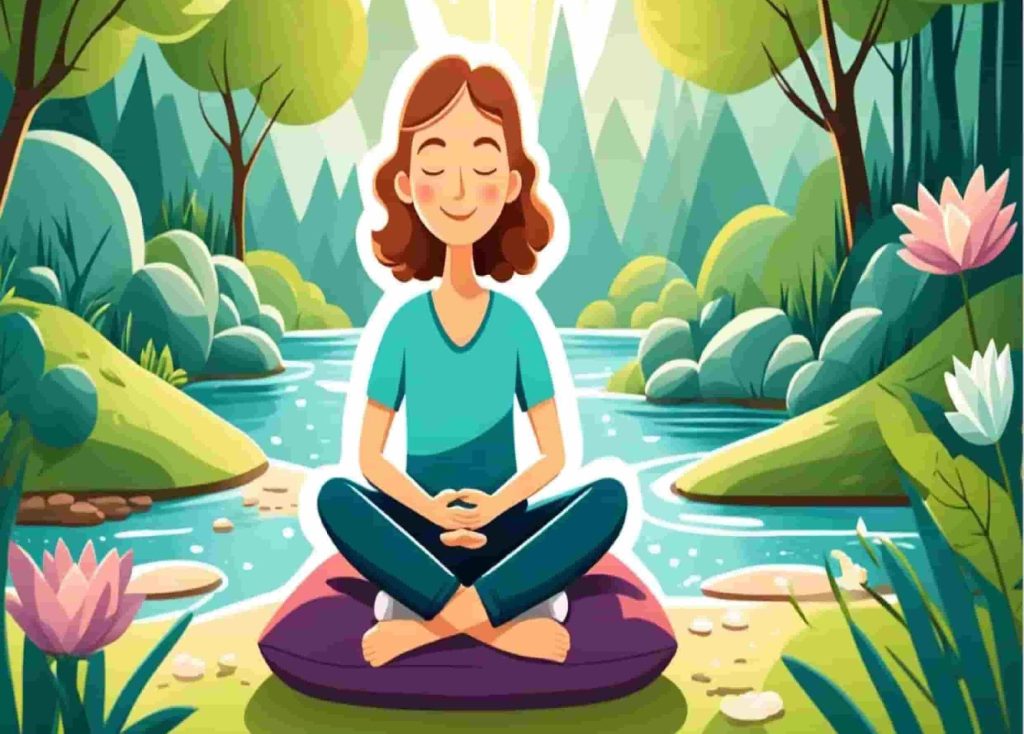
10 Ways to Incorporate Meditation Into Your Daily Routine Meditation doesn’t have to be a long or complicated practice. Even a few minutes of mindfulness can bring calmness, clarity, and focus to your day. Here are 10 simple ways to integrate meditation into your daily routine: 1. Morning Mindfulness (Start Your Day with Intention) ✅ How? Before getting out of bed, take 2-5 minutes to focus on your breath.✅ Benefits: Sets a positive tone for the day and reduces stress.📌 Tip: Try a short gratitude meditation by mentally listing 3 things you’re thankful for. 2. Breath Awareness During Daily Tasks ✅ How? While brushing your teeth, making coffee, or showering, focus on your breath and sensations.✅ Benefits: Turns routine moments into mini-meditations, keeping you present.📌 Tip: Inhale deeply through the nose, exhale slowly through the mouth. 3. Walking Meditation ✅ How? Walk slowly and focus on each step, the rhythm of your breath, and the sensation of movement.✅ Benefits: Combines movement and mindfulness, great for stress relief.📌 Tip: Try it while walking in nature or during your daily commute. 4. Mindful Eating ✅ How? Eat slowly, savor each bite, and pay attention to textures, flavors, and smells.✅ Benefits: Improves digestion, reduces overeating, and enhances appreciation for food.📌 Tip: Put your phone away while eating to fully engage with the experience. 5. Take a 2-Minute Meditation Break ✅ How? Pause during your workday to close your eyes, breathe deeply, and reset your mind.✅ Benefits: Enhances focus, productivity, and stress relief.📌 Tip: Set a reminder to pause and breathe every few hours. 6. Meditate Before Sleeping ✅ How? Before bed, do a 5-minute guided meditation or deep breathing exercise.✅ Benefits: Improves sleep quality and relaxes the nervous system.📌 Tip: Try Yoga Nidra or a body scan meditation for deeper rest. 7. Mindful Listening ✅ How? During conversations, give full attention to the speaker without distractions or interrupting.✅ Benefits: Strengthens relationships and improves communication.📌 Tip: Take a deep breath before responding to stay present and engaged. 8. Use an App or Guided Meditation ✅ How? Apps like Headspace, Insight Timer, or Calm offer quick, guided sessions.✅ Benefits: Makes meditation easy and accessible.📌 Tip: Start with just 5 minutes per day. 9. Meditate During Chores ✅ How? While washing dishes, folding laundry, or sweeping, focus on the rhythm of your movements and breath.✅ Benefits: Turns boring tasks into relaxing mindfulness exercises.📌 Tip: Engage fully in the sensation of warm water, textures, or sounds. 10. Gratitude Reflection Before Bed ✅ How? Spend 2-3 minutes thinking of things you’re grateful for before sleeping.✅ Benefits: Cultivates positivity and reduces anxiety.📌 Tip: Write down 3 good things from the day in a journal. Final Thoughts Meditation doesn’t have to be a separate activity—it can be woven into everyday moments. By practicing mindfulness in simple ways, you’ll experience greater peace, focus, and well-being without needing extra time.