Best Yoga Teacher Training in Bangalore, India | Yoga Alliance USA | Accredited

karuna yoga vidya peetham logo

Blog

-
Blog

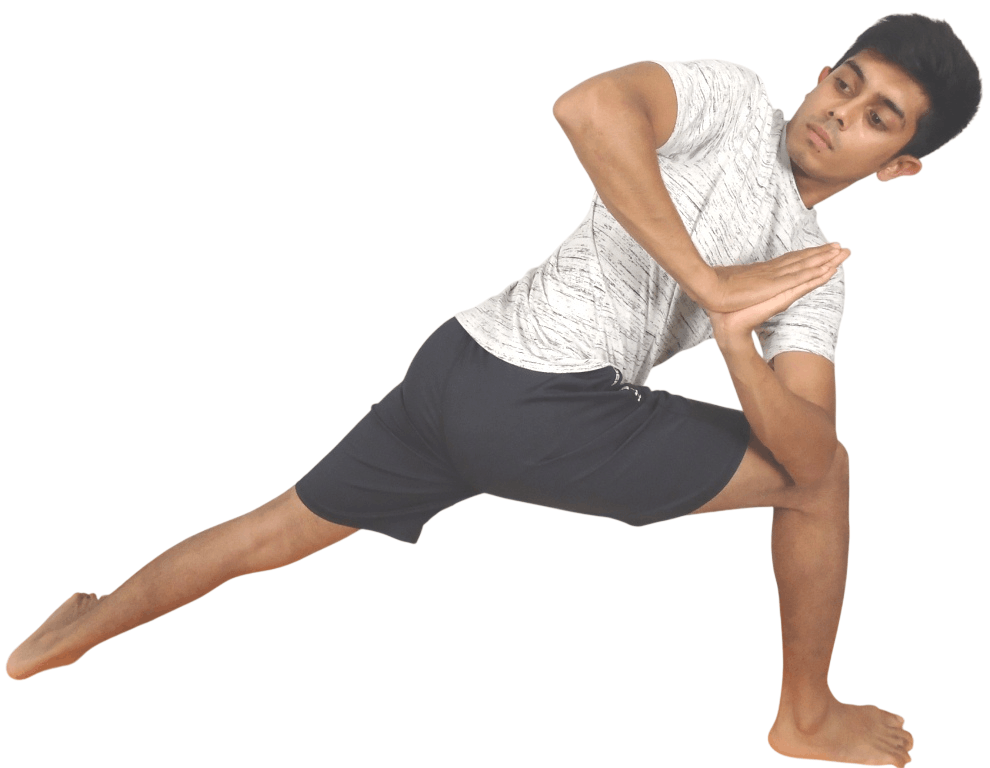
Parsva Tadasana – Legs Crossed (Standing Side Stretch Pose with Legs Crossed)

1. Introduction Standing yoga postures form the structural foundation of many yoga practices. They cultivate balance, strength, stability, flexibility, and postural awareness. Among these poses, Parsva Tadasana (Standing Side Stretch Pose) is a simple yet powerful posture that improves lateral spinal mobility, expands the rib cage, and enhances overall body alignment. A variation of this pose is Parsva Tadasana with Legs Crossed, where the practitioner crosses one leg over the other while performing the side stretch. This variation introduces additional elements of balance, hip stabilization, and fascial stretching, particularly along the lateral myofascial chains of the body. In this posture, the body elongates sideways while maintaining a stable base. The crossing of the legs intensifies the stretch along the outer hips, iliotibial band, and lateral trunk muscles. From a traditional yogic perspective, lateral stretching postures help maintain spinal flexibility and energetic balance within the body’s nadis (energy channels). From a modern anatomical viewpoint, Parsva Tadasana improves thoracic mobility, rib cage expansion, fascial elasticity, and neuromuscular coordination. Although the movement appears gentle, it involves a coordinated interaction between muscles, joints, fascia, and breathing mechanics. This posture also encourages awareness of symmetry and alignment, which is essential for injury prevention and healthy movement patterns. 2. Word Meaning (Etymology) The name Parsva Tadasana comes from Sanskrit words. Parsva – Side or lateralTada – MountainAsana – Posture or pose Thus: Parsva Tadasana means “Side Mountain Pose” or “Standing Side Stretch Pose.” In this variation, the legs are crossed, which introduces additional muscular engagement and fascial tension. The symbolism of the pose reflects the stability of a mountain combined with the flexibility of nature, where the body remains rooted yet capable of movement and expansion. 3. Definition of the Pose Parsva Tadasana with Legs Crossed is a standing yoga posture in which the legs are crossed for stability and balance while the arms reach overhead and the torso bends laterally, creating a deep stretch along the sides of the body. The posture involves: The pose combines balance, side-body stretching, and postural awareness. 4. Method of Practice (Step-by-Step) Starting Position Crossing the Legs Raising the Arms Performing the Side Stretch Holding the Pose Returning to Center Repeat on the Opposite Side 5. Alignment Cues Proper alignment ensures safe and effective practice. Feet Legs Pelvis Spine Arms Head 6. Benefits 1. Improves Spinal Flexibility The lateral bending movement increases mobility in the thoracic and lumbar spine. 2. Expands the Rib Cage The stretch opens the intercostal muscles, improving breathing capacity. 3. Stretches the Side Body The pose stretches: 4. Improves Balance Crossing the legs challenges postural stability and coordination. 5. Enhances Postural Awareness Encourages alignment of the spine, pelvis, and shoulders. 6. Improves Circulation Lateral stretching enhances blood flow to the spinal muscles and rib cage. 7. Reduces Muscular Stiffness Particularly beneficial for individuals with sedentary lifestyles. 7. Contraindications Certain individuals should avoid or modify the pose. Lower Back Injury Excessive lateral bending may worsen symptoms. Balance Disorders Crossed legs may create instability. Severe Hip Pain Crossing the legs may aggravate discomfort. Shoulder Injury Overhead arm extension may cause strain. 8. Counterposes Counterposes restore muscular balance. Tadasana Returns the body to neutral alignment. Standing Forward Fold Releases tension in the spine. Gentle Spinal Twist Restores spinal mobility. 9. Preparatory Practices Preparing the body improves safety and effectiveness. Shoulder Warm-ups Side Stretch Exercises Balance Training 10. Modifications Wall Support Stand close to a wall for balance. Chair Assistance Hold a chair for additional stability. Gentle Arm Variation Keep hands on hips instead of overhead. Reduced Side Bend Perform a smaller range of movement. 11. Muscles Involved Primary Muscles Secondary Muscles Stabilizing Muscles 12. Kinesiology Kinesiology studies muscle movement and joint actions. Spine Movement: lateral flexion Muscles involved: Shoulder Joint Movement: flexion and stabilization Muscles involved: Hip Joint Movement: stabilization Muscles involved: 13. Kinematics Kinematics studies movement patterns. In Parsva Tadasana: Primary Movement Secondary Movement Movement Type This pose uses a closed kinetic chain where the feet remain fixed while the torso moves. 14. Biomechanism Biomechanism explains how forces interact within the body. Base of Support The crossed legs create a narrow base, increasing balance demand. Center of Gravity Shifts laterally during the side bend. Fascial Stretch The pose stretches the lateral fascial line, connecting: 15. Functional Anatomy & Physiology Musculoskeletal System Improves flexibility of lateral spinal muscles. Respiratory System Rib cage expansion improves lung capacity. Nervous System Enhances proprioception and body awareness. Circulatory System Promotes circulation through gentle stretching. 16. Teaching Methodology Teaching Parsva Tadasana requires clear instructions and awareness of alignment. Step 1: Establish a Stable Base Ensure students feel grounded through the feet. Step 2: Lengthen the Spine Encourage vertical extension before side bending. Step 3: Introduce the Side Stretch Guide students to bend gently without collapsing. Step 4: Coordinate Breath Inhale to lengthen, exhale to deepen the stretch. 17. Common Mistakes Collapsing the Chest Students may round the upper body. Overbending the Lower Back Occurs when the movement lacks thoracic mobility. Losing Balance Crossed legs reduce stability. Shoulders Rising Toward Ears Creates neck tension. 18. How to Correct and Adjust While Teaching Verbal Instructions Teachers may say: Hands-On Adjustments Teachers may: Prop Assistance Use: Observation Teachers should observe: 19. Therapeutic Applications Parsva Tadasana with crossed legs may help with: It is often used in gentle yoga therapy and mobility programs. 20. Conclusion Parsva Tadasana with legs crossed is a simple yet effective yoga posture that combines balance, lateral stretching, and postural awareness. By crossing the legs and bending sideways, the pose intensifies the stretch along the lateral muscles of the body while improving stability and coordination. From a biomechanical perspective, the pose enhances spinal lateral flexion, rib cage mobility, and hip stabilization. From a physiological standpoint, it supports respiratory expansion, circulation, and neuromuscular awareness.

Read More »

Sucirandhrasana (Reverse Pigeon Pose)

1. Introduction Reverse Pigeon Pose, known in Sanskrit as Sucirandhrasana, is a supine yoga posture widely practiced in Hatha Yoga and therapeutic yoga sessions to stretch and release tension in the hips and lower back. The pose is often referred to as Eye of the Needle Pose because the shape created by the legs resembles threading a needle. It is called Reverse Pigeon Pose because the hip-opening action resembles that of the traditional Pigeon Pose (Kapotasana) but is performed while lying on the back. Modern lifestyles that involve prolonged sitting frequently lead to tightness in the hip muscles, particularly the gluteal muscles and piriformis. This tightness can contribute to lower back discomfort, poor posture, and restricted mobility. Reverse Pigeon Pose provides an effective method for gently stretching the hip rotators and relieving tension in the lower body while keeping the spine supported by the floor. From a biomechanical perspective, Sucirandhrasana primarily involves hip external rotation, hip flexion, and knee flexion while maintaining spinal neutrality. The pose also requires gentle engagement of the abdominal muscles to stabilize the pelvis and support the lumbar spine. From a therapeutic standpoint, this posture is frequently recommended for individuals experiencing sciatic nerve discomfort, hip tightness, and lower back stiffness. Because it is practiced in a supine position, it places minimal strain on the spine and is therefore considered a safe and accessible hip-opening posture for many practitioners. Beyond its physical benefits, Reverse Pigeon Pose also promotes relaxation and stress reduction. By encouraging slow breathing and releasing muscular tension, the pose activates the parasympathetic nervous system, which supports mental calmness and emotional balance. 2. Word Meaning and Etymology The Sanskrit name Sucirandhrasana can be broken down into three parts: Suchi (Sucī) – NeedleRandhra – Hole or openingAsana – Posture or seat Thus, Sucirandhrasana literally translates to “Needle Eye Pose” or “Pose of the Needle Opening.” The name describes the visual shape created when one leg threads through the space formed by the opposite leg, similar to passing thread through the eye of a needle. In yoga practice, the English name Reverse Pigeon Pose is also used because the posture produces a hip stretch similar to that of Pigeon Pose, but in a reclined position. 3. Definition of the Pose Reverse Pigeon Pose is a supine hip-opening yoga posture in which one ankle is placed across the opposite thigh while the supporting leg is drawn toward the chest, creating a deep stretch in the outer hip and gluteal muscles. Key Characteristics The posture primarily targets the gluteal muscles, piriformis, and deep hip rotators, making it an effective stretch for the hip region. 4. Method of Practice (Step-by-Step) Starting Position Step-by-Step Practice Step 1 – Cross the Ankle Lift the right foot and place the right ankle across the left thigh just above the knee. Step 2 – Flex the Foot Flex the right foot to protect the knee joint. Step 3 – Lift the Supporting Leg Lift the left foot off the floor and bring the left knee toward the chest. Step 4 – Hold the Leg Thread the hands through the legs and hold the back of the left thigh or shin. Step 5 – Maintain Alignment Keep the head and shoulders relaxed on the floor. Step 6 – Deepen the Stretch Gently draw the legs closer toward the chest while maintaining steady breathing. Step 7 – Hold the Pose Remain in the posture for 5–10 breaths. Step 8 – Release Slowly lower the foot back to the floor and switch sides. 5. Alignment Cues Proper alignment ensures safety and effectiveness. Spine Hips Knees Feet Neck 6. Preparatory Practices Several poses help prepare the body for Reverse Pigeon Pose by warming up the hips and lower back. Recommended Preparatory Asanas These movements increase hip mobility and reduce muscular tension. 7. Counterposes Counterposes help release the muscles after deep hip stretching. Common Counterposes These poses restore neutral alignment and relax the hips. 8. Modifications and Variations Beginner Modification Keep the supporting foot on the floor instead of lifting it. Strap Variation Use a yoga strap behind the thigh to hold the leg comfortably. Wall Support Place the foot against a wall for additional support. Advanced Variation Draw the supporting leg closer to the chest for a deeper stretch. 9. Muscles Involved Primary Muscles Secondary Muscles These muscles work together to stabilize the hips and support the stretch. 10. Kinesiology Kinesiology examines the relationship between muscles and movement. Joint Actions Hip joint – flexion and external rotationKnee joint – flexionSpine – stabilization Muscle Contractions Isometric contractions stabilize the pelvis. Eccentric contractions occur in the hip muscles as they lengthen. 11. Kinematics Kinematics studies motion without considering forces. Plane of Motion Movement occurs primarily in the transverse plane due to hip rotation. Axis of Movement The hip rotates around the vertical axis. Segmental Movement The pelvis remains stable while the femur rotates outward. 12. Biomechanics Biomechanics analyzes mechanical forces acting on the body. Hip Mechanics External rotation of the hip stretches the deep rotator muscles. Pelvic Stability The abdominal muscles stabilize the pelvis during the pose. Load Distribution Because the body is supported by the floor, joint compression is minimal. 13. Functional Anatomy Hip Joint The hip is a ball-and-socket joint capable of multiple movements. Important structures include: Gluteal Muscles The gluteal muscles stabilize the pelvis and control hip movement. Piriformis Muscle The piriformis plays a key role in hip external rotation and is often targeted in this stretch. 14. Physiological Effects Reverse Pigeon Pose influences several body systems. Musculoskeletal System Nervous System Circulatory System Lymphatic System 15. Benefits Physical Benefits Therapeutic Benefits Energetic Benefits (Yogic Perspective) 16. Contraindications Certain individuals should avoid or modify the pose. Medical Conditions Safety Guidelines 17. Teaching and Adjustment Techniques Verbal Instructions Teachers should encourage students to: Observational Teaching Teachers should observe: Hands-On Adjustments Teachers may gently: Adjustments should always be gentle and respectful. 18. Common Mistakes and Corrections Knee Stress Correction: flex the foot and reduce pressure on the knee. Rounded

Read More »

Sucirandhrasana (Reverse Pigeon Pose)

1. Introduction Reverse Pigeon Pose, known in Sanskrit as Sucirandhrasana, is a supine yoga posture widely practiced in Hatha Yoga and therapeutic yoga sessions to stretch and release tension in the hips and lower back. The pose is often referred to as Eye of the Needle Pose because the shape created by the legs resembles threading a needle. It is called Reverse Pigeon Pose because the hip-opening action resembles that of the traditional Pigeon Pose (Kapotasana) but is performed while lying on the back. Modern lifestyles that involve prolonged sitting frequently lead to tightness in the hip muscles, particularly the gluteal muscles and piriformis. This tightness can contribute to lower back discomfort, poor posture, and restricted mobility. Reverse Pigeon Pose provides an effective method for gently stretching the hip rotators and relieving tension in the lower body while keeping the spine supported by the floor. From a biomechanical perspective, Sucirandhrasana primarily involves hip external rotation, hip flexion, and knee flexion while maintaining spinal neutrality. The pose also requires gentle engagement of the abdominal muscles to stabilize the pelvis and support the lumbar spine. From a therapeutic standpoint, this posture is frequently recommended for individuals experiencing sciatic nerve discomfort, hip tightness, and lower back stiffness. Because it is practiced in a supine position, it places minimal strain on the spine and is therefore considered a safe and accessible hip-opening posture for many practitioners. Beyond its physical benefits, Reverse Pigeon Pose also promotes relaxation and stress reduction. By encouraging slow breathing and releasing muscular tension, the pose activates the parasympathetic nervous system, which supports mental calmness and emotional balance. 2. Word Meaning and Etymology The Sanskrit name Sucirandhrasana can be broken down into three parts: Suchi (Sucī) – NeedleRandhra – Hole or openingAsana – Posture or seat Thus, Sucirandhrasana literally translates to “Needle Eye Pose” or “Pose of the Needle Opening.” The name describes the visual shape created when one leg threads through the space formed by the opposite leg, similar to passing thread through the eye of a needle. In yoga practice, the English name Reverse Pigeon Pose is also used because the posture produces a hip stretch similar to that of Pigeon Pose, but in a reclined position. 3. Definition of the Pose Reverse Pigeon Pose is a supine hip-opening yoga posture in which one ankle is placed across the opposite thigh while the supporting leg is drawn toward the chest, creating a deep stretch in the outer hip and gluteal muscles. Key Characteristics The posture primarily targets the gluteal muscles, piriformis, and deep hip rotators, making it an effective stretch for the hip region. 4. Method of Practice (Step-by-Step) Starting Position Step-by-Step Practice Step 1 – Cross the Ankle Lift the right foot and place the right ankle across the left thigh just above the knee. Step 2 – Flex the Foot Flex the right foot to protect the knee joint. Step 3 – Lift the Supporting Leg Lift the left foot off the floor and bring the left knee toward the chest. Step 4 – Hold the Leg Thread the hands through the legs and hold the back of the left thigh or shin. Step 5 – Maintain Alignment Keep the head and shoulders relaxed on the floor. Step 6 – Deepen the Stretch Gently draw the legs closer toward the chest while maintaining steady breathing. Step 7 – Hold the Pose Remain in the posture for 5–10 breaths. Step 8 – Release Slowly lower the foot back to the floor and switch sides. 5. Alignment Cues Proper alignment ensures safety and effectiveness. Spine Hips Knees Feet Neck 6. Preparatory Practices Several poses help prepare the body for Reverse Pigeon Pose by warming up the hips and lower back. Recommended Preparatory Asanas These movements increase hip mobility and reduce muscular tension. 7. Counterposes Counterposes help release the muscles after deep hip stretching. Common Counterposes These poses restore neutral alignment and relax the hips. 8. Modifications and Variations Beginner Modification Keep the supporting foot on the floor instead of lifting it. Strap Variation Use a yoga strap behind the thigh to hold the leg comfortably. Wall Support Place the foot against a wall for additional support. Advanced Variation Draw the supporting leg closer to the chest for a deeper stretch. 9. Muscles Involved Primary Muscles Secondary Muscles These muscles work together to stabilize the hips and support the stretch. 10. Kinesiology Kinesiology examines the relationship between muscles and movement. Joint Actions Hip joint – flexion and external rotationKnee joint – flexionSpine – stabilization Muscle Contractions Isometric contractions stabilize the pelvis. Eccentric contractions occur in the hip muscles as they lengthen. 11. Kinematics Kinematics studies motion without considering forces. Plane of Motion Movement occurs primarily in the transverse plane due to hip rotation. Axis of Movement The hip rotates around the vertical axis. Segmental Movement The pelvis remains stable while the femur rotates outward. 12. Biomechanics Biomechanics analyzes mechanical forces acting on the body. Hip Mechanics External rotation of the hip stretches the deep rotator muscles. Pelvic Stability The abdominal muscles stabilize the pelvis during the pose. Load Distribution Because the body is supported by the floor, joint compression is minimal. 13. Functional Anatomy Hip Joint The hip is a ball-and-socket joint capable of multiple movements. Important structures include: Gluteal Muscles The gluteal muscles stabilize the pelvis and control hip movement. Piriformis Muscle The piriformis plays a key role in hip external rotation and is often targeted in this stretch. 14. Physiological Effects Reverse Pigeon Pose influences several body systems. Musculoskeletal System Nervous System Circulatory System Lymphatic System 15. Benefits Physical Benefits Therapeutic Benefits Energetic Benefits (Yogic Perspective) 16. Contraindications Certain individuals should avoid or modify the pose. Medical Conditions Safety Guidelines 17. Teaching and Adjustment Techniques Verbal Instructions Teachers should encourage students to: Observational Teaching Teachers should observe: Hands-On Adjustments Teachers may gently: Adjustments should always be gentle and respectful. 18. Common Mistakes and Corrections Knee Stress Correction: flex the foot and reduce pressure on the knee. Rounded Back Correction: keep the spine relaxed and neutral. Excessive Pulling Correction: hold the thigh instead of the shin. 19. Integration in Yoga Practice Reverse Pigeon Pose is commonly used

Read More »

Standing Twist Opposite Hand to Knee Pose(One-Legged Standing Garland Pose)

1. Introduction Balancing postures combined with twisting movements are an important part of yoga practice because they develop strength, coordination, flexibility, and neuromuscular control simultaneously. Standing balance poses challenge the body’s ability to stabilize itself while maintaining alignment, while twisting movements mobilize the spine and stimulate internal organs. The Standing Twist Opposite Hand to Knee Pose, sometimes referred to as One-Legged Standing Garland Pose, is a dynamic yoga posture that integrates balance, spinal rotation, and hip mobility. In this posture, the practitioner balances on one leg while lifting the opposite knee toward the chest and twisting the torso so that the opposite hand connects with the raised knee. This pose combines elements from several well-known yoga movements: • standing balance postures• spinal twists• core stabilization• hip flexion The twisting action stimulates the abdominal organs, while the balancing aspect activates stabilizing muscles throughout the body. The pose also improves proprioception, which is the body’s ability to sense its position in space. From a functional movement perspective, balancing on one leg while rotating the torso is similar to movements performed in everyday activities such as walking, climbing stairs, or turning while standing. Practicing such movements in yoga helps develop coordination and joint stability. Biomechanically, the posture involves: • unilateral weight-bearing on one leg• hip flexion of the raised leg• spinal rotation• shoulder movement to reach the knee• strong activation of the core muscles In addition to strengthening muscles, the posture improves balance, concentration, and mental focus. Because maintaining the posture requires attention and stability, the mind naturally becomes more present and engaged. 2. Word Meaning (Etymology) Although this posture is often described in English, its components can be understood through Sanskrit terminology. The name Garland Pose traditionally refers to Malasana, which is a deep squatting posture. In the One-Legged Standing Garland Pose, the lifted knee and arm connection resemble a partial garland-like structure created by the limbs. Breaking down the descriptive terms: Eka – onePada – foot or legAsana – posture Thus, Eka Padasana refers to a posture performed on one leg. The twisting element involves spinal rotation, which in many Sanskrit pose names is described by the word: Parivrtta – revolved or twisted. Therefore, conceptually the posture can be understood as a one-legged standing twist posture resembling the arm-to-knee connection seen in Garland Pose. 3. Definition of the Pose Standing Twist Opposite Hand to Knee Pose is a standing yoga posture in which the practitioner balances on one leg while lifting the opposite knee toward the chest and rotating the torso so that the opposite hand touches or holds the raised knee, creating a spinal twist while maintaining balance. The posture integrates: • unilateral balance• spinal rotation• hip flexion• core stabilization It is generally considered a moderate-level balance posture. 4. Method of Practice (Step-by-Step) Starting Position Step 1: Establish the Base Step 2: Lift the Opposite Knee Step 3: Engage the Core Step 4: Initiate the Twist Step 5: Connect Hand to Knee Step 6: Extend the Free Arm Step 7: Maintain Balance Step 8: Hold the Pose Step 9: Release 5. Alignment Cues Proper alignment helps maintain balance and prevent injury. Feet • Ground the standing foot firmly. Ankles • Maintain ankle stability. Knees • Keep the standing knee slightly soft. Hips • Keep hips level. Spine • Lengthen the spine before twisting. Shoulders • Relax shoulders away from ears. Gaze (Drishti) • Focus on a steady point. 6. Benefits 1. Improves Balance Balancing on one leg strengthens stabilizing muscles. 2. Strengthens the Legs The standing leg develops strength and endurance. 3. Enhances Core Stability Core muscles stabilize the body during the twist. 4. Improves Spinal Mobility The twisting motion increases spinal flexibility. 5. Stimulates Digestive Organs Twisting compresses and releases abdominal organs. 6. Improves Coordination Balancing and twisting simultaneously improve neuromuscular coordination. 7. Enhances Concentration Maintaining balance requires mental focus. 7. Contraindications Knee Injury Avoid balancing if the knee is unstable. Ankle Injury Practice with caution. Severe Lower Back Pain Avoid deep twisting. Balance Disorders Practice near a wall. 8. Counterposes After this posture, the following poses help neutralize the spine: • Mountain Pose• Standing Forward Fold• Gentle seated twist 9. Preparatory Practices Preparatory poses include: • Tree Pose• Chair Pose• Standing knee-to-chest pose• Gentle spinal twists These poses prepare the legs, hips, and spine. 10. Modifications Use Wall Support Stand near a wall for balance. Hold the Knee with Both Hands Reduces twisting intensity. Keep the Raised Foot Low Lift the knee only slightly. Use a Chair Hold a chair for stability. 11. Muscles Involved Primary Muscles • Quadriceps• Gluteus medius• Hip flexors Secondary Muscles • Hamstrings• Calf muscles• Erector spinae Stabilizing Muscles • Transverse abdominis• Oblique abdominal muscles• Ankle stabilizers 12. Kinesiology Kinesiology examines muscle actions. Hip Joint Raised leg performs hip flexion. Standing leg stabilizes the pelvis. Knee Joint Standing knee remains slightly flexed. Spine Performs spinal rotation. Shoulder Joint Arm crossing the body performs horizontal adduction. 13. Kinematics Kinematics studies movement patterns. Plane of Motion Movement occurs primarily in the transverse plane due to spinal rotation. Type of Movement Static balance posture with rotational component. 14. Biomechanism Biomechanics examines forces acting on the body. Base of Support The base of support is the standing foot. Center of Gravity Shifts above the standing leg. Balance Mechanism Small muscular adjustments maintain equilibrium. 15. Functional Anatomy & Physiology Musculoskeletal System Strengthens the legs, hips, and core. Nervous System Improves proprioception and coordination. Digestive System Twisting stimulates abdominal organs. Circulatory System Improves blood flow to muscles and organs. 16. Teaching Methodology Yoga teachers should introduce this pose gradually. Step 1 Teach basic balance poses. Step 2 Add knee lifting. Step 3 Introduce the twisting movement. 17. Common Mistakes Leaning Forward Keep the torso upright. Collapsing the Standing Leg Engage thigh muscles. Over-twisting the Spine Twist gently. Holding the Breath Maintain steady breathing. 18. How to Correct and Adjust While Teaching Verbal Instructions Teachers may say: • “Ground through the standing foot.”• “Lift your spine tall.”• “Twist gently from

Read More »

Tadasana Twist Arms Shoulder Level Spread Out (Mountain Pose Twist – Arms at Shoulder Level Spread Out)

1. Introduction Standing yoga postures form the foundation of many yoga practices because they develop strength, stability, and body awareness. Among the standing poses, Mountain Pose (Tadasana) is considered the most fundamental posture. Although it appears simple, it establishes the essential principles of posture, alignment, grounding, and breath awareness. From this foundational pose, many variations can be practiced to improve mobility and coordination. One such variation is the Mountain Pose Twist with Arms at Shoulder Level Spread Out, which introduces gentle spinal rotation while maintaining the stability of a standing posture. This variation combines axial rotation of the spine with arm extension at shoulder level, creating a movement that improves spinal mobility, strengthens postural muscles, and enhances neuromuscular coordination. It is often practiced as part of warm-up sequences, mobility flows, or therapeutic yoga sessions designed to relieve stiffness in the upper body. Modern lifestyles frequently involve long hours of sitting, working at computers, and maintaining static postures. These habits can lead to tightness in the shoulders, reduced thoracic mobility, and poor spinal posture. Twisting movements performed in a standing position help counteract these effects by encouraging rotational movement of the spine and releasing muscular tension. The posture also improves postural awareness, helping practitioners align the head, shoulders, spine, and pelvis in a balanced way. When the arms are extended at shoulder level, the muscles of the upper back, shoulders, and chest become actively engaged. Another important aspect of this posture is its ability to stimulate the thoracic spine, which is often less mobile than other regions of the spine. The thoracic spine plays a crucial role in respiration and upper body movement. Gentle twisting movements can help restore mobility in this area. From a physiological perspective, twisting movements can stimulate the abdominal organs, improve circulation, and encourage healthy breathing patterns. The open chest position created by spreading the arms supports deeper breathing and expansion of the lungs. Energetically, this posture is associated with activation of the Manipura Chakra, which governs vitality, digestion, and inner strength. The upright nature of the pose also promotes grounding through the feet, connecting the practitioner to the stabilizing energy of the earth. Because of its accessibility and adaptability, Mountain Pose Twist with Arms Spread Out can be practiced by beginners, intermediate practitioners, and even individuals participating in therapeutic yoga programs. 2. Word Meaning (Etymology) The Sanskrit name Tadasana consists of two words. Tada Tada means mountain. Asana Asana means posture or pose. Combined Meaning Tadasana means Mountain Pose, representing stability, strength, and grounded presence. The twisting variation with arms spread at shoulder level describes the action of spinal rotation with horizontal arm extension. Thus, the posture can be described as: “Mountain Pose with Twisting Movement and Arms Extended at Shoulder Level.” 3. Definition of the Pose Mountain Pose Twist with Arms at Shoulder Level Spread Out is a standing yoga posture in which the practitioner maintains the stability of Tadasana while extending the arms horizontally and performing controlled spinal rotation from side to side. This posture integrates: • standing balance• spinal rotation• shoulder extension• thoracic mobility• breath coordination It is considered a gentle mobility posture suitable for beginners and intermediate practitioners. 4. Method of Practice (Step-by-Step) Starting Position Step 1: Align the Body Step 2: Extend the Arms Step 3: Prepare for the Twist Step 4: Twist to the Right Step 5: Hold the Position Step 6: Return to Center Step 7: Twist to the Left Step 8: Repeat Step 9: Release 5. Alignment Cues Proper alignment ensures safe and effective practice. Feet • Ground the feet firmly into the floor. Knees • Keep the knees slightly relaxed. Hips • Maintain neutral hip alignment. Spine • Lengthen the spine before twisting. Shoulders • Keep shoulders relaxed and level. Arms • Extend arms evenly at shoulder height. 6. Benefits 1. Improves Spinal Mobility The twisting movement increases flexibility of the thoracic spine. 2. Strengthens Postural Muscles Standing alignment strengthens muscles supporting the spine. 3. Enhances Shoulder Mobility Arm extension improves shoulder flexibility. 4. Improves Coordination The posture requires coordination between upper and lower body. 5. Promotes Better Posture Practicing the pose helps maintain upright alignment. 6. Stimulates Digestive Organs Twisting gently massages abdominal organs. 7. Improves Circulation Movement enhances blood flow throughout the body. 7. Contraindications Severe Back Pain Avoid twisting movements. Spinal Injuries Practice only under professional guidance. Shoulder Injuries Avoid raising arms fully. Dizziness or Balance Disorders Practice near a wall for support. 8. Counterposes Helpful counterposes include: • Mountain Pose• Standing Forward Fold• Shoulder rolls 9. Preparatory Practices Preparatory poses include: • Shoulder rotations• Gentle spinal twists• Cat–Cow Pose 10. Modifications Lower Arm Position Keep the arms slightly below shoulder level. Use Wall Support Stand near a wall for stability. Reduce Range of Twist Perform a smaller rotation. Keep Hands on Hips If shoulder discomfort occurs. 11. Muscles Involved Primary Muscles • Oblique abdominal muscles• Erector spinae Secondary Muscles • Deltoids• Trapezius Stabilizing Muscles • Core stabilizers• Gluteal muscles• Quadriceps 12. Kinesiology Kinesiology studies muscle movement. Spine Performs axial rotation. Shoulder Joint Arms remain in horizontal abduction. Hip Joint Maintains static stabilization. Ankle Joint Provides balance support. 13. Kinematics Kinematics describes body movement. Plane of Motion Movement occurs primarily in the transverse plane. Type of Movement Controlled spinal rotation in standing posture. 14. Biomechanism Biomechanics studies mechanical forces. Base of Support The base of support is formed by the two feet. Center of Gravity Located around the pelvic region. Load Distribution Body weight is distributed evenly between both legs. 15. Functional Anatomy & Physiology Musculoskeletal System Improves spinal flexibility and muscle coordination. Nervous System Enhances proprioception and motor control. Respiratory System Open chest position supports deeper breathing. Digestive System Twisting stimulates abdominal organs. 16. Teaching Methodology Teachers should introduce the posture gradually. Step 1 Teach Mountain Pose alignment. Step 2 Add arm extension. Step 3 Introduce gentle twisting movement. 17. Common Mistakes Moving the Hips During the Twist Encourage keeping hips facing forward. Raising Shoulders Encourage relaxed shoulders. Twisting Too Fast Encourage

Read More »

Tadasana on Tiptoes Hasta Vinyasa (Mountain Pose on Tiptoes with Arm Flow)

1. Introduction Mountain Pose on Tiptoes with Arm Flow is a dynamic standing yoga posture that combines balance, coordination, spinal elongation, and breath-synchronized arm movement. This variation is derived from the foundational posture Tadasana, which is widely regarded as one of the most fundamental standing poses in yoga. In traditional yoga practice, Tadasana represents stability, grounding, and alignment, similar to the steady presence of a mountain. When the pose is modified by lifting the heels onto the toes and coordinating arm movements with breath, it becomes a more dynamic practice that challenges balance and enhances body awareness. The term Hasta Vinyasa refers to the flowing movement of the arms synchronized with breathing. In this variation, practitioners rise onto their toes while lifting and lowering the arms in rhythmic patterns. This movement encourages mind-body coordination, muscular activation, and improved circulation. Mountain Pose on Tiptoes with Arm Flow is often included in warm-up sequences, balance training, and standing flows in yoga practice. It prepares the body for more complex postures by activating the muscles of the feet, legs, core, and shoulders. From an anatomical perspective, the posture strengthens the calf muscles, quadriceps, and core stabilizers, while improving ankle stability and shoulder mobility. The action of lifting onto the toes activates the gastrocnemius and soleus muscles, which are essential for balance and locomotion. The raised arms encourage spinal elongation and chest expansion, improving breathing capacity and posture. Energetically, the posture stimulates the Muladhara Chakra (root center) and Anahata Chakra (heart center), balancing grounding and upward energy flow. Mentally, balancing poses such as this one improve focus, concentration, and body awareness. The dynamic flow of the arms synchronized with breathing encourages mindfulness and rhythm. 2. Word Meaning and Etymology Understanding the Sanskrit terminology clarifies the meaning of the posture. Tada “Tada” means mountain. Asana “Asana” means posture or seat. Hasta “Hasta” means hand or arm. Vinyasa “Vinyasa” means to place in a special way, referring to coordinated movement with breath. Full Meaning The name Tadasana on Tiptoes Hasta Vinyasa can be interpreted as: “Mountain Pose on Tiptoes with Flowing Arm Movements.” This name reflects both the balance element and the dynamic arm sequence. 3. Definition Mountain Pose on Tiptoes with Arm Flow is a dynamic standing yoga posture in which: The posture emphasizes balance, coordination, and spinal elongation. 4. Preparatory Practices Several yoga postures help prepare the body for this posture. Foundational Standing Posture Develops alignment awareness. Shoulder Activation Warms up the shoulders. Forward Fold Stretches the posterior chain. Balance Preparation Improves balance and focus. These poses warm up the legs, shoulders, and spine. 5. Method of Practice (Step-by-Step) Step 1: Starting Position Begin in Tadasana. Stand upright with feet hip-width apart. Step 2: Ground the Feet Distribute weight evenly across both feet. Engage the thigh muscles. Step 3: Raise the Arms Inhale and lift both arms forward and upward. Extend the arms toward the ceiling. Step 4: Lift the Heels Slowly raise the heels off the floor. Balance on the balls of the feet. Step 5: Lengthen the Spine Lift through the crown of the head. Engage the core muscles. Step 6: Arm Flow Move the arms gently up and down with the breath. Inhale – arms rise. Exhale – arms lower slightly. Step 7: Hold the Balance Maintain the posture for 5–10 breaths. Step 8: Return to Neutral Lower the heels slowly. Release the arms. Return to Tadasana. 6. Alignment Cues Head and Neck Keep the neck neutral. Gaze forward at a fixed point. Shoulders Relax the shoulders away from the ears. Spine Lengthen the spine upward. Avoid arching the lower back. Hips Keep the pelvis neutral. Knees Keep the knees straight but not locked. Feet Press evenly through the balls of the feet. 7. Muscles Involved Primary Muscles Secondary Muscles Stabilizing Muscles These muscles help maintain balance and posture. 8. Kinesiology Kinesiology examines muscle movement. Ankle Joint Movement: plantar flexion Shoulder Joint Movement: flexion Spine Movement: axial extension Hip Joint Movement: stabilization Muscles act both dynamically and isometrically. 9. Kinematics Kinematics studies motion patterns. Movement Pattern Plane of Motion The posture primarily occurs in the sagittal plane. Type of Motion Combination of dynamic movement and static balance. 10. Biomechanism Biomechanics explains mechanical forces. Base of Support The base of support decreases when the heels lift. Center of Gravity The center of gravity shifts upward. Muscle Activation The calf muscles maintain balance. Joint Stability Core muscles stabilize the spine. 11. Functional Anatomy & Physiology Musculoskeletal System Strengthens the legs and improves posture. Nervous System Enhances balance and proprioception. Respiratory System Arm movement expands the rib cage. Circulatory System Improves blood circulation. Energetic Perspective The posture stimulates: These centers support grounding and emotional openness. 12. Benefits Physical Benefits Physiological Benefits Mental Benefits 13. Contraindications Avoid or modify the posture if students have: Students with balance difficulties should use wall support. 14. Modifications Wall Support Stand near a wall for balance. Lower Heel Lift Lift the heels slightly. Slow Arm Movement Perform gentle arm movements. Chair Support Hold a chair for stability. These variations make the posture accessible. 15. Counterposes After practicing this posture, the following poses help relax the muscles. These poses stretch the legs and spine. 16. Teaching Methodology Effective teaching involves clear instructions. Demonstration Teacher demonstrates the posture. Breath Coordination Encourage synchronized breathing. Gradual Progression Start with simple balance before adding arm flow. 17. Common Mistakes Leaning Forward Students may lean forward excessively. Correction: keep the torso upright. Tension in Shoulders Students may lift the shoulders. Correction: relax the shoulders. Wobbling Feet Students may lose balance. Correction: focus on a fixed point. 18. Adjustments and Corrections While Teaching Verbal Cues Examples include: Visual Demonstration Teacher demonstrates correct alignment. Hands-on Adjustments With permission, the teacher may: Adjustments should be gentle. 19. Safety Considerations Teachers should observe: Students should exit the pose if they feel pain or dizziness. Props may be used when necessary. 20. Conclusion Mountain Pose on Tiptoes with Arm Flow (Tadasana on Tiptoes Hasta Vinyasa) is a dynamic and

Read More »

Tadasana Pavanmuktasana Namaskarasana)Standing Wind Release Pose with Prayer Hands)

1. Introduction Yoga postures that combine balance, joint mobility, and internal organ stimulation are highly beneficial for maintaining overall health and functional movement. One such posture is Standing Wind Release Pose with Prayer Hands, traditionally referred to as Tadasana Pavanmuktasana Namaskarasana. This posture integrates elements of standing balance, hip flexion, core activation, and mindful breathing. The classical Pavanmuktasana (Wind-Relieving Pose) is commonly practiced in a supine position where the knees are drawn toward the chest to stimulate digestion and relieve abdominal gas. In the standing variation, the practitioner balances on one leg while lifting the opposite knee toward the chest and maintaining the hands in Namaskara Mudra (prayer position) at the heart center. This posture combines the grounding stability of Tadasana (Mountain Pose) with the digestive benefits of Pavanmuktasana and the mindful gesture of Namaskarasana. The integration of these elements creates a posture that promotes balance, coordination, core strength, and internal organ stimulation. From a biomechanical perspective, the posture involves several joint actions: • hip flexion of the lifted leg• stabilization of the standing leg• activation of core muscles• spinal alignment and postural control• shoulder and arm positioning in prayer gesture Because the practitioner must maintain equilibrium while lifting one leg, the posture challenges the proprioceptive system, which is responsible for balance and spatial awareness. Modern lifestyles often lead to reduced physical activity, poor posture, and digestive disturbances due to sedentary habits. Practicing standing poses like this one can improve circulation, digestion, and muscular coordination. Physiologically, the posture stimulates the abdominal organs, including the intestines and stomach. The compression created by drawing the knee toward the abdomen may assist in relieving bloating and improving digestive efficiency. In addition to physical benefits, the Namaskara gesture encourages mental focus and emotional balance. Bringing the hands together at the heart center symbolizes unity, mindfulness, and inner awareness. The posture also develops leg strength and ankle stability, which are essential for maintaining balance in daily activities such as walking and climbing stairs. 2. Word Meaning (Etymology) The Sanskrit name of the posture combines three key terms. Tadasana Tada – mountainAsana – posture or pose Tadasana represents stability, grounding, and upright posture, similar to a mountain. Pavanmuktasana Pavana – wind or airMukta – release or liberationAsana – posture Thus, Pavanmuktasana means “Wind-Relieving Pose.” Namaskarasana Namaskara – greeting, salutation, or prayer gestureAsana – posture This refers to the prayer hand position (Anjali Mudra). Combined Meaning Tadasana Pavanmuktasana Namaskarasana can therefore be interpreted as: “Standing Wind-Relieving Pose with Prayer Hands.” 3. Definition of the Pose Standing Wind Release Pose with Prayer Hands is a standing yoga posture in which the practitioner balances on one leg while lifting the opposite knee toward the chest and holding the hands in prayer position at the heart center, creating abdominal compression while maintaining spinal alignment and balance. The posture integrates: • unilateral balance• hip flexion• core engagement• digestive organ stimulation• mindful breathing This posture is generally considered a beginner to intermediate balance posture. 4. Method of Practice (Step-by-Step) Starting Position Step 1: Establish the Base Step 2: Engage the Core Step 3: Lift the Knee Step 4: Bring Hands to Prayer Position Step 5: Maintain Balance Step 6: Hold the Pose Step 7: Release Step 8: Repeat 5. Alignment Cues Correct alignment ensures stability and prevents strain. Feet • Ground the standing foot evenly. Ankles • Maintain ankle stability. Knees • Keep the standing knee slightly soft. Hips • Keep hips level and facing forward. Spine • Maintain a tall, neutral spine. Shoulders • Relax shoulders downward. Hands • Press palms gently together. 6. Benefits 1. Improves Balance Balancing on one leg strengthens stabilizing muscles. 2. Strengthens the Legs The standing leg develops muscular endurance. 3. Stimulates Digestion The lifted knee compresses the abdominal organs. 4. Improves Postural Alignment Maintaining upright posture strengthens the back muscles. 5. Enhances Core Stability Core muscles maintain balance and spinal support. 6. Improves Concentration Maintaining balance requires mental focus. 7. Encourages Mindfulness The prayer gesture promotes calmness and awareness. 7. Contraindications Knee Injury Avoid lifting the knee too high. Ankle Instability Practice with support. Severe Balance Disorders Practice near a wall. Recent Abdominal Surgery Avoid abdominal compression. 8. Counterposes After practicing this posture, the following poses may be helpful: • Mountain Pose• Standing Forward Fold• Gentle spinal twists 9. Preparatory Practices Helpful preparatory poses include: • Tree Pose• Standing Knee-to-Chest Pose• Gentle hip mobility exercises 10. Modifications Use Wall Support Stand near a wall for balance. Hold the Knee with Hands Beginners may hold the knee for stability. Keep the Foot Lower Lift the knee only slightly. Practice Seated Version Practice seated knee-to-chest movement. 11. Muscles Involved Primary Muscles • Quadriceps• Hip flexors• Core muscles Secondary Muscles • Gluteus medius• Hamstrings• Calf muscles Stabilizing Muscles • Transverse abdominis• Oblique abdominal muscles• Ankle stabilizers 12. Kinesiology Kinesiology studies muscle movement. Hip Joint Lifted leg performs hip flexion. Knee Joint Lifted knee performs flexion. Spine Maintains neutral alignment. Shoulder Joint Arms remain in static prayer position. 13. Kinematics Kinematics studies the motion of body segments. Plane of Motion Movement occurs primarily in the sagittal plane. Type of Movement Static balance posture with unilateral leg movement. 14. Biomechanism Biomechanics explains the mechanical forces involved. Base of Support The base of support is the standing foot. Center of Gravity Shifts toward the standing leg. Balance Mechanism Small muscular adjustments maintain equilibrium. 15. Functional Anatomy & Physiology Musculoskeletal System Strengthens the legs and core muscles. Nervous System Improves proprioception and coordination. Digestive System Abdominal compression stimulates digestion. Circulatory System Encourages blood flow through the lower body. 16. Teaching Methodology Teachers should introduce the posture gradually. Step 1 Teach Mountain Pose. Step 2 Practice standing balance. Step 3 Add the lifted knee variation. 17. Common Mistakes Leaning Forward Encourage upright posture. Collapsing the Standing Leg Engage thigh muscles. Holding the Breath Maintain steady breathing. Overlifting the Knee Lift only to comfortable height. 18. How to Correct and Adjust While Teaching Verbal Cues Teachers may say: • “Ground through your standing

Read More »

Tadasana Urdhva Hastasana – Head Straight (Mountain Pose with Raised Hands and Head Straight)

1. Introduction In the practice of yoga, foundational postures play a crucial role in developing body awareness, alignment, stability, and breath coordination. Among these foundational postures, Tadasana (Mountain Pose) is often regarded as the mother of all standing postures. It establishes the structural and energetic alignment required for more complex asanas. A dynamic variation of this posture is Tadasana Urdhva Hastasana, where the arms are raised overhead while maintaining the head in a neutral, straight position. This pose integrates vertical spinal extension, shoulder elevation, and whole-body activation, creating a sense of upward expansion and grounding simultaneously. In Sanskrit: Thus, Tadasana Urdhva Hastasana translates to Mountain Pose with Upward Raised Arms. When the head remains straight and neutral, the pose emphasizes postural alignment and spinal neutrality, avoiding cervical compression or hyperextension. This version is particularly useful in therapeutic yoga, beginner yoga classes, and posture correction programs. From a biomechanical perspective, this pose involves joint stacking, axial spinal extension, shoulder flexion, scapular upward rotation, and core stabilization. Although it appears simple, it is a powerful posture for developing postural integrity, respiratory expansion, neuromuscular awareness, and balance. 2. Word Meaning (Etymology) The name Tadasana Urdhva Hastasana originates from Sanskrit terminology. Tada – MountainAsana – Pose or postureUrdhva – Upward or elevatedHasta – Hand or arm Thus: Tadasana Urdhva Hastasana means “Mountain Pose with Raised Hands.” The mountain symbolizes stability, strength, grounding, and uprightness. In this pose, the practitioner stands tall like a mountain while extending the arms upward, representing growth, openness, and expansion. Keeping the head straight ensures that the cervical spine remains aligned with the rest of the vertebral column, maintaining structural integrity. 3. Definition of the Pose Tadasana Urdhva Hastasana with Head Straight is a standing yoga posture in which the body remains vertically aligned like a mountain while the arms are raised overhead and the head remains neutral, creating spinal elongation, shoulder mobility, and full-body postural integration. In this posture: The pose integrates stability and expansion simultaneously. 4. Method of Practice (Step-by-Step) Starting Position Establishing the Base Aligning the Pelvis Raising the Arms Final Position Releasing the Pose 5. Alignment Cues Correct alignment ensures efficiency and safety in the posture. Feet Legs Pelvis Spine Shoulders Head and Neck 6. Benefits of Tadasana Urdhva Hastasana 1. Improves Posture The pose promotes proper spinal alignment, helping correct poor posture caused by prolonged sitting. 2. Strengthens the Body Muscles strengthened include: 3. Enhances Spinal Length Raising the arms creates axial elongation of the spine, reducing compression. 4. Improves Breathing Capacity Expanding the chest increases lung capacity and respiratory efficiency. 5. Enhances Balance and Stability Maintaining upright alignment improves proprioception and balance. 6. Stimulates Circulation The upright position improves blood circulation throughout the body. 7. Increases Shoulder Mobility The overhead arm movement improves shoulder joint flexibility. 8. Promotes Mindfulness The pose encourages awareness of body alignment and breath. 7. Contraindications Although generally safe, certain individuals should modify the pose. Shoulder Injuries Raising the arms overhead may aggravate rotator cuff injuries. Severe Neck Pain Keeping the head neutral is essential to prevent strain. High Blood Pressure Holding arms overhead for long periods may increase strain. Vertigo or Balance Disorders Support from a wall may be necessary. 8. Counterposes Counterposes help relax muscles activated during the posture. Standing Forward Fold Releases spinal tension. Arm Release Lowering the arms relaxes the shoulder muscles. Shoulder Rolls Relieve tension in the upper back. 9. Preparatory Practices To prepare the body for this pose, certain exercises are helpful. Shoulder Mobility Exercises Spinal Elongation Practices Foot Activation 10. Modifications Wall Support Practice with the back against a wall to maintain alignment. Chair Support Hold a chair for balance. Strap Assistance Use a yoga strap between the hands to reduce shoulder tension. 11. Muscles Involved Primary Muscles Secondary Muscles Stabilizing Muscles 12. Kinesiology Kinesiology studies muscle movement and joint actions. Shoulder Joint Movement: flexion Muscles involved: Spine Movement: axial extension Muscles involved: Knee Joint Movement: extension stabilization Muscles involved: Ankle Joint Movement: neutral stabilization Muscles involved: 13. Kinematics Kinematics studies motion without considering forces. In this pose: Movement Pattern Joint Movements 14. Biomechanism Biomechanism examines how mechanical forces interact with the body. Base of Support The feet provide a stable foundation. Center of Gravity The center of gravity remains aligned over the mid-foot. Load Distribution Body weight is distributed through: Arm Elevation Mechanics Scapula rotates upward to allow full arm elevation without shoulder impingement. 15. Functional Anatomy & Physiology Musculoskeletal System Promotes postural alignment and muscle activation. Respiratory System Arm elevation expands the rib cage, improving breathing. Nervous System Enhances proprioception and neuromuscular coordination. Circulatory System Improves blood circulation due to upright alignment. 16. Teaching Methodology When teaching this pose, instructors should focus on awareness and alignment. Step 1: Grounding Encourage students to feel the connection with the floor. Step 2: Spine Awareness Guide them to lengthen the spine. Step 3: Controlled Arm Movement Raise the arms slowly with the breath. Step 4: Breath Coordination Inhale while lifting the arms and exhale while releasing. 17. Common Mistakes Overarching the Lower Back Occurs when core muscles are not engaged. Shoulders Lifting Toward Ears Creates neck tension. Locked Knees Reduces joint stability. Forward Head Position Misaligns the cervical spine. 18. How to Correct and Adjust While Teaching Verbal Corrections Teachers may say: Physical Adjustments Teachers may: Prop Assistance Use: Observational Correction Teachers should observe: 19. Therapeutic Applications Tadasana Urdhva Hastasana can help with: It is commonly used in rehabilitative yoga programs. 20. Conclusion Tadasana Urdhva Hastasana with the head straight is a foundational yet profound yoga posture that embodies the principles of alignment, stability, and expansion. Although it appears simple, it requires coordinated engagement of multiple muscle groups and careful attention to body mechanics. By combining grounded stability through the feet with upward expansion through the spine and arms, the pose creates a harmonious balance between strength and relaxation. From a physiological perspective, it improves posture, enhances breathing capacity, strengthens stabilizing muscles, and promotes neuromuscular awareness.

Read More »

Tadasana Cactus Arms Backbend (Mountain Pose with Cactus Arms Backbend)

1. Introduction Mountain Pose with Cactus Arms Backbend is a dynamic variation of the classical standing posture known as Tadasana. In this variation, the practitioner lifts the arms into a “cactus” or “goalpost” position and gently arches the spine backward. The posture combines the grounding stability of Mountain Pose with a mild standing backbend and shoulder opening. Tadasana is often considered the foundation of many standing yoga postures. Although it may appear simple, it teaches essential principles such as alignment, balance, grounding, and awareness of the body in space. When combined with cactus arms and a backbend, the pose becomes a powerful posture for opening the chest, strengthening the back muscles, and improving posture. Modern lifestyles often involve prolonged sitting, slouching, and forward rounding of the shoulders. These habits can lead to tight chest muscles, weak back muscles, and poor spinal alignment. Mountain Pose with Cactus Arms Backbend helps counter these patterns by encouraging spinal extension and chest expansion. The cactus arm position—also known as “goalpost arms”—places the shoulders in external rotation and opens the front of the chest. This position stretches the pectoral muscles while strengthening the muscles of the upper back. From a physiological perspective, this posture enhances lung capacity, spinal mobility, and muscular balance. The gentle backbend stimulates the spinal extensors while maintaining stability through the legs and core. Energetically, the pose is associated with openness and vitality. It stimulates the heart region and promotes confidence and emotional openness. Because of these qualities, this posture is often included in standing warm-up sequences, heart-opening practices, and backbend preparation routines. When practiced mindfully, Tadasana Cactus Arms Backbend improves posture, breathing capacity, strength, and body awareness. 2. Word Meaning and Etymology The Sanskrit name Tadasana consists of two words. Tada Tada means mountain. Asana Asana means posture or seat. Full Meaning Tadasana translates as: “Mountain Pose.” The posture represents the stability, strength, and grounded presence of a mountain. The cactus arm variation refers to the arm position resembling the shape of a cactus or goalpost, where the elbows are bent at approximately 90 degrees and the upper arms extend outward. 3. Definition Mountain Pose with Cactus Arms Backbend is a standing yoga posture in which: The posture integrates: It is commonly used as a preparatory backbend and posture-correcting exercise. 4. Preparatory Practices Certain poses help prepare the body for this posture by warming up the spine, shoulders, and chest. Standing Preparation Shoulder Opening Gentle Backbends Chest Opening Spinal Warm-up These practices prepare the spine and shoulders for the backbend. 5. Method of Practice (Step-by-Step) Step 1: Starting Position Stand upright in Tadasana. Keep the feet hip-width apart. Distribute weight evenly on both feet. Step 2: Engage the Legs Activate the thigh muscles. Lift the kneecaps gently. Ground the feet into the floor. Step 3: Lift the Arms Raise the arms to shoulder height. Bend the elbows to 90 degrees. Bring the forearms upright. Step 4: Create the Cactus Arm Position Open the chest. Draw the shoulder blades toward each other. Keep the elbows slightly behind the shoulders. Step 5: Initiate the Backbend Inhale deeply. Lift the chest upward. Step 6: Arch the Spine Gently lean backward from the upper back. Avoid compressing the lower back. Step 7: Hold the Pose Maintain steady breathing. Stay in the posture for 5–10 breaths. Step 8: Return to Neutral Inhale and return to upright position. Lower the arms slowly. Relax in standing. 6. Alignment Cues Head and Neck Keep the neck long. Avoid dropping the head excessively. Shoulders Draw shoulders down and back. Avoid shrugging. Chest Lift the sternum upward. Open the front body. Spine Initiate the backbend from the thoracic spine. Avoid excessive lumbar compression. Hips Keep the pelvis neutral. Engage the core. Legs Press firmly through the feet. Keep legs active. 7. Muscles Involved Primary Muscles Secondary Muscles Stabilizing Muscles These muscles stabilize the spine and shoulders. 8. Kinesiology Kinesiology examines how muscles generate movement. Spine Movement: extension Shoulder Joint Movement: abduction and external rotation Elbow Joint Movement: flexion Hip Joint Movement: stabilization The pose integrates upper-body mobility with lower-body stability. 9. Kinematics Kinematics studies motion patterns. Movements Involved Movement Type The posture involves controlled extension with static stabilization. 10. Biomechanism Biomechanics explains how forces act within the posture. Base of Support The base of support is formed by the feet. Center of Gravity The center of gravity shifts slightly backward during the backbend. Spinal Mechanics The vertebral column extends, especially in the thoracic region. Shoulder Mechanics The scapulae retract and depress. 11. Functional Anatomy & Physiology Musculoskeletal System The posture strengthens the back muscles and improves spinal mobility. Respiratory System Opening the chest improves lung expansion. Circulatory System Enhances blood circulation through the chest and shoulders. Nervous System Stimulates alertness and energy. Energetic Perspective The posture stimulates the Anahata Chakra, associated with love, compassion, and emotional openness. 12. Benefits Physical Benefits Physiological Benefits Mental Benefits 13. Contraindications This posture should be avoided or modified in individuals with: Students with lower back pain should perform a smaller backbend. 14. Modifications Wall Support Practice with the back against a wall. Smaller Backbend Focus on chest lift instead of deep arching. Hands on Hips Place hands on hips instead of cactus arms. Chair Support Perform the pose seated in a chair. 15. Counterposes After practicing this posture, the following counterposes help neutralize the spine. These poses release the spine and relax the back muscles. 16. Teaching Methodology Teaching this posture requires attention to alignment and safety. Demonstration Teacher demonstrates the cactus arm position. Step-by-Step Instructions Guide students gradually into the backbend. Breath Coordination Encourage inhalation while opening the chest. 17. Common Mistakes Overarching the Lower Back Students may compress the lumbar spine. Correction: engage the core and lift the chest. Shoulders Lifting Up Students may shrug the shoulders. Correction: draw shoulders down. Elbows Too Far Back Students may push elbows excessively behind. Correction: keep elbows aligned with shoulders. 18. Adjustments and Corrections While Teaching Verbal Corrections Examples include: Visual Demonstration Teacher shows proper

Read More »

Supta Sucirandhrasana – One Leg on Top(Supine Windshield Wiper Pose – One Leg on Top)

1. Introduction Supine yoga postures play an essential role in modern yoga practice because they provide stability, relaxation, and controlled movement while minimizing the influence of gravity. These poses are particularly useful for beginners, therapeutic yoga practitioners, and individuals recovering from injury because the body is supported by the floor. One such beneficial posture is the Supine Windshield Wiper Pose Variation One Leg on Top, which is associated with the Sanskrit term Supta Sucirandhrasana. In contemporary yoga practice, the Windshield Wiper movement is often used to mobilize the hips and lower spine through gentle rotational movement of the legs. The name “windshield wiper” comes from the movement of the legs moving side to side, similar to the motion of a windshield wiper on a car. When practiced with one leg resting on top of the other, the posture introduces a deeper stretch to the hips and lower back while maintaining spinal support from the floor. The Sanskrit name Supta Sucirandhrasana traditionally refers to Reclining Eye-of-the-Needle Pose, a posture that targets the hip muscles, particularly the piriformis and gluteal region. The variation with one leg on top modifies the original pose to create a controlled rotational stretch in the hips and lumbar spine. Modern lifestyles often lead to tight hips, restricted lower back mobility, and reduced spinal flexibility due to prolonged sitting and sedentary habits. These conditions may contribute to discomfort, reduced range of motion, and poor posture. Gentle mobility exercises like Supine Windshield Wiper Pose can help restore movement and improve the functional health of the hips and spine. From an anatomical perspective, this posture stretches the gluteal muscles, piriformis, hip rotators, and lower back muscles, while engaging the core muscles for stabilization. The controlled rotation of the legs promotes mobility in the hip joints and encourages healthy movement patterns in the lumbar spine. The pose is often used in warm-up sequences, therapeutic yoga sessions, rehabilitation programs, and relaxation practices. Because the body remains supported on the floor, practitioners can focus on slow, mindful movements and breathing without the challenge of balancing or weight-bearing. Energetically, supine twisting and hip-opening postures are associated with stimulation of the Muladhara Chakra (root energy center) and Svadhisthana Chakra (sacral energy center). These energy centers relate to grounding, stability, emotional balance, and creativity. 2. Word Meaning (Etymology) The Sanskrit term Supta Sucirandhrasana is composed of several words. Supta Supta means reclining or lying down. Suci Suci means needle. Randhra Randhra means hole or opening. Asana Asana means posture or pose. Combined Meaning Supta Sucirandhrasana translates to: “Reclining Eye of the Needle Pose.” In the Windshield Wiper variation with one leg on top, the legs move gently side to side while maintaining a crossed-leg position. 3. Definition of the Pose Supine Windshield Wiper Pose Variation One Leg on Top is a reclined yoga posture in which the practitioner lies on the back with one leg crossed over the other while the legs move side to side, creating gentle rotational movement in the hips and lower spine. The posture involves: • hip external rotation• hip internal rotation• lumbar spinal rotation• stabilization of the pelvis and core It is considered a gentle mobility and stretching exercise for the hips and lower back. 4. Method of Practice (Step-by-Step) Starting Position Step 1: Cross One Leg Step 2: Position the Arms Step 3: Begin the Windshield Wiper Movement Step 4: Maintain Control Step 5: Return to Center Step 6: Move to the Opposite Side Step 7: Repeat the Movement Step 8: Release 5. Alignment Cues Spine • Keep the spine neutral. Shoulders • Keep both shoulders grounded. Hips • Allow gentle rotation in the hips. Knees • Avoid excessive pressure on the knee joint. Breathing • Maintain slow, steady breathing. 6. Benefits 1. Improves Hip Mobility The posture increases flexibility in the hip joints. 2. Relieves Lower Back Tension Gentle spinal rotation releases lower back stiffness. 3. Stretches the Gluteal Muscles The crossed-leg position targets the gluteal region. 4. Enhances Spinal Mobility The side-to-side movement improves rotational mobility. 5. Promotes Relaxation The supine position encourages relaxation. 6. Improves Joint Lubrication Movement stimulates synovial fluid in the joints. 7. Supports Rehabilitation The gentle motion is useful in therapeutic settings. 7. Contraindications Knee Injury Avoid crossing the leg if it causes pain. Severe Lower Back Pain Practice under supervision. Hip Injury Reduce the range of motion. Recent Surgery Consult a healthcare professional before practice. 8. Counterposes After practicing the pose, helpful counterposes include: • Knees-to-Chest Pose• Supine Relaxation Pose• Gentle spinal extension 9. Preparatory Practices Preparatory poses include: • Cat-Cow Pose• Reclining Butterfly Pose• Gentle hip rotations 10. Modifications Place a Cushion Under the Head Supports neck alignment. Reduce the Range of Motion Move the legs only slightly. Use a Yoga Strap Helps maintain leg position. Keep the Feet on the Floor A beginner-friendly option. 11. Muscles Involved Primary Muscles • Gluteus maximus• Piriformis Secondary Muscles • Hip rotators• Hamstrings Stabilizing Muscles • Core muscles• spinal stabilizers 12. Kinesiology Kinesiology examines muscular movement. Hip Joint Performs external and internal rotation. Spine Performs lumbar rotation. Pelvis Maintains controlled rotation. 13. Kinematics Kinematics describes movement patterns. Plane of Motion Movement occurs primarily in the transverse plane. Type of Movement Rotational movement of the hips and lumbar spine. 14. Biomechanism Biomechanics studies the forces affecting the body. Base of Support The base of support is the back of the body. Center of Gravity Located near the pelvic region. Load Distribution The body weight is supported by the floor. 15. Functional Anatomy & Physiology Musculoskeletal System The pose stretches hip rotators and mobilizes the lumbar spine. Nervous System The slow movement stimulates relaxation. Circulatory System Improves blood flow in the pelvic region. Respiratory System The supine position supports diaphragmatic breathing. 16. Teaching Methodology Yoga teachers should introduce the movement gradually. Step 1 Teach basic supine relaxation. Step 2 Practice gentle hip rotations. Step 3 Introduce the crossed-leg windshield wiper movement. 17. Common Mistakes Moving Too Quickly Encourage slow, controlled motion. Lifting the Shoulders Keep shoulders

Read More »

Supta Parivrtta Vrschikasana (Scorpion Twist Pose)

1. Introduction Twisting postures are an essential component of yoga practice because they promote spinal mobility, stimulate internal organs, and enhance overall body awareness. Among the many variations of twisting poses, Scorpion Twist Pose, known in Sanskrit as Supta Parivrtta Vrschikasana, is a dynamic and deeply releasing posture performed in a reclining position. The posture combines elements of spinal rotation, hip mobility, and controlled back extension, creating a powerful stretch for the spine, shoulders, and abdominal region. The name “Scorpion Twist” comes from the resemblance of the body’s shape to that of a scorpion’s curved tail during the pose. In modern yoga practice, this posture is often included in vinyasa flows, restorative sequences, and spinal mobility practices. Because it is performed in a supine position, the pose allows practitioners to explore deep twisting movements while maintaining stability and safety. The spine is the central axis of the human body and plays a crucial role in movement and posture. Twisting movements help maintain the health of the spinal joints by lubricating the intervertebral discs and improving the elasticity of surrounding muscles and ligaments. Modern lifestyles often involve long periods of sitting, which can lead to stiffness in the spine and tightness in the hip flexors. Twisting postures like Scorpion Twist Pose help counteract these effects by encouraging rotational mobility and releasing tension in the lower back and hips. In addition to musculoskeletal benefits, twisting poses also provide physiological stimulation to internal organs, especially those located in the abdominal cavity. The gentle compression and release created by the twist may support digestive function and circulation. From an energetic perspective, twisting poses are believed to stimulate the Manipura Chakra, the energy center associated with digestion, vitality, and personal power. Scorpion Twist Pose is particularly beneficial because it integrates multiple movement patterns, including: • spinal rotation• hip extension• shoulder stabilization• abdominal engagement These combined movements make the posture both therapeutic and strengthening. 2. Word Meaning (Etymology) The Sanskrit name Supta Parivrtta Vrschikasana consists of four words. Supta Supta means reclining or lying down. Parivrtta Parivrtta means revolved, twisted, or rotated. Vrschika Vrschika means scorpion. Asana Asana means posture or pose. Combined Meaning Supta Parivrtta Vrschikasana can be translated as: “Reclining Revolved Scorpion Pose.” The posture resembles the curved tail of a scorpion while the body twists in a reclining position. 3. Definition of the Pose Scorpion Twist Pose (Supta Parivrtta Vrschikasana) is a supine spinal twisting posture in which the practitioner extends one leg across the body while maintaining shoulder stability and spinal rotation, creating a scorpion-like shape with the body. The pose integrates: • spinal rotation• hip extension• thoracic mobility• shoulder stability• breath awareness It is generally considered an intermediate-level twisting posture. 4. Method of Practice (Step-by-Step) Starting Position Step 1: Lift One Leg Step 2: Extend the Leg Step 3: Begin the Twist Step 4: Maintain Shoulder Stability Step 5: Turn the Head Step 6: Hold the Pose Step 7: Return to Center Step 8: Repeat on the Other Side 5. Alignment Cues Proper alignment helps prevent injury. Shoulders • Keep both shoulders grounded. Spine • Lengthen the spine before twisting. Hips • Allow natural hip rotation without forcing. Arms • Keep the arms extended for stability. Neck • Turn the head gently. 6. Benefits 1. Improves Spinal Flexibility Twisting movements maintain spinal mobility. 2. Relieves Lower Back Tension Gentle rotation releases tension in lumbar muscles. 3. Stimulates Digestion Abdominal compression may enhance digestive function. 4. Improves Hip Mobility The extended leg stretch increases hip flexibility. 5. Enhances Circulation Twisting movements stimulate blood flow. 6. Promotes Nervous System Relaxation The supine position encourages relaxation. 7. Improves Body Awareness The pose requires controlled movement and mindfulness. 7. Contraindications Spinal Injuries Avoid deep twisting. Herniated Disc Consult a medical professional. Pregnancy Avoid deep abdominal compression. Severe Hip Pain Modify the posture accordingly. 8. Counterposes Helpful counterposes include: • Knees-to-Chest Pose• Gentle Bridge Pose• Supine Relaxation Pose 9. Preparatory Practices Preparatory poses include: • Cat–Cow Pose• Supine Spinal Twist• Reclining Hamstring Stretch 10. Modifications Bend the Top Leg Reduces intensity of the stretch. Use a Yoga Block Place a block under the extended leg. Keep Head Neutral Avoid neck rotation if discomfort occurs. Support the Hips Use a folded blanket under the hips. 11. Muscles Involved Primary Muscles • Oblique abdominal muscles• Erector spinae Secondary Muscles • Gluteus maximus• Hamstrings Stabilizing Muscles • Core stabilizers• Shoulder stabilizers 12. Kinesiology Kinesiology studies the mechanics of muscle movement. Spine Performs axial rotation. Hip Joint Extended leg performs flexion and adduction. Shoulder Joint Arms remain in static abduction. 13. Kinematics Kinematics describes body motion. Plane of Motion Movement occurs primarily in the transverse plane. Type of Movement Spinal rotation combined with hip movement. 14. Biomechanism Biomechanics explains mechanical forces acting on the body. Base of Support Formed by: • shoulders• upper back• extended leg Center of Gravity Located near the abdominal region. Load Distribution Weight is distributed along the spine and shoulders. 15. Functional Anatomy & Physiology Musculoskeletal System Improves spinal flexibility and muscle balance. Digestive System Twisting compresses abdominal organs. Nervous System Encourages parasympathetic relaxation. Circulatory System Enhances blood circulation. 16. Teaching Methodology Teachers should introduce the posture gradually. Step 1 Teach basic supine twists. Step 2 Add leg extension. Step 3 Introduce deeper twisting variation. 17. Common Mistakes Lifting the Shoulders Encourage grounding through both shoulders. Forcing the Twist Encourage gentle movement. Holding the Breath Maintain steady breathing. Overstretching the Hamstrings Allow slight knee bend. 18. How to Correct and Adjust While Teaching Verbal Cues Teachers may say: • “Lengthen the spine before twisting.”• “Keep both shoulders grounded.”• “Move slowly with your breath.” Hands-On Adjustments Teachers may gently: • guide the leg across the body• stabilize the shoulders• support the hips Use of Props Helpful props include: • yoga blocks• bolsters• blankets 19. Therapeutic Applications Scorpion Twist Pose may help improve: • spinal mobility• digestive function• relaxation• hip flexibility It is often included in restorative yoga and therapeutic sequences. 20. Conclusion Scorpion Twist Pose (Supta

Read More »

Supta Matsyendrasana(Supine Spinal Twist Pose )

1. Introduction Supine Spinal Twist Pose, commonly known as Supta Matsyendrasana, is a foundational twisting posture in Hatha Yoga practiced in a reclined position. It is widely used in yoga classes for spinal mobility, relaxation, digestive stimulation, and nervous system regulation. Because it is performed lying on the back, it provides a gentle yet effective way to mobilize the spine while minimizing compressive forces on the vertebral column. Twisting postures are traditionally considered cleansing and rejuvenating in yogic philosophy. They are believed to wring out stagnation in the abdominal organs, stimulate pranic flow, and balance the nervous system. In modern anatomical understanding, spinal twists mobilize the vertebrae, stretch surrounding muscles and fascia, improve circulation to spinal structures, and enhance neuromuscular coordination. Supta Matsyendrasana is particularly valued in therapeutic yoga and restorative sequences. It is commonly practiced at the end of a yoga session, before relaxation poses such as Savasana, because it releases tension accumulated in the spine during asana practice. From a biomechanical perspective, the pose involves spinal rotation combined with hip adduction and internal rotation. The posture requires controlled engagement of the abdominal muscles, spinal stabilizers, and hip muscles to maintain alignment and prevent strain. 2. Word Meaning and Etymology The Sanskrit term Supta Matsyendrasana can be divided into three components: Supta – Reclined or lying downMatsyendra – Name of the yogic sage MatsyendranathAsana – Posture or seat Thus, Supta Matsyendrasana literally means “Reclined Pose of Matsyendra” or “Supine Spinal Twist.” Sage Matsyendranath Matsyendranath is considered one of the founders of Hatha Yoga and the guru of Gorakshanath. According to yogic legend, Matsyendra learned the secrets of yoga while inside the belly of a fish and later transmitted them to humanity. Twisting poses dedicated to him symbolize the awakening of spinal energy and transformation of the body through yogic practice. 3. Definition of the Pose Supta Matsyendrasana is a supine spinal rotation posture in which the practitioner lies on the back and rotates the spine by dropping one bent leg across the body while keeping the shoulders grounded. The pose involves: It is commonly used for: In yoga therapy, Supta Matsyendrasana is considered a gentle spinal twist suitable for beginners and therapeutic settings. 4. Method of Practice (Step-by-Step) Starting Position Step-by-Step Practice Step 1 – Bend the Knee Bend the right knee and bring it toward the chest. Step 2 – Extend the Arms Extend both arms out to the sides at shoulder level forming a T shape. Step 3 – Initiate the Twist Guide the right knee across the body toward the left side. Step 4 – Position the Head Turn the head gently toward the right side, opposite the direction of the twist. Step 5 – Maintain Alignment Keep both shoulders grounded on the floor. Step 6 – Breathing Maintain slow, deep breathing. Hold the posture for 5–10 breaths. Step 7 – Release Inhale and return the knee to the center. Step 8 – Repeat Extend the leg and repeat on the opposite side. 5. Alignment Cues Proper alignment ensures safety and maximizes the benefits of the posture. Spine Shoulders Hips Neck Breath 6. Preparatory Practices Certain poses prepare the body for Supta Matsyendrasana by improving spinal mobility and hip flexibility. Recommended Preparatory Asanas These movements warm up the spine and release tension in the lower back. 7. Counterposes Counterposes neutralize the spine after twisting. Examples include: These poses restore spinal alignment and allow integration of the effects of the twist. 8. Modifications and Variations Beginner Modification Place a yoga block or pillow under the knee to support the twist. Gentle Therapeutic Version Keep the bent knee closer to the chest instead of dropping it completely to the floor. Advanced Variation Straighten the top leg while twisting to increase stretch. Pregnancy Modification Pregnant practitioners should avoid deep twists and instead perform gentle open twists. 9. Muscles Involved Primary Muscles Hip Muscles Shoulder Stabilizers Neck Muscles These muscles coordinate to stabilize the spine while allowing controlled rotation. 10. Kinesiology of Supta Matsyendrasana Kinesiology studies human movement and muscle activity. Joint Movements Muscle Actions The abdominal oblique muscles create the rotational force. The spinal stabilizers maintain alignment. The hip muscles control the movement of the leg across the body. Type of Contractions 11. Kinematics Kinematics studies motion without considering forces. In Supta Matsyendrasana, movement occurs primarily in: Transverse Plane The twist occurs around the vertical axis of the spine. Angular Motion The vertebrae rotate relative to each other. Segmental Movement Each vertebra contributes small rotational movement, creating the overall spinal twist. The thoracic spine allows greater rotation compared to the lumbar spine. 12. Biomechanics of the Pose Biomechanics analyzes forces acting on the body. Spinal Rotation Mechanics The intervertebral joints guide rotational movement. Facet joints limit excessive rotation in the lumbar region. Load Distribution Because the body is supported by the floor, compressive forces on the spine are reduced. Fascial Stretch The thoracolumbar fascia experiences gentle tension during twisting. This improves elasticity and mobility of connective tissue. Core Stability The abdominal muscles stabilize the pelvis and spine to prevent excessive strain. 13. Functional Anatomy Functional anatomy describes how anatomical structures work together. Vertebral Column The spine consists of: Rotation occurs mainly in the thoracic region due to the orientation of facet joints. Intervertebral Discs The discs allow movement while absorbing shock. Twisting promotes hydration and nutrient exchange within discs. Abdominal Organs The twisting motion compresses and releases abdominal organs. This stimulates digestive function. 14. Physiological Effects Supta Matsyendrasana influences several body systems. Musculoskeletal System Nervous System Digestive System Circulatory System 15. Benefits Regular practice of Supta Matsyendrasana offers many benefits. Physical Benefits Therapeutic Benefits Energetic Benefits (Yogic Perspective) 16. Contraindications Certain individuals should avoid or modify this pose. Medical Conditions Safety Guidelines Practicing under the guidance of a qualified yoga teacher is recommended. 17. Teaching and Adjustment Techniques Proper teaching ensures safe and effective practice. Verbal Instructions Teachers should guide students to: Observation Teachers should observe: Hands-On Adjustment A teacher may gently: Adjustments should always be gentle and

Read More »

Supta Parivrtta Sucirandhrasana(Supine Windshield Wiper Twist Pose)

1. Introduction Supine Windshield Wiper Twist Pose, often referred to in yoga practice as a variation of Supta Parivrtta Sucirandhrasana, is a gentle and dynamic spinal twisting movement performed while lying on the back. The movement resembles the motion of windshield wipers moving from side to side, which is why it is commonly called the Windshield Wiper Twist. This pose is frequently used in yoga sequences to improve spinal mobility, release tension in the lower back and hips, and prepare the body for deeper twisting postures. The posture is commonly practiced in Hatha Yoga, Vinyasa Yoga, restorative yoga, and therapeutic yoga sessions. It is especially beneficial as a warm-up exercise for the spine and hips because it involves gentle rotational movement of the lumbar spine and pelvis while the body remains supported on the floor. In this variation, the practitioner lies on the back with knees bent and feet placed on the floor. The knees then move slowly from side to side, creating a twisting action through the spine and pelvis. The movement allows the lumbar and thoracic vertebrae to rotate gently while stretching the surrounding muscles and connective tissues. From an anatomical perspective, this movement primarily involves spinal rotation, hip internal and external rotation, and gentle stretching of the lumbar and thoracic muscles. The movement engages and mobilizes muscles such as the obliques, erector spinae, gluteal muscles, and hip rotators. These muscles contribute to spinal stability and mobility. Biomechanically, the pose allows controlled rotation of the spine while the body remains grounded. Because the back is supported by the floor, the movement can be performed safely with minimal risk of excessive strain. This makes the pose suitable for individuals who may have limited spinal mobility or mild lower-back stiffness. Physiologically, Supine Windshield Wiper Twist Pose may improve circulation in the spinal region, reduce muscular tension, and promote relaxation of the nervous system. The gentle twisting motion also provides mild compression and decompression of the abdominal organs, which may support digestive function. Energetically, twisting poses are believed in yogic philosophy to stimulate the Manipura Chakra (solar plexus energy center). This energy center is associated with digestion, vitality, and personal power. The rhythmic movement of the twist may help release stagnant energy in the abdominal region. Because the pose is gentle and adaptable, it is widely used in beginner yoga classes, rehabilitation programs, and relaxation sequences. However, proper alignment and mindful movement are essential to avoid strain on the lower back or knees. 2. Word Meaning and Etymology The Sanskrit name Supta Parivrtta Sucirandhrasana can be broken down into several components. Supta – reclined or lying downParivrtta – twisted or revolvedSucirandhra – needle-like opening or thread-through positionAsana – posture or seat Thus, Supta Parivrtta Sucirandhrasana roughly translates to “Reclined Revolved Needle Pose.” In the Windshield Wiper variation, the twisting movement is dynamic rather than static, making it a gentle rotational flow rather than a fixed posture. 3. Definition of the Pose Supine Windshield Wiper Twist Pose is a reclined yoga movement in which the practitioner lies on the back with knees bent and slowly rotates the legs from side to side, creating a gentle twisting action in the spine and pelvis. Key Characteristics This movement is commonly used for spinal mobility and lower-back relaxation. 4. Method of Practice (Step-by-Step) Starting Position Step-by-Step Instructions Step 1 – Establish Neutral Spine Relax the spine and allow the natural curve of the lower back. Step 2 – Engage the Core Lightly Gently activate the abdominal muscles to support the spine. Step 3 – Begin the Movement Inhale and prepare for movement. Step 4 – Drop the Knees to One Side Exhale slowly and lower both knees toward the right side. Step 5 – Maintain Shoulder Contact Keep both shoulders grounded on the floor. Step 6 – Return to Center Inhale and bring the knees back to the center. Step 7 – Move to the Opposite Side Exhale and lower the knees toward the left side. Step 8 – Continue the Flow Repeat the movement slowly for 8–12 repetitions. 5. Alignment Cues Proper alignment ensures safe and effective twisting. Head and Neck Keep the head relaxed and neutral. Shoulders Maintain both shoulders in contact with the floor. Spine Allow the twist to originate from the waist. Knees Keep the knees bent and aligned. Core Engage the abdominal muscles gently to support the spine. 6. Preparatory Practices The following poses prepare the body for this movement. Pelvic Tilts Mobilize the lower back. Cat–Cow Pose Improve spinal flexibility. Supine Knee-to-Chest Pose Release tension in the lower back. 7. Counterposes After practicing this pose, the following counterposes may be beneficial. Supine Neutral Position Rest flat on the back. Gentle Backbend Lift the chest slightly to extend the spine. Happy Baby Pose Stretch the hips and lower back. 8. Modifications Support with Bolster Place a bolster under the knees during the twist. Reduced Range of Motion Lower the knees halfway instead of fully to the floor. Single-Leg Variation Move one knee at a time for greater control. Arm Support Place hands on the abdomen for relaxation. 9. Muscles Involved Primary Muscles External obliquesInternal obliquesErector spinaeGluteus medius Secondary Muscles Quadratus lumborumHip rotatorsAbdominal stabilizers These muscles control and stabilize the twisting movement. 10. Kinesiology Kinesiology examines muscle activity during movement. Joint Actions Spine – rotationHip – internal and external rotationPelvis – rotational movement Muscle Function The oblique muscles assist in spinal rotation, while stabilizing muscles maintain alignment. 11. Kinematics Kinematics studies movement patterns without considering forces. Plane of Movement Movement occurs primarily in the transverse plane. Axis of Motion Spinal rotation occurs around the vertical axis. Segmental Motion Each vertebral segment contributes slightly to the twist. 12. Biomechanics Biomechanics analyzes forces acting on the body. Base of Support The base of support includes: Center of Gravity The center of gravity shifts slightly as the knees move. Load Distribution The floor supports most of the body weight. 13. Functional Anatomy Vertebral Column The vertebral column allows controlled rotation during twisting movements.

Read More »

Supta Parivrtta Garudasana (Reclining Eagle Spina Twist Pose)

1. Introduction Yoga postures that combine twisting movements with hip and shoulder integration offer profound benefits for the spine, nervous system, and internal organs. One such posture is Supta Parivrtta Garudasana, commonly known as the Reclining Eagle Spinal Twist Pose. This pose is a supine variation that integrates elements from Garudasana (Eagle Pose) and Parivrtta (revolved or twisted) postures, bringing together leg wrapping and spinal rotation while lying on the back. Unlike standing twists, this posture allows the practitioner to relax the body while accessing deeper spinal rotation, hip stretching, and fascial release. From a traditional yoga perspective, spinal twisting postures help stimulate digestive organs, detoxification processes, and pranic flow through the spinal column. The supine position further promotes parasympathetic nervous system activation, making the posture calming and restorative. Modern anatomy and movement science explain that this pose affects multiple kinetic chains, including the posterior chain, spiral fascial lines, and deep core stabilizers. It improves spinal mobility, hip rotation, and thoracic flexibility while promoting relaxation of the nervous system. Supta Parivrtta Garudasana is particularly beneficial for individuals experiencing lower back stiffness, tight hips, and sedentary lifestyle-related postural imbalances. The pose also supports myofascial release along the spine and outer hips. Despite its gentle appearance, the posture requires mindful alignment to prevent strain in the lumbar spine and sacroiliac joints. When practiced with proper technique and breath awareness, it becomes a powerful tool for spinal health, nervous system relaxation, and deep musculoskeletal integration. 2. Word Meaning (Etymology) The name Supta Parivrtta Garudasana comes from Sanskrit. Supta – Reclining or lying downParivrtta – Revolved or twistedGaruda – EagleAsana – Posture or pose Thus, the name translates to: “Reclining Revolved Eagle Pose.” The pose derives its name from the leg position resembling Garudasana (Eagle Pose), where the legs wrap around each other like the entwined limbs of an eagle. When this leg wrap is combined with a spinal twist in a reclining position, it creates Supta Parivrtta Garudasana. Symbolically, Garuda in yogic mythology represents strength, focus, and expansive awareness, qualities that are reflected in the integration and control required in the pose. 3. Definition of the Pose Supta Parivrtta Garudasana is a supine twisting yoga posture in which the legs are wrapped in an eagle-leg configuration while the spine rotates laterally, creating a deep stretch for the hips, gluteal muscles, outer thighs, and spinal muscles. The posture involves: This combination produces a spiral stretch through the lower body and spine. 4. Method of Practice (Step-by-Step) Starting Position Preparing the Legs Entering the Twist Rotating the Spine Head Position Holding the Pose Returning to Center 5. Alignment Cues Proper alignment helps maintain safety and effectiveness. Spine Shoulders Hips Legs Head Breath 6. Benefits 1. Improves Spinal Mobility Twisting movements improve thoracic and lumbar rotation. 2. Stretches the Outer Hips Targets muscles such as: 3. Releases Lower Back Tension The twist decompresses the lumbar vertebrae. 4. Improves Digestion Twisting stimulates abdominal organs including: 5. Enhances Nervous System Relaxation The supine position activates the parasympathetic nervous system. 6. Improves Hip Flexibility Leg wrapping stretches hip rotators and outer thighs. 7. Enhances Circulation Twisting encourages blood flow to spinal muscles. 7. Contraindications Certain individuals should avoid or modify the pose. Severe Lower Back Injury Deep twisting may aggravate symptoms. Herniated Disc Requires professional supervision. Pregnancy Deep spinal twists should be avoided. Hip Surgery Leg wrapping may strain the joint. Shoulder Injury Extended arms may cause discomfort. 8. Counterposes Counterposes restore spinal neutrality. Supine Relaxation Pose (Savasana) Allows the spine to relax. Knees-to-Chest Pose Gently decompresses the lower back. Gentle Bridge Pose Rebalances spinal movement. 9. Preparatory Practices Certain poses prepare the body. Supine Twist Warms up the spine. Figure-Four Stretch Prepares the hips. Eagle Pose (Garudasana) Introduces the leg wrapping pattern. Hip Mobility Exercises Improve joint flexibility. 10. Modifications Use of Bolster Place a bolster under the legs for support. Gentle Leg Cross Cross the legs without wrapping tightly. Head Neutral Keep the head facing upward if neck discomfort occurs. Blanket Support Place a blanket under the hips. 11. Muscles Involved Primary Muscles Secondary Muscles Stabilizing Muscles 12. Kinesiology Kinesiology studies muscle movement and joint actions. Spine Movement: axial rotation Muscles involved: Hip Joint Movement: adduction and rotation Muscles involved: Shoulder Joint Movement: stabilization Muscles involved: 13. Kinematics Kinematics examines motion patterns. Movement Pattern Type of Movement The pose involves a combination of rotational and passive stretching movements. 14. Biomechanism Biomechanism explains how forces interact within the body. Base of Support The upper back and shoulders provide stability. Center of Gravity Shifts laterally as the legs move sideways. Fascial Spiral The pose stretches the spiral fascial chain, linking: 15. Functional Anatomy & Physiology Musculoskeletal System Improves joint mobility and muscular flexibility. Digestive System Abdominal compression stimulates digestion. Nervous System Promotes relaxation and stress reduction. Respiratory System Encourages deeper breathing by expanding the rib cage. 16. Teaching Methodology When teaching the pose, instructors should emphasize gentle movement and breath awareness. Step 1: Teach Basic Supine Twist Introduce spinal rotation gradually. Step 2: Introduce Leg Wrapping Guide students into the eagle-leg position. Step 3: Add the Twist Encourage slow and controlled movement. Step 4: Focus on Breath Deep breathing enhances relaxation. 17. Common Mistakes Shoulders Lifting Occurs when the twist is forced. Over-Twisting the Lower Back Can strain lumbar vertebrae. Tight Leg Wrapping May restrict circulation. Neck Strain Turning the head too far may cause discomfort. 18. How to Correct and Adjust While Teaching Verbal Cues Teachers may say: Hands-On Adjustments Teachers may: Prop Assistance Use: Observational Correction Teachers should observe: 19. Therapeutic Applications Supta Parivrtta Garudasana can help with: It is often used in restorative yoga and therapeutic programs. 20. Conclusion Supta Parivrtta Garudasana, or Reclining Eagle Spinal Twist Pose, is a deeply therapeutic yoga posture that integrates hip stretching, spinal rotation, and nervous system relaxation. By combining the leg wrap of Eagle Pose with a supine spinal twist, the posture creates a spiral stretch through the body that benefits the hips, spine, and digestive organs. From

Read More »

Tri Pada Adho Mukha Svanasana(Three-Legged Downward Facing Dog Pose)

Introduction Yoga postures are designed to cultivate strength, flexibility, balance, and awareness through mindful movement and breath. Among the many postures practiced in yoga, Three-Legged Downward Facing Dog Pose (Tri Pada Adho Mukha Svanasana) is a dynamic variation of the classical Downward Facing Dog posture. This asana is widely practiced in Vinyasa Yoga, Ashtanga Yoga, and flow-based sequences because it builds strength, improves balance, and enhances hip mobility. Three-Legged Downward Dog is an asymmetrical inversion posture where one leg remains grounded while the other leg extends upward. The pose challenges the practitioner’s ability to maintain stability in the shoulders and arms while coordinating movement in the hips and legs. It simultaneously stretches the hamstrings and calves, strengthens the shoulders and core, and improves overall body awareness. In yoga sequencing, this posture often serves as a transition pose between standing and balancing positions. For example, it frequently leads into lunge variations, standing splits, or knee-to-nose core exercises. Because it requires both strength and flexibility, the pose helps practitioners gradually develop the physical readiness needed for more advanced arm balances and inversions. From an anatomical perspective, Three-Legged Downward Dog engages many muscle groups across the body. The shoulders and arms support body weight, the core stabilizes the spine and pelvis, and the legs coordinate opposing movements of hip flexion and extension. Biomechanically, the posture combines closed kinetic chain stability in the upper body with open kinetic chain movement in the lifted leg. Beyond its physical aspects, this pose also cultivates mental focus and breath awareness. Maintaining balance while lifting one leg requires concentration and mindful breathing. The posture therefore reflects the yogic principle of integration between stability (sthira) and ease (sukha). Word Meaning and Etymology The Sanskrit name Tri Pada Adho Mukha Svanasana can be understood by analyzing each word. Thus, Tri Pada Adho Mukha Svanasana translates to “Three-Legged Downward-Facing Dog Pose.” The name reflects the structure of the posture: This posture symbolizes strength, alertness, and stability, qualities often associated with animals in yoga imagery. Definition of Three-Legged Downward Facing Dog Pose Three-Legged Downward Facing Dog is an inverted yoga posture in which the body forms an inverted “V” shape while one leg remains grounded and the other leg lifts upward toward the sky. In this pose: The posture combines strength, flexibility, and balance, making it an effective full-body yoga pose. Method of Practice (Step-by-Step) Step 1: Starting Position Begin in Downward Facing Dog Pose (Adho Mukha Svanasana). Step 2: Establish Stability Step 3: Lift One Leg Step 4: Maintain Alignment Step 5: Maintain the Pose Step 6: Return to Downward Dog Repeat the posture with the opposite leg. Alignment Cues Proper alignment ensures safety and effectiveness. Hands Arms Spine Hips Lifted Leg Grounded Leg Preparatory Practices Several poses prepare the body for this posture. Downward Facing Dog Builds shoulder strength. Cat–Cow Pose Mobilizes the spine. Standing Forward Fold Stretches the hamstrings. Low Lunge Opens the hips. Counterposes Counterposes help balance the body after practicing. Child’s Pose Relaxes the spine and shoulders. Cobra Pose Provides gentle spinal extension. Kneeling Stretch Releases the hips. Modifications Modifications allow the pose to be practiced safely. Beginners Lift the leg only slightly. Tight Hamstrings Bend the grounded knee slightly. Wrist Sensitivity Practice using yoga blocks. Shoulder Weakness Reduce holding time. Benefits of Three-Legged Downward Dog This posture offers numerous benefits. 1. Strengthens the Shoulders and Arms Supporting the body weight develops upper body strength. 2. Stretches the Hamstrings The grounded leg receives a deep stretch. 3. Improves Hip Mobility The lifted leg enhances hip extension. 4. Enhances Core Stability The abdominal muscles stabilize the pelvis. 5. Improves Balance and Coordination Maintaining the posture requires body awareness. 6. Improves Circulation The inverted position increases blood flow to the upper body. 7. Builds Functional Strength The posture develops strength needed for advanced yoga poses. Contraindications Certain individuals should practice caution. Wrist Injuries Avoid excessive pressure on the wrists. Shoulder Injury Modify the posture. Hamstring Injury Avoid overstretching. High Blood Pressure Consult a healthcare professional. Muscles Involved Three-Legged Downward Dog activates many muscles. Shoulder Muscles These muscles stabilize the shoulder girdle. Arm Muscles Support body weight. Core Muscles Stabilize the spine. Leg Muscles Grounded Leg Lifted Leg Kinesiology Kinesiology studies muscular activity during movement. In Three-Legged Downward Dog: Hip Joint Lifted leg: extensionGrounded leg: flexion stabilization Shoulder Joint Maintains flexion and stabilization. Ankle Joint Grounded foot moves into dorsiflexion. Kinematics Kinematics describes joint movement. Spine Maintains neutral elongation. Hip Lifted leg performs extension. Shoulder Maintains flexion approximately 180°. Biomechanics Biomechanics examines forces acting on the body. Closed Kinetic Chain The hands and grounded foot remain fixed. Load Distribution Weight is distributed between: Center of Gravity The center of gravity shifts slightly forward when one leg lifts. Biomechanism of the Pose The posture involves coordinated muscular engagement. Shoulder Stabilization Upper body muscles support body weight. Core Stabilization Abdominal muscles prevent spinal collapse. Hip Extension The lifted leg moves upward through glute activation. Functional Anatomy and Physiology Three-Legged Downward Dog affects multiple body systems. Musculoskeletal System Strengthens shoulders, arms, and legs. Nervous System Improves proprioception and balance. Circulatory System Enhances blood circulation due to inversion. Respiratory System Encourages deep breathing through chest expansion. Teaching Methodology Teaching this posture requires careful instruction. Demonstration Teachers should demonstrate the pose clearly. Verbal Instructions Examples include: Common Mistakes Over-Rotating the Hips Encourage hips to stay level. Collapsing the Shoulders Encourage shoulder engagement. Arching the Lower Back Encourage core engagement. How to Correct and Adjust While Teaching Verbal Corrections Encourage proper alignment. Visual Observation Observe: Hands-On Adjustments With consent: Hip Alignment Guide hips to remain square. Spinal Lengthening Encourage length through the spine. Shoulder Stability Press gently on upper arms to encourage engagement. Teaching Tips for Yoga Instructors Conclusion Three-Legged Downward Facing Dog Pose (Tri Pada Adho Mukha Svanasana) is a dynamic and strengthening yoga posture that develops balance, flexibility, and stability. As a variation of Downward Facing Dog, the pose introduces asymmetrical movement that challenges the practitioner’s coordination and muscular control. From an anatomical and biomechanical perspective, the posture engages multiple joints and muscle groups, making it an effective full-body exercise. It strengthens the shoulders and arms, stretches the hamstrings, opens the hips, and enhances core stability.

Read More »

Twisted Dragon Pose

1. Introduction Yoga postures that combine deep hip opening with spinal rotation are particularly effective for improving flexibility, strengthening stabilizing muscles, and enhancing functional mobility. Among these postures, Twisted Dragon Pose is a powerful lunge-based posture commonly practiced in Yin Yoga, Hatha Yoga, and Vinyasa Yoga sequences. The posture integrates the deep hip stretch of Dragon Pose (a variation of low lunge) with a controlled spinal twist, creating a dynamic combination of mobility and stability. Dragon Pose itself is known for its ability to stretch the hip flexors, groin muscles, and quadriceps, while simultaneously strengthening the legs and stabilizing the pelvis. When a twist is introduced, the posture becomes Twisted Dragon Pose, adding a new dimension of spinal mobility and abdominal engagement. The twisting component activates the oblique abdominal muscles, spinal rotators, and deep core stabilizers, making the posture both strengthening and therapeutic. From a functional movement perspective, Twisted Dragon Pose is extremely valuable because it mimics many everyday movements that involve hip extension combined with trunk rotation, such as walking, turning, and reaching. These natural movement patterns require coordinated activation between the hips, spine, and core muscles. Practicing this posture helps develop this coordination and improves overall movement efficiency. The posture also contributes to joint health by encouraging movement in the hip joint, which is a ball-and-socket joint capable of movement in multiple planes. Twisted Dragon Pose allows the hip to move into flexion, extension, and external rotation, while the spine rotates gently. This combination improves the functional range of motion in both the hips and spine. Physiologically, the posture stimulates the digestive organs and abdominal circulation, as twisting compresses and releases the organs in the abdominal cavity. This process can support digestion and detoxification. In addition, the deep stretch in the hip flexors counteracts the effects of prolonged sitting, which often leads to tight hip flexor muscles. In yoga therapy, Twisted Dragon Pose is sometimes used to address: • hip stiffness• lower back tightness• digestive sluggishness• poor posture caused by sedentary habits Because the posture involves both strength and flexibility, it must be practiced with proper alignment and awareness to prevent strain on the knees or lower back. 2. Word Meaning (Etymology) The term Twisted Dragon Pose is derived from two descriptive components. Dragon – Symbolic reference to a deep lunge posture resembling the powerful stance of a dragon. In Yin Yoga, Dragon Pose refers to a deep hip-opening lunge. Twisted – Refers to the rotational movement of the torso and spine. In traditional Sanskrit naming conventions, a similar posture may be described as a revolved or twisted lunge, often using the word: Parivrtta – Revolved or twisted. Thus, Twisted Dragon Pose can be interpreted as a revolved deep lunge posture that integrates spinal rotation with hip opening. 3. Definition of the Pose Twisted Dragon Pose is a yoga posture performed from a deep lunge position in which the front knee is bent and the back leg is extended while the torso rotates toward the front leg, creating a combination of hip stretch and spinal twist. The posture includes several key movement components: • hip flexion in the front leg• hip extension in the back leg• spinal rotation• core stabilization It is considered a moderate to advanced yoga posture depending on the depth of the twist. 4. Method of Practice (Step-by-Step) Starting Position Step 1: Step the Foot Forward Step 2: Extend the Back Leg Step 3: Stabilize the Base Step 4: Place the Opposite Hand Step 5: Initiate the Twist Step 6: Extend the Upper Arm Step 7: Maintain the Pose Hold the posture for 5–10 breaths. Step 8: Release the Pose 5. Alignment Cues Front Foot • Keep the knee aligned above the ankle. Back Leg • Extend the leg actively. Hips • Square the hips forward. Spine • Lengthen the spine before twisting. Shoulders • Stack the shoulders vertically. Neck • Keep the neck neutral. 6. Benefits 1. Improves Hip Flexibility Stretches hip flexors and groin muscles. 2. Enhances Spinal Mobility The twist mobilizes the vertebrae. 3. Strengthens Core Muscles Engages abdominal stabilizers. 4. Stimulates Digestion Twisting massages the abdominal organs. 5. Improves Balance Requires stability through the legs and core. 6. Relieves Lower Back Tension Encourages spinal decompression. 7. Enhances Circulation Promotes blood flow in the pelvic region. 7. Contraindications Knee Injury Avoid deep lunges. Lower Back Pain Limit spinal twisting. Hip Injury Practice with modifications. Pregnancy Avoid deep abdominal compression. 8. Counterposes After Twisted Dragon Pose, practice: • Child’s Pose• Downward Dog• Gentle spinal extension These poses neutralize the spine. 9. Preparatory Practices Before practicing Twisted Dragon Pose: • Low Lunge Pose• Cat–Cow Pose• Gentle spinal twists• Hip flexor stretches These movements prepare the hips and spine. 10. Modifications Using Yoga Blocks Place blocks under the hands. Lower the Back Knee Reduces intensity. Smaller Twist Keep the hands on the hips. Wall Support Practice near a wall for balance. 11. Muscles Involved Primary Muscles • Hip flexors• Gluteus maximus• Oblique abdominals Secondary Muscles • Quadriceps• Hamstrings• Erector spinae Stabilizing Muscles • Transverse abdominis• Multifidus 12. Kinesiology Kinesiology examines muscle movement. Hip Joint Front leg: • flexion Back leg: • extension Spine Movement: • rotation Muscles involved: • internal obliques• external obliques Shoulder Joint Movement: • flexion and rotation 13. Kinematics Kinematics studies movement patterns. Type of Movement Static posture with rotational component. Planes of Motion • sagittal plane (lunge)• transverse plane (twist) 14. Biomechanism Biomechanics explains mechanical forces. Base of Support Formed by: • front foot• back knee or foot• supporting hand Center of Gravity Shifts forward toward the front leg. Force Distribution Weight distributed between hands and legs. 15. Functional Anatomy & Physiology Musculoskeletal System Strengthens legs and spinal stabilizers. Digestive System Twists massage abdominal organs. Nervous System Encourages body awareness and balance. Circulatory System Improves blood flow in the lower body. 16. Teaching Methodology Teaching Twisted Dragon Pose requires careful progression. Step 1 Teach Low Lunge Pose. Step 2 Add spinal elongation. Step 3 Introduce the twist. Step 4 Encourage

Read More »

Upavistha Bitilasana–Marjaryasana (Seated Cat–Cow Pose)

1. Introduction Seated Cat–Cow Pose, traditionally referred to as Upavistha Bitilasana–Marjaryasana, is a gentle and rhythmic spinal movement performed in a seated position. It is a variation of the classic Cat–Cow movement commonly practiced in a quadruped (hands-and-knees) position. In the seated variation, practitioners move the spine through flexion and extension while sitting upright, often coordinating the movement with inhalation and exhalation. This makes the practice accessible to individuals who may have difficulty bearing weight on the wrists or knees. The pose is widely used in Hatha Yoga, therapeutic yoga, chair yoga, and meditation preparation practices. Because the movement is slow and controlled, it serves as an excellent exercise for improving spinal mobility, posture, and breathing coordination. The dynamic nature of the movement gently mobilizes the vertebral column while activating the surrounding muscles. From an anatomical perspective, Seated Cat–Cow Pose primarily involves spinal flexion and spinal extension. During the Cat phase (Marjaryasana), the spine rounds and the abdominal muscles engage, while during the Cow phase (Bitilasana), the spine arches and the chest opens. These alternating movements encourage healthy mobility of the vertebral joints, intervertebral discs, and surrounding connective tissues. Biomechanically, the pose promotes controlled articulation of the spine, encouraging each vertebra to move in a coordinated sequence. This type of movement supports spinal health by maintaining flexibility and distributing mechanical loads evenly across the vertebral column. Physiologically, the rhythmic movement improves circulation, respiratory efficiency, and neuromuscular coordination. The expansion of the chest during inhalation encourages diaphragmatic breathing, while the contraction during exhalation stimulates the abdominal organs. Seated Cat–Cow Pose is particularly beneficial for individuals who spend long hours sitting, such as office workers or students. The practice helps counteract the negative effects of prolonged sitting, including slouched posture, reduced spinal mobility, and muscle stiffness. In therapeutic yoga settings, the pose is frequently recommended for individuals experiencing mild back stiffness, poor posture, or limited spinal mobility. Because the movement is gentle and adaptable, it can be practiced by people of various ages and fitness levels. Energetically, the movement is believed to stimulate the spinal energy pathway (Sushumna Nadi) and activate the heart chakra (Anahata) and solar plexus chakra (Manipura). The opening and closing movements of the chest and abdomen are thought to promote energetic balance and emotional release. Understanding the functional anatomy, biomechanics, and teaching principles of Seated Cat–Cow Pose is essential for yoga teachers and practitioners. Proper alignment and mindful movement help ensure that the pose remains safe, effective, and accessible. 2. Word Meaning and Etymology The Sanskrit-inspired name Upavistha Bitilasana–Marjaryasana consists of several meaningful terms. Upavistha – seated or sittingBitilasana – Cow PoseMarjaryasana – Cat PoseAsana – posture or seat Thus, Upavistha Bitilasana–Marjaryasana means “Seated Cow–Cat Posture.” Symbolic Meaning The alternating movements resemble the natural spinal motion of animals: Together, they represent the balance between expansion and contraction in the body and breath. 3. Definition of the Pose Seated Cat–Cow Pose is a dynamic seated yoga movement in which the practitioner alternates between spinal extension (Cow Pose) and spinal flexion (Cat Pose) while coordinating the movement with the breath. Key Characteristics This movement is commonly used as a warm-up for the spine and respiratory system. 4. Method of Practice (Step-by-Step) Starting Position Step-by-Step Instructions Step 1 – Establish the Base Sit upright with the spine neutral and shoulders relaxed. Step 2 – Cow Pose (Inhalation) Inhale deeply while arching the back and lifting the chest forward. Allow the shoulders to move slightly backward and the gaze to lift. Step 3 – Expand the Chest Draw the shoulder blades toward each other to open the chest. Step 4 – Cat Pose (Exhalation) Exhale slowly while rounding the spine. Draw the navel toward the spine and tuck the chin toward the chest. Step 5 – Deepen the Spinal Flexion Allow the shoulders to move forward as the upper back rounds. Step 6 – Continue the Flow Repeat the movement rhythmically for 8–12 breaths. Step 7 – Return to Neutral Finish by returning to a neutral seated posture. 5. Alignment Cues Proper alignment ensures safe spinal movement. Head and Neck Keep the neck aligned with the spine. Spine Move the spine smoothly through flexion and extension. Shoulders Relax the shoulders away from the ears. Pelvis Allow gentle anterior tilt during Cow Pose and posterior tilt during Cat Pose. 6. Preparatory Practices The following practices prepare the body for Seated Cat–Cow Pose. Gentle Neck Rolls Improve cervical mobility. Seated Shoulder Rolls Release tension in the upper body. Diaphragmatic Breathing Prepare the respiratory muscles. 7. Counterposes After practicing Seated Cat–Cow Pose, the following poses help restore balance. Seated Forward Fold Gently stretches the spine. Gentle Spinal Twist Releases tension in the vertebral column. Relaxed Sitting Pose Allows the spine to settle. 8. Modifications Chair Variation Perform the movement while sitting on a chair. Support Under Hips Sit on a folded blanket to elevate the pelvis. Hands on Shins Provides additional leverage for spinal movement. 9. Muscles Involved Primary Muscles Erector spinaeRectus abdominisTransverse abdominisIntercostal muscles Secondary Muscles Latissimus dorsiRhomboidsTrapeziusHip flexors These muscles coordinate spinal movement and breathing. 10. Kinesiology Kinesiology examines the relationship between muscles and movement. Joint Actions Spine – flexion and extensionPelvis – anterior and posterior tiltShoulders – protraction and retraction Muscle Contraction Both eccentric and concentric contractions occur during the movement. 11. Kinematics Kinematics describes motion without considering forces. Plane of Movement Movement occurs primarily in the sagittal plane. Axis of Motion The spinal movement occurs around a mediolateral axis. Segmental Motion Each vertebra contributes to the overall spinal motion. 12. Biomechanics Biomechanics analyzes mechanical forces in the body. Base of Support The base of support consists of the sitting bones and legs. Center of Gravity The center of gravity shifts slightly during spinal movement. Load Distribution Mechanical load is distributed along the vertebral column. 13. Functional Anatomy Vertebral Column The vertebral column consists of 33 vertebrae that provide structural support and mobility. Intervertebral Discs These discs act as shock absorbers during spinal movement. Spinal Ligaments Ligaments stabilize the vertebral joints.

Read More »

Tri Pada Adho Mukha Svanasana -Phalakasana Knee-to-Nose Vinyasa(Three-Legged Downward Facing Dog – Tiger Curl Flow)

1. Introduction The Three-Legged Downward Facing Dog to Tiger Curl Flow is a dynamic yoga movement sequence frequently practiced in Vinyasa Yoga, Power Yoga, and Ashtanga-inspired flows. The movement combines two core postures: Tri Pada Adho Mukha Svanasana (Three-Legged Downward Facing Dog) and Phalakasana Knee-to-Nose (Tiger Curl). Together they create a fluid transition that strengthens the core, enhances hip mobility, and improves coordination between breath and movement. Dynamic yoga flows are essential components of modern yoga practice because they train both strength and flexibility simultaneously. Unlike static poses, flowing sequences develop neuromuscular control and cardiovascular endurance while reinforcing functional movement patterns. The Tiger Curl Flow particularly emphasizes core activation, shoulder stability, and spinal control, making it a valuable exercise for building strength and body awareness. From an anatomical standpoint, the flow involves complex interactions between the upper body, core, spine, and lower limbs. During Three-Legged Downward Dog, the body forms an inverted “V” shape while one leg lifts into hip extension. During the Tiger Curl transition, the lifted leg moves forward toward the chest while the body shifts into a plank-like position. This movement requires coordinated engagement of multiple muscle groups, including the abdominal muscles, shoulder stabilizers, hip flexors, and spinal extensors. Biomechanically, the flow involves closed kinetic chain movements, meaning the hands remain fixed on the ground while the body moves relative to them. This requires strong shoulder stabilization and core control to maintain alignment and prevent excessive strain on the joints. From a physiological perspective, this sequence improves circulation, enhances muscular endurance, and stimulates metabolic activity. It also encourages synchronized breathing patterns, which support oxygen delivery and energy regulation during practice. Beyond its physical benefits, the flow also has psychological advantages. The rhythmic coordination of breath and movement encourages mindfulness and concentration. The movement challenges balance and strength, which cultivates resilience and mental focus. 2. Word Meaning and Etymology Tri Pada Adho Mukha Svanasana The Sanskrit name can be divided into four components: Tri – ThreePada – Foot or legAdho – DownwardMukha – Face or facingSvana – DogAsana – Posture Thus, Tri Pada Adho Mukha Svanasana translates to “Three-Legged Downward Facing Dog Pose.” The pose is a variation of Adho Mukha Svanasana, in which one leg lifts upward. Phalakasana Knee-to-Nose (Tiger Curl) Phalaka – Plank or boardAsana – Posture In the Tiger Curl movement, the lifted knee moves toward the nose or chest while the body transitions toward a plank position. Symbolic Meaning The posture sequence represents strength, agility, and fluid movement, similar to the dynamic stretch of animals such as dogs or tigers. 3. Definition of the Flow The Three-Legged Downward Dog – Tiger Curl Flow is a dynamic yoga sequence in which the practitioner lifts one leg in Downward Facing Dog and then draws the knee toward the chest while shifting forward into a plank position. Key Characteristics The flow is often repeated multiple times before switching sides. 4. Method of Practice (Step-by-Step) Starting Position Step-by-Step Practice Step 1 – Lift the Leg Inhale and lift the right leg upward into Three-Legged Downward Dog. Step 2 – Maintain Alignment Keep the hips squared and extend the lifted leg strongly. Step 3 – Shift Forward Exhale and shift the body forward toward Plank Pose. Step 4 – Draw the Knee Bring the right knee toward the nose or chest. Step 5 – Round the Spine Engage the abdominal muscles and round the spine slightly. Step 6 – Return to Downward Dog Inhale and extend the leg back into Three-Legged Downward Dog. Step 7 – Repeat Repeat the flow 5–10 times before switching sides. 5. Alignment Cues Hands Shoulders Spine Core Hips Legs 6. Preparatory Practices Recommended Preparatory Asanas These poses prepare the shoulders, core, and hamstrings. 7. Counterposes Common Counterposes These poses release tension after the dynamic sequence. 8. Modifications and Variations Beginner Modification Lower the lifted knee to the floor during the Tiger Curl. Wrist Support Use yoga wedges or fists instead of palms. Slow Variation Perform the movement slowly for better control. Advanced Variation Add elbow-to-knee movements for increased core engagement. 9. Muscles Involved Primary Muscles Secondary Muscles 10. Kinesiology Joint Actions Shoulders – flexion and stabilizationSpine – alternating flexion and extensionHip – flexion and extensionKnee – flexion Muscle Activity Isometric contractions stabilize the shoulders and core. Dynamic contractions occur in the hip flexors and extensors. 11. Kinematics Plane of Motion Movement primarily occurs in the sagittal plane. Axis of Motion Motion occurs around the mediolateral axis. Segmental Motion The spine alternates between extension and flexion during the flow. 12. Biomechanics Shoulder Mechanics Shoulders bear a significant portion of body weight. Scapular stabilization is essential. Core Mechanics The abdominal muscles generate force to draw the knee forward. Hip Mechanics Hip flexion and extension control the movement of the leg. 13. Functional Anatomy Shoulder Complex Includes: Core System The core stabilizes the spine during dynamic movement. Hip Joint The hip joint enables large ranges of motion. 14. Physiological Effects Musculoskeletal System Cardiovascular System Nervous System Respiratory System 15. Benefits Physical Benefits Functional Benefits Energetic Benefits 16. Contraindications Medical Conditions Safety Guidelines 17. Teaching and Adjustment Techniques Verbal Cues Teachers should encourage students to: Observational Teaching Teachers should observe: Hands-On Adjustments Teachers may gently: 18. Common Mistakes and Corrections Collapsing Shoulders Correction: engage serratus anterior. Sagging Lower Back Correction: activate core muscles. Uneven Hips Correction: square the hips during leg lift. 19. Integration in Yoga Practice The Tiger Curl Flow is commonly included in: It serves as a powerful strength-building and coordination exercise. 20. Conclusion The Three-Legged Downward Dog – Tiger Curl Flow is a dynamic yoga sequence that integrates strength, flexibility, and coordination. By combining spinal extension with core-driven flexion, the movement enhances both muscular control and mobility. From a biomechanical perspective, the flow challenges the stability of the shoulders and core while requiring coordinated movement of the hips and spine. These characteristics make it an effective exercise for improving functional strength and preventing movement imbalances. Physiologically, the sequence increases circulation, stimulates the nervous system,

Read More »

Upavistha Hamsasana (Sitting Swan Pose)

1. Introduction Yoga practice includes a wide variety of seated postures that cultivate flexibility, stability, and mindful awareness of the body. Among these postures, poses that open the hips and stretch the spine are especially important because they address common areas of tightness caused by modern lifestyles. One such posture is Sitting Swan Pose, traditionally known as Upavistha Hamsasana. Sitting Swan Pose is a seated hip-opening posture that combines elements of spinal elongation and hip external rotation. The posture resembles the elegant and elongated shape of a swan, symbolizing grace, balance, and fluidity. In yoga symbolism, the swan represents purity and wisdom, making this posture not only physically beneficial but also symbolically meaningful. In contemporary yoga practice, many people experience stiffness in the hips due to long hours of sitting, lack of mobility, and limited physical activity. Tight hip muscles can lead to reduced flexibility, lower back discomfort, and postural imbalances. Postures like Sitting Swan Pose help restore mobility and balance in the hip joints while encouraging relaxation and stability in the seated position. From an anatomical perspective, this pose primarily stretches the gluteal muscles, piriformis, and deep hip rotators, while simultaneously strengthening the muscles responsible for maintaining an upright spinal posture. The combination of hip opening and spinal elongation helps create a balanced stretch throughout the lower body and trunk. Sitting Swan Pose is often used in yoga sequences designed to improve hip flexibility, spinal mobility, and postural alignment. It can also be incorporated into meditative practices, as the seated position allows practitioners to maintain a stable and comfortable posture for breathing exercises or mindfulness techniques. The posture also plays a role in functional movement patterns. Healthy hip mobility is essential for everyday activities such as walking, bending, and sitting. By improving flexibility in the hip joints, Sitting Swan Pose can support better movement mechanics and reduce strain on the lower back and knees. Energetically, this posture is associated with the activation of the Muladhara Chakra (root energy center) and the Svadhisthana Chakra (sacral energy center). These energy centers are linked to stability, grounding, emotional balance, and creativity. 2. Word Meaning (Etymology) The Sanskrit name Upavistha Hamsasana is composed of three words. Upavistha Upavistha means seated or sitting down. Hamsa Hamsa means swan. In yogic symbolism, the swan represents wisdom, purity, and spiritual awareness. Asana Asana means posture or pose. Combined Meaning Upavistha Hamsasana translates to: “Seated Swan Pose.” The name reflects the elegant shape of the body in the posture. 3. Definition of the Pose Sitting Swan Pose is a seated yoga posture in which one leg is bent and externally rotated while the other leg extends backward or remains folded, creating a deep stretch in the hip muscles while maintaining an upright spine. The posture involves: • hip external rotation• hip flexion• spinal extension and elongation• stabilization of the pelvis It is considered a gentle hip-opening posture suitable for mobility training and flexibility development. 4. Method of Practice (Step-by-Step) Starting Position Step 1: Bend One Knee Step 2: Position the Hip Step 3: Adjust the Back Leg Step 4: Lengthen the Spine Step 5: Maintain the Pose Step 6: Hold the Pose Step 7: Release Step 8: Repeat on the Opposite Side 5. Alignment Cues Correct alignment ensures safe practice. Pelvis • Keep the pelvis neutral and balanced. Spine • Lengthen the spine upward. Shoulders • Relax the shoulders away from the ears. Knees • Avoid excessive pressure on the knee joint. Head • Maintain a neutral head position. 6. Benefits 1. Improves Hip Flexibility The posture stretches the hip muscles. 2. Strengthens Postural Muscles Maintaining an upright spine activates back muscles. 3. Enhances Spinal Alignment Encourages proper posture. 4. Relieves Lower Back Tension Hip opening reduces strain on the lower back. 5. Improves Circulation The posture promotes blood flow in the pelvic region. 6. Enhances Joint Mobility Improves flexibility in the hip joints. 7. Promotes Relaxation The posture encourages calm breathing and mental focus. 7. Contraindications Knee Injury Avoid deep hip rotation. Hip Injury Practice with caution. Severe Lower Back Pain Use modifications. Recent Surgery Consult a medical professional before practice. 8. Counterposes After practicing Sitting Swan Pose, it is helpful to perform neutralizing poses. Examples include: • Seated Forward Fold• Gentle seated twist• Easy Pose 9. Preparatory Practices Preparatory poses help warm up the body. Examples include: • Butterfly Pose• Cat-Cow Pose• Seated hip rotations 10. Modifications Use a Cushion Sit on a cushion to improve pelvic alignment. Support the Knee Place a block under the bent knee. Keep Both Legs Bent Beginners may keep both legs folded. Reduce the Range of Motion Avoid forcing the hip rotation. 11. Muscles Involved Primary Muscles • Gluteus maximus• Piriformis Secondary Muscles • Hip rotators• Adductors Stabilizing Muscles • Erector spinae• Core muscles 12. Kinesiology Kinesiology studies muscular movement. Hip Joint Performs external rotation and flexion. Spine Maintains neutral extension. Pelvis Maintains stability. 13. Kinematics Kinematics describes body movement. Plane of Motion Movement occurs primarily in the transverse plane. Type of Movement Combination of hip rotation and spinal stabilization. 14. Biomechanism Biomechanics examines forces acting on the body. Base of Support The base of support is formed by the pelvis and legs. Center of Gravity Located near the pelvic region. Load Distribution Weight is distributed evenly across the sitting bones. 15. Functional Anatomy & Physiology Musculoskeletal System The posture stretches the hip rotators and strengthens spinal stabilizers. Nervous System Promotes relaxation and body awareness. Circulatory System Improves blood flow in the pelvic region. Respiratory System The upright posture allows deeper breathing. 16. Teaching Methodology Yoga teachers should guide students progressively. Step 1 Teach basic seated postures. Step 2 Introduce gentle hip-opening movements. Step 3 Guide students into Sitting Swan Pose gradually. 17. Common Mistakes Rounding the Back Encourage spinal length. Collapsing the Chest Lift the sternum gently. Forcing the Knee Down Allow the knee to relax naturally. Uneven Weight Distribution Keep both sitting bones grounded. 18. How to Correct and Adjust While Teaching Verbal Cues Teachers may

Read More »

Tri Pada Adho Mukha Svanasana – Stacked (Three-Legged Downward Facing Dog Pose – Stacked)

1. Introduction Three-Legged Downward Facing Dog Pose Variation Stacked, known in Sanskrit as Tri Pada Adho Mukha Svanasana (Stacked Variation), is an advanced variation of the classical Downward Facing Dog pose. This posture is widely practiced in Hatha Yoga, Vinyasa Yoga, Ashtanga Yoga, and Power Yoga sequences as it combines strength, flexibility, balance, and coordination. The pose builds upon the foundation of Downward Facing Dog by lifting one leg toward the sky and stacking the hips so that the lifted hip opens upward. In this variation, the body forms an inverted “V” shape similar to the standard Downward Dog, but with one leg extended upward and the pelvis rotated outward. The lifted leg creates a deeper opening in the hip joint while also strengthening the shoulders and core muscles. The stacked variation increases the intensity of the posture and encourages greater mobility in the hips, hamstrings, and spine. Modern lifestyles often lead to tight hips, weak shoulder stabilizers, and limited spinal mobility due to prolonged sitting and insufficient physical activity. Practicing Three-Legged Downward Dog helps address these issues by strengthening the upper body, lengthening the spine, and stretching the posterior chain of muscles. The stacked variation further enhances hip mobility and increases flexibility in the hip rotators. From an anatomical perspective, this posture involves shoulder flexion, hip flexion in the grounded leg, hip extension and external rotation in the lifted leg, spinal elongation, and ankle dorsiflexion. These movements activate several important muscle groups including the deltoids, trapezius, latissimus dorsi, hamstrings, gluteal muscles, quadriceps, and core stabilizers. Biomechanically, the pose distributes body weight between the hands and the grounded foot, requiring stability through the shoulder girdle and engagement of the abdominal muscles. The lifted leg introduces asymmetry, which challenges balance and proprioception. Physiologically, Three-Legged Downward Dog improves circulation, respiratory efficiency, joint mobility, and muscular endurance. The mild inversion increases blood flow to the brain and stimulates the nervous system, promoting alertness and mental clarity. Beyond its physical effects, the pose encourages focus, concentration, and body awareness. Maintaining stability while lifting and stacking the leg requires controlled breathing and mindful movement, making the posture both physically and mentally engaging. 2. Word Meaning and Etymology The Sanskrit name Tri Pada Adho Mukha Svanasana consists of several components: Tri – ThreePada – Foot or legAdho – DownwardMukha – FaceSvana (Svan) – DogAsana – Posture Thus, Tri Pada Adho Mukha Svanasana means “Three-Legged Downward Facing Dog Pose.” Meaning of the Stacked Variation The stacked variation refers to the position in which the lifted hip rotates upward so that the hips are “stacked” vertically. This creates a deeper hip opening and a stronger stretch along the side body. Symbolic Meaning In yogic symbolism, the dog stretch represents alertness, readiness, and vitality. The three-legged variation symbolizes expansion and growth beyond the basic posture. 3. Definition of the Pose Three-Legged Downward Facing Dog Pose Stacked Variation is a yoga posture in which the practitioner begins in Downward Facing Dog, lifts one leg upward, and rotates the hips so that the lifted hip opens toward the ceiling while maintaining stability in the shoulders and grounded leg. Key Characteristics The pose integrates strength, flexibility, and balance. 4. Method of Practice (Step-by-Step) Starting Position Step-by-Step Instructions Step 1 – Establish the Base Press firmly through both hands and lengthen the spine. Step 2 – Lift One Leg Inhale and lift the right leg toward the ceiling. Step 3 – Engage the Core Stabilize the torso to prevent excessive movement. Step 4 – Stack the Hips Rotate the right hip upward while allowing the pelvis to open. Step 5 – Bend the Raised Knee (Optional) Bend the lifted knee slightly to deepen the hip opening. Step 6 – Maintain the Pose Hold the posture for 5–8 breaths. Step 7 – Return to Neutral Lower the lifted leg and return to Downward Dog. Step 8 – Repeat on the Other Side Lift the opposite leg and repeat the steps. 5. Alignment Cues Proper alignment ensures safety and effectiveness. Hands Shoulders Spine Grounded Leg Lifted Leg 6. Preparatory Practices Recommended Preparatory Poses These poses prepare the shoulders, hips, and hamstrings. 7. Counterposes Recommended Counterposes These poses release the spine and shoulders after the posture. 8. Modifications Beginner Modification Keep the lifted leg lower instead of fully extended. Block Support Place hands on yoga blocks. Knee Bend Keep the grounded knee slightly bent. Gentle Variation Avoid stacking the hips and keep them square. 9. Muscles Involved Primary Muscles Secondary Muscles These muscles stabilize the joints and support the posture. 10. Kinesiology Kinesiology studies muscle actions and joint movement. Joint Actions Shoulder – flexion and stabilizationHip (grounded leg) – flexionHip (lifted leg) – extension and external rotationSpine – axial elongation Muscle Activity The shoulder stabilizers maintain upper-body support while the gluteal muscles lift the leg. 11. Kinematics Kinematics describes movement without considering forces. Plane of Motion Movement occurs primarily in the sagittal and transverse planes. Axis of Motion Rotation occurs around the vertical axis of the hip joint. Segmental Motion The pelvis rotates while the spine remains elongated. 12. Biomechanics Biomechanics examines mechanical forces acting on the body. Weight Distribution Body weight is distributed between the hands and the grounded foot. Lever Mechanics The lifted leg acts as a lever, increasing load on the shoulder muscles. Core Stability The abdominal muscles stabilize the pelvis during hip rotation. 13. Functional Anatomy Shoulder Joint The shoulder joint provides flexibility while the surrounding muscles stabilize the arms. Hip Joint The hip joint allows extension and rotation in the lifted leg. Vertebral Column The spine elongates and stabilizes during the posture. 14. Physiological Effects Musculoskeletal System Circulatory System The mild inversion enhances blood flow to the upper body. Respiratory System Chest expansion improves breathing efficiency. Nervous System Improves balance, coordination, and proprioception. 15. Benefits Physical Benefits Therapeutic Benefits Mental Benefits 16. Contraindications Individuals with the following conditions should practice cautiously: Safety Considerations 17. Teaching and Adjustment Techniques Verbal Instructions Teachers should guide students to: Observational Teaching Teachers should observe:

Read More »

Tadasana Urdhva Hastasana(Volcano Pose-Urdhva Hastasana)

1. Introduction Volcano Pose, known in Sanskrit as Urdhva Hastasana, is a fundamental standing posture in yoga that involves raising the arms overhead while maintaining an elongated spine and stable base through the feet. It is frequently practiced as part of Sun Salutation (Surya Namaskar) sequences and serves as a transitional posture between standing and forward-bending poses. Despite its apparent simplicity, Volcano Pose plays a crucial role in developing body awareness, spinal alignment, postural stability, and coordinated breathing. The name “Volcano Pose” is often used in yoga teaching to describe the visual imagery created when the arms rise upward from the grounded base of the body, resembling lava flowing upward from a volcano. This imagery encourages practitioners to feel the energetic upward expansion of the body while remaining rooted through the feet. From an anatomical perspective, Urdhva Hastasana involves coordinated extension of the spine, elevation of the arms, stabilization of the shoulder girdle, and activation of the lower body muscles to maintain balance. The posture strengthens the postural muscles of the back and legs while promoting flexibility in the shoulders and rib cage. It also encourages diaphragmatic breathing by expanding the thoracic cavity. In yoga philosophy, upward-reaching postures symbolize growth, expansion, and openness. The upward movement of the arms and chest is associated with the awakening of energy and the cultivation of vitality. Because of these qualities, Volcano Pose is often used at the beginning of yoga sequences to energize the body and focus the mind. 2. Word Meaning and Etymology The Sanskrit name Urdhva Hastasana is composed of three words: Urdhva – Upward or elevatedHasta – Hand or armAsana – Posture or seat Thus, Urdhva Hastasana literally means “Upward Raised Hands Pose.” Another way the pose is described is Tadasana Urdhva Hastasana, meaning the arm-raised variation of Mountain Pose. Interpretation The combination symbolizes the balance between stability (earth element) and expansion (space element). 3. Definition of Volcano Pose Volcano Pose is a standing yoga posture in which the practitioner stands upright with the feet grounded and raises the arms overhead while lengthening the spine and expanding the chest. Key Characteristics The posture is considered an axial extension posture, meaning it lengthens the body vertically from the feet to the fingertips. 4. Method of Practice (Step-by-Step) Starting Position Step-by-Step Practice Step 1 – Ground the Feet Press evenly through the heels, balls of the feet, and toes. Step 2 – Engage the Legs Activate the quadriceps and lift the kneecaps slightly. Step 3 – Lengthen the Spine Draw the tailbone slightly downward while lifting the crown of the head upward. Step 4 – Raise the Arms Inhale and lift both arms overhead. Step 5 – Position the Hands The palms may face each other or touch overhead. Step 6 – Expand the Chest Lift the sternum and broaden the collarbones. Step 7 – Maintain Alignment Keep the shoulders relaxed and avoid excessive arching of the lower back. Step 8 – Breathing Maintain slow and steady breathing while holding the pose for 5–10 breaths. Step 9 – Release Exhale and slowly lower the arms back to the sides. 5. Alignment Cues Correct alignment is essential for safe practice. Feet Legs Pelvis Spine Shoulders Neck 6. Preparatory Practices Several poses help prepare the body for Volcano Pose. Recommended Preparatory Asanas These movements warm up the shoulders, spine, and rib cage. 7. Counterposes After practicing Urdhva Hastasana, counterposes help balance the body. Common Counterposes These poses release tension in the shoulders and spine. 8. Modifications and Variations Beginner Modification Keep the hands shoulder-width apart instead of touching. Shoulder-Friendly Variation Bend the elbows slightly. Wall Support Practice with the back against a wall to maintain alignment. Advanced Variation Add a gentle backbend while keeping the core engaged. 9. Muscles Involved Primary Muscles Secondary Muscles These muscles coordinate to stabilize the posture. 10. Kinesiology Kinesiology examines how muscles and joints create movement. Joint Actions Shoulder joint – flexion and elevationScapula – upward rotationSpine – axial extensionHip joint – stabilization Muscle Contractions Isometric contractions occur in the legs and core to maintain stability. Dynamic muscle activity occurs in the shoulders during arm elevation. 11. Kinematics Kinematics studies motion without considering forces. Plane of Movement Volcano Pose primarily occurs in the sagittal plane. Axis of Movement Movement occurs around the mediolateral axis during arm elevation. Segmental Movement The arms move upward while the spine elongates vertically. 12. Biomechanics Biomechanics analyzes the mechanical forces acting on the body. Shoulder Mechanics Arm elevation requires coordination between: Scapulohumeral Rhythm The shoulder blade rotates upward to allow full arm elevation. Spinal Stability The core muscles stabilize the lumbar spine. Load Distribution Body weight is evenly distributed through both feet. 13. Functional Anatomy Shoulder Complex The shoulder joint allows a wide range of motion. Key structures include: Rib Cage Lifting the arms expands the rib cage, supporting deeper breathing. Spinal Column The vertebral column lengthens during axial extension. 14. Physiological Effects Volcano Pose affects several body systems. Musculoskeletal System Respiratory System Circulatory System Nervous System 15. Benefits Physical Benefits Therapeutic Benefits Energetic Benefits (Yogic Perspective) 16. Contraindications Certain individuals should practice caution. Medical Conditions Safety Recommendations 17. Teaching and Adjustment Techniques Verbal Cues Teachers should guide students to: Observational Teaching Teachers should observe: Hands-On Adjustments Teachers may gently: Adjustments should always be gentle and respectful. 18. Common Mistakes and Corrections Overarching the Lower Back Correction: engage the abdominal muscles. Shrugging the Shoulders Correction: relax the shoulders away from the ears. Locked Knees Correction: maintain a slight bend in the knees. 19. Integration in Yoga Practice Volcano Pose is commonly used in: It serves as an energizing posture that prepares the body for more complex movements. 20. Conclusion Volcano Pose (Urdhva Hastasana) is a foundational yoga posture that combines grounding, extension, and upward expansion. Although simple in appearance, the pose requires precise coordination between the feet, legs, core, spine, and shoulders to maintain balance and alignment. From a biomechanical perspective, the posture involves axial extension of the spine, shoulder flexion, and stabilization

Read More »

Urdhva Mukha Pasasana Flow → Supta Baddha Konasana(Thread the Needle Pose Flow to Reclining Bound Angle Pose)

1. Introduction Yoga practice often integrates dynamic movements and restorative postures to create balance between effort and relaxation. One such effective combination is the Thread the Needle Pose Flow transitioning into Reclining Bound Angle Pose (Supta Baddha Konasana). This sequence combines spinal rotation, shoulder mobility, and hip opening with deep relaxation, making it valuable in both traditional Hatha Yoga and modern therapeutic yoga practice. Thread the Needle Pose Flow is a dynamic spinal rotation performed from a quadruped position. It gently mobilizes the thoracic spine, stretches the shoulders, and activates the core muscles. After performing this dynamic movement, practitioners may transition into Supta Baddha Konasana, a restorative posture that opens the hips and encourages deep diaphragmatic breathing. The integration of these two poses creates a balanced yoga sequence that moves from activity to relaxation. While Thread the Needle stimulates spinal mobility and muscular activation, Supta Baddha Konasana promotes parasympathetic relaxation and internal awareness. From an anatomical perspective, the sequence influences multiple body systems. Thread the Needle primarily affects the thoracic spine, scapulae, and shoulder joints, whereas Supta Baddha Konasana focuses on the hips, pelvic region, and respiratory system. Together, they enhance flexibility, circulation, and neuromuscular coordination. Biomechanically, Thread the Needle involves axial rotation of the spine, whereas Supta Baddha Konasana emphasizes hip abduction and external rotation. These contrasting movements promote balanced mobility across the body’s major joints. Physiologically, the sequence stimulates blood circulation, improves breathing efficiency, and encourages relaxation of the nervous system. The restorative nature of Supta Baddha Konasana helps calm the mind, reduce stress, and enhance mental clarity. 2. Word Meaning and Etymology Thread the Needle Pose The movement resembles the action of passing a thread through the eye of a needle. Sanskrit Association: Urdhva Mukha Pasasana Urdhva – UpwardMukha – FacePasa – Noose or bindingAsana – Posture Although Pasasana traditionally refers to a twisting pose, the threaded movement in yoga resembles the action of twisting and binding the body. Supta Baddha Konasana The Sanskrit name consists of four components: Supta – Reclining or lying downBaddha – Bound or tiedKona – AngleAsana – Posture Thus, Supta Baddha Konasana means “Reclining Bound Angle Pose.” The posture resembles a relaxed position where the soles of the feet come together and the knees fall outward. 3. Definition of the Pose Flow The Thread the Needle to Supta Baddha Konasana Flow is a yoga sequence in which the practitioner performs spinal rotational movements in a quadruped position and then transitions into a supine hip-opening posture for relaxation and breath awareness. Key Characteristics Thread the Needle Phase: Supta Baddha Konasana Phase: This combination promotes mobility followed by relaxation. 4. Method of Practice (Step-by-Step) Part 1: Thread the Needle Pose Flow Starting Position Step-by-Step Flow Step 1 – Inhale Lift the right arm toward the ceiling and rotate the chest open. Step 2 – Expand the Rib Cage Allow the thoracic spine to rotate while keeping the hips stable. Step 3 – Exhale Thread the right arm underneath the body between the left hand and left knee. Step 4 – Lower the Shoulder Bring the right shoulder and side of the head toward the floor. Step 5 – Hold Maintain the twist for 3–5 breaths. Step 6 – Return Press through the supporting hand and return to Tabletop Pose. Step 7 – Repeat Repeat 5–8 times before switching sides. Part 2: Transition to Supta Baddha Konasana Step 1 – Sit Upright Come to a seated position. Step 2 – Bring the Feet Together Join the soles of the feet and allow the knees to drop outward. Step 3 – Recline Slowly lower the torso onto the floor. Step 4 – Position the Arms Place the arms beside the body or on the abdomen. Step 5 – Relax Stay in the pose for 3–5 minutes with deep breathing. 5. Alignment Cues Thread the Needle Pose Supta Baddha Konasana 6. Preparatory Practices Recommended Preparatory Asanas These movements prepare the spine, shoulders, and hips. 7. Counterposes After Thread the Needle After Supta Baddha Konasana 8. Modifications Thread the Needle Modification Supta Baddha Konasana Modification Neck Support Restorative Variation 9. Muscles Involved Thread the Needle Pose Primary muscles: Secondary muscles: Supta Baddha Konasana Primary muscles stretched: Secondary muscles relaxed: 10. Kinesiology Kinesiology studies muscle actions during movement. Thread the Needle Spinal movement: axial rotationShoulder movement: horizontal adductionScapular movement: protraction Supta Baddha Konasana Hip movement: abduction and external rotation 11. Kinematics Kinematics describes movement patterns. Thread the Needle Plane of motion: transverse planeAxis: vertical axis of the spine Supta Baddha Konasana Plane of motion: frontal planeAxis: anteroposterior axis 12. Biomechanics Spinal Rotation The thoracic spine allows approximately 30–35 degrees of rotation. Hip Joint Mechanics The hip joint is a ball-and-socket joint, allowing wide range of motion. Load Distribution During Thread the Needle, body weight is partially supported by the hands and knees. In Supta Baddha Konasana, the body weight is evenly distributed across the back. 13. Functional Anatomy Thoracic Spine The thoracic spine supports rotational movement due to rib cage articulation. Shoulder Joint The glenohumeral joint enables wide range of arm movement. Hip Joint The hip joint allows abduction and external rotation. 14. Physiological Effects Nervous System The sequence promotes relaxation and reduces stress. Respiratory System Supta Baddha Konasana improves diaphragmatic breathing. Circulatory System Spinal movement enhances blood circulation. Digestive System The hip opening posture stimulates abdominal organs. 15. Benefits Physical Benefits Therapeutic Benefits Mental Benefits 16. Contraindications Individuals with the following conditions should practice cautiously: Pregnant individuals should modify Supta Baddha Konasana with support. 17. Teaching and Adjustment Techniques Verbal Cues Teachers should guide students to: Observational Teaching Teachers should observe: Hands-On Adjustments Teachers may gently: Adjustments must always be gentle and respectful. 18. Common Mistakes and Corrections Collapsing Shoulder Correction: engage shoulder stabilizers. Over-Twisting the Lower Back Correction: focus rotation in the thoracic spine. Knee Discomfort in Supta Baddha Konasana Correction: place blocks under the knees. 19. Integration in Yoga Practice This sequence is commonly included in: The flow effectively combines mobility and relaxation. 20. Conclusion The Thread the Needle Pose Flow transitioning into Supta Baddha Konasana is a well-balanced yoga sequence that integrates dynamic spinal rotation with restorative hip opening. The sequence promotes both physical mobility and mental relaxation,

Read More »

Tri Pada Adho Mukha Svanasana(Three-Legged Downward Facing Dog Pose -Stacked)

1. Introduction Three-Legged Downward Facing Dog Pose Variation Stacked, known in Sanskrit as Tri Pada Adho Mukha Svanasana (Stacked Variation), is an advanced variation of the classical Downward Facing Dog pose. This posture is widely practiced in Hatha Yoga, Vinyasa Yoga, Ashtanga Yoga, and Power Yoga sequences as it combines strength, flexibility, balance, and coordination. The pose builds upon the foundation of Downward Facing Dog by lifting one leg toward the sky and stacking the hips so that the lifted hip opens upward. In this variation, the body forms an inverted “V” shape similar to the standard Downward Dog, but with one leg extended upward and the pelvis rotated outward. The lifted leg creates a deeper opening in the hip joint while also strengthening the shoulders and core muscles. The stacked variation increases the intensity of the posture and encourages greater mobility in the hips, hamstrings, and spine. Modern lifestyles often lead to tight hips, weak shoulder stabilizers, and limited spinal mobility due to prolonged sitting and insufficient physical activity. Practicing Three-Legged Downward Dog helps address these issues by strengthening the upper body, lengthening the spine, and stretching the posterior chain of muscles. The stacked variation further enhances hip mobility and increases flexibility in the hip rotators. From an anatomical perspective, this posture involves shoulder flexion, hip flexion in the grounded leg, hip extension and external rotation in the lifted leg, spinal elongation, and ankle dorsiflexion. These movements activate several important muscle groups including the deltoids, trapezius, latissimus dorsi, hamstrings, gluteal muscles, quadriceps, and core stabilizers. Biomechanically, the pose distributes body weight between the hands and the grounded foot, requiring stability through the shoulder girdle and engagement of the abdominal muscles. The lifted leg introduces asymmetry, which challenges balance and proprioception. Physiologically, Three-Legged Downward Dog improves circulation, respiratory efficiency, joint mobility, and muscular endurance. The mild inversion increases blood flow to the brain and stimulates the nervous system, promoting alertness and mental clarity. Beyond its physical effects, the pose encourages focus, concentration, and body awareness. Maintaining stability while lifting and stacking the leg requires controlled breathing and mindful movement, making the posture both physically and mentally engaging. 2. Word Meaning and Etymology The Sanskrit name Tri Pada Adho Mukha Svanasana consists of several components: Tri – ThreePada – Foot or legAdho – DownwardMukha – FaceSvana (Svan) – DogAsana – Posture Thus, Tri Pada Adho Mukha Svanasana means “Three-Legged Downward Facing Dog Pose.” Meaning of the Stacked Variation The stacked variation refers to the position in which the lifted hip rotates upward so that the hips are “stacked” vertically. This creates a deeper hip opening and a stronger stretch along the side body. Symbolic Meaning In yogic symbolism, the dog stretch represents alertness, readiness, and vitality. The three-legged variation symbolizes expansion and growth beyond the basic posture. 3. Definition of the Pose Three-Legged Downward Facing Dog Pose Stacked Variation is a yoga posture in which the practitioner begins in Downward Facing Dog, lifts one leg upward, and rotates the hips so that the lifted hip opens toward the ceiling while maintaining stability in the shoulders and grounded leg. Key Characteristics The pose integrates strength, flexibility, and balance. 4. Method of Practice (Step-by-Step) Starting Position Step-by-Step Instructions Step 1 – Establish the Base Press firmly through both hands and lengthen the spine. Step 2 – Lift One Leg Inhale and lift the right leg toward the ceiling. Step 3 – Engage the Core Stabilize the torso to prevent excessive movement. Step 4 – Stack the Hips Rotate the right hip upward while allowing the pelvis to open. Step 5 – Bend the Raised Knee (Optional) Bend the lifted knee slightly to deepen the hip opening. Step 6 – Maintain the Pose Hold the posture for 5–8 breaths. Step 7 – Return to Neutral Lower the lifted leg and return to Downward Dog. Step 8 – Repeat on the Other Side Lift the opposite leg and repeat the steps. 5. Alignment Cues Proper alignment ensures safety and effectiveness. Hands Shoulders Spine Grounded Leg Lifted Leg 6. Preparatory Practices Recommended Preparatory Poses These poses prepare the shoulders, hips, and hamstrings. 7. Counterposes Recommended Counterposes These poses release the spine and shoulders after the posture. 8. Modifications Beginner Modification Keep the lifted leg lower instead of fully extended. Block Support Place hands on yoga blocks. Knee Bend Keep the grounded knee slightly bent. Gentle Variation Avoid stacking the hips and keep them square. 9. Muscles Involved Primary Muscles Secondary Muscles These muscles stabilize the joints and support the posture. 10. Kinesiology Kinesiology studies muscle actions and joint movement. Joint Actions Shoulder – flexion and stabilizationHip (grounded leg) – flexionHip (lifted leg) – extension and external rotationSpine – axial elongation Muscle Activity The shoulder stabilizers maintain upper-body support while the gluteal muscles lift the leg. 11. Kinematics Kinematics describes movement without considering forces. Plane of Motion Movement occurs primarily in the sagittal and transverse planes. Axis of Motion Rotation occurs around the vertical axis of the hip joint. Segmental Motion The pelvis rotates while the spine remains elongated. 12. Biomechanics Biomechanics examines mechanical forces acting on the body. Weight Distribution Body weight is distributed between the hands and the grounded foot. Lever Mechanics The lifted leg acts as a lever, increasing load on the shoulder muscles. Core Stability The abdominal muscles stabilize the pelvis during hip rotation. 13. Functional Anatomy Shoulder Joint The shoulder joint provides flexibility while the surrounding muscles stabilize the arms. Hip Joint The hip joint allows extension and rotation in the lifted leg. Vertebral Column The spine elongates and stabilizes during the posture. 14. Physiological Effects Musculoskeletal System Circulatory System The mild inversion enhances blood flow to the upper body. Respiratory System Chest expansion improves breathing efficiency. Nervous System Improves balance, coordination, and proprioception. 15. Benefits Physical Benefits Therapeutic Benefits Mental Benefits 16. Contraindications Individuals with the following conditions should practice cautiously: Safety Considerations 17. Teaching and Adjustment Techniques Verbal Instructions Teachers should guide students to: Observational Teaching Teachers should observe: Hands-On Adjustments Teachers may gently: Adjustments should always be safe and respectful. 18. Common Mistakes and Corrections Collapsing Shoulders Correction: engage the shoulder stabilizers. Overarching the Lower Back

Read More »

Tri Pada Adho Mukha Svanasana → Phalakasana Knee-to-Nose Vinyasa(Three-Legged Downward Facing Dog – Tiger Curl Flow)

1. Introduction The Three-Legged Downward Facing Dog to Tiger Curl Flow is a dynamic yoga movement sequence frequently practiced in Vinyasa Yoga, Power Yoga, and Ashtanga-inspired flows. The movement combines two core postures: Tri Pada Adho Mukha Svanasana (Three-Legged Downward Facing Dog) and Phalakasana Knee-to-Nose (Tiger Curl). Together they create a fluid transition that strengthens the core, enhances hip mobility, and improves coordination between breath and movement. Dynamic yoga flows are essential components of modern yoga practice because they train both strength and flexibility simultaneously. Unlike static poses, flowing sequences develop neuromuscular control and cardiovascular endurance while reinforcing functional movement patterns. The Tiger Curl Flow particularly emphasizes core activation, shoulder stability, and spinal control, making it a valuable exercise for building strength and body awareness. From an anatomical standpoint, the flow involves complex interactions between the upper body, core, spine, and lower limbs. During Three-Legged Downward Dog, the body forms an inverted “V” shape while one leg lifts into hip extension. During the Tiger Curl transition, the lifted leg moves forward toward the chest while the body shifts into a plank-like position. This movement requires coordinated engagement of multiple muscle groups, including the abdominal muscles, shoulder stabilizers, hip flexors, and spinal extensors. Biomechanically, the flow involves closed kinetic chain movements, meaning the hands remain fixed on the ground while the body moves relative to them. This requires strong shoulder stabilization and core control to maintain alignment and prevent excessive strain on the joints. From a physiological perspective, this sequence improves circulation, enhances muscular endurance, and stimulates metabolic activity. It also encourages synchronized breathing patterns, which support oxygen delivery and energy regulation during practice. Beyond its physical benefits, the flow also has psychological advantages. The rhythmic coordination of breath and movement encourages mindfulness and concentration. The movement challenges balance and strength, which cultivates resilience and mental focus. 2. Word Meaning and Etymology Tri Pada Adho Mukha Svanasana The Sanskrit name can be divided into four components: Tri – ThreePada – Foot or legAdho – DownwardMukha – Face or facingSvana – DogAsana – Posture Thus, Tri Pada Adho Mukha Svanasana translates to “Three-Legged Downward Facing Dog Pose.” The pose is a variation of Adho Mukha Svanasana, in which one leg lifts upward. Phalakasana Knee-to-Nose (Tiger Curl) Phalaka – Plank or boardAsana – Posture In the Tiger Curl movement, the lifted knee moves toward the nose or chest while the body transitions toward a plank position. Symbolic Meaning The posture sequence represents strength, agility, and fluid movement, similar to the dynamic stretch of animals such as dogs or tigers. 3. Definition of the Flow The Three-Legged Downward Dog – Tiger Curl Flow is a dynamic yoga sequence in which the practitioner lifts one leg in Downward Facing Dog and then draws the knee toward the chest while shifting forward into a plank position. Key Characteristics The flow is often repeated multiple times before switching sides. 4. Method of Practice (Step-by-Step) Starting Position Step-by-Step Practice Step 1 – Lift the Leg Inhale and lift the right leg upward into Three-Legged Downward Dog. Step 2 – Maintain Alignment Keep the hips squared and extend the lifted leg strongly. Step 3 – Shift Forward Exhale and shift the body forward toward Plank Pose. Step 4 – Draw the Knee Bring the right knee toward the nose or chest. Step 5 – Round the Spine Engage the abdominal muscles and round the spine slightly. Step 6 – Return to Downward Dog Inhale and extend the leg back into Three-Legged Downward Dog. Step 7 – Repeat Repeat the flow 5–10 times before switching sides. 5. Alignment Cues Hands Shoulders Spine Core Hips Legs 6. Preparatory Practices Recommended Preparatory Asanas These poses prepare the shoulders, core, and hamstrings. 7. Counterposes Common Counterposes These poses release tension after the dynamic sequence. 8. Modifications and Variations Beginner Modification Lower the lifted knee to the floor during the Tiger Curl. Wrist Support Use yoga wedges or fists instead of palms. Slow Variation Perform the movement slowly for better control. Advanced Variation Add elbow-to-knee movements for increased core engagement. 9. Muscles Involved Primary Muscles Secondary Muscles 10. Kinesiology Joint Actions Shoulders – flexion and stabilizationSpine – alternating flexion and extensionHip – flexion and extensionKnee – flexion Muscle Activity Isometric contractions stabilize the shoulders and core. Dynamic contractions occur in the hip flexors and extensors. 11. Kinematics Plane of Motion Movement primarily occurs in the sagittal plane. Axis of Motion Motion occurs around the mediolateral axis. Segmental Motion The spine alternates between extension and flexion during the flow. 12. Biomechanics Shoulder Mechanics Shoulders bear a significant portion of body weight. Scapular stabilization is essential. Core Mechanics The abdominal muscles generate force to draw the knee forward. Hip Mechanics Hip flexion and extension control the movement of the leg. 13. Functional Anatomy Shoulder Complex Includes: Core System The core stabilizes the spine during dynamic movement. Hip Joint The hip joint enables large ranges of motion. 14. Physiological Effects Musculoskeletal System Cardiovascular System Nervous System Respiratory System 15. Benefits Physical Benefits Functional Benefits Energetic Benefits 16. Contraindications Medical Conditions Safety Guidelines 17. Teaching and Adjustment Techniques Verbal Cues Teachers should encourage students to: Observational Teaching Teachers should observe: Hands-On Adjustments Teachers may gently: 18. Common Mistakes and Corrections Collapsing Shoulders Correction: engage serratus anterior. Sagging Lower Back Correction: activate core muscles. Uneven Hips Correction: square the hips during leg lift. 19. Integration in Yoga Practice The Tiger Curl Flow is commonly included in: It serves as a powerful strength-building and coordination exercise. 20. Conclusion The Three-Legged Downward Dog – Tiger Curl Flow is a dynamic yoga sequence that integrates strength, flexibility, and coordination. By combining spinal extension with core-driven flexion, the movement enhances both muscular control and mobility. From a biomechanical perspective, the flow challenges the stability of the shoulders and core while requiring coordinated movement of the hips and spine. These characteristics make it an effective exercise for improving functional strength and preventing movement imbalances. Physiologically, the sequence increases circulation, stimulates the nervous system, and improves breathing efficiency. From a yogic perspective, it builds internal heat and energy while promoting mental focus and mindfulness.

Read More »

Uttana Shishosana (Puppy Dog Pose)

1. Introduction Puppy Dog Pose, known in Sanskrit as Uttana Shishosana, is a gentle yet powerful yoga posture that combines elements of spinal extension and shoulder opening. It is commonly practiced in Hatha Yoga, Vinyasa Yoga, and restorative yoga sequences. The pose resembles the natural stretch a puppy performs when extending its front legs forward while keeping its hips elevated, which is why it is often called “Puppy Pose” or “Extended Puppy Pose.” Uttana Shishosana is considered a heart-opening and shoulder-opening posture that bridges the structural elements of Child’s Pose (Balasana) and Downward Facing Dog (Adho Mukha Svanasana). In this posture, the practitioner begins in a tabletop position and gradually walks the hands forward while keeping the hips stacked above the knees. As the chest moves toward the floor, the spine lengthens and the shoulders experience a deep stretch. From an anatomical perspective, the pose primarily affects the thoracic spine, shoulder joints, and upper back muscles. The posture encourages spinal extension while lengthening the muscles of the back body and opening the chest. It also promotes flexibility in the shoulders and upper arms while strengthening the stabilizing muscles of the core and hips. From a physiological standpoint, Uttana Shishosana stimulates circulation, improves breathing capacity, and helps relieve tension in the neck and shoulders. Because of its calming nature, it is often used in yoga therapy to relieve stress and fatigue. 2. Word Meaning and Etymology The Sanskrit name Uttana Shishosana consists of three components: Uttana – Intense stretch or extended stretchShishos – Puppy or young dogAsana – Posture or seat Thus, Uttana Shishosana literally means “Intense Stretch Puppy Pose” or “Extended Puppy Pose.” Symbolic Interpretation The name reflects the natural behavior of puppies stretching their bodies forward with their hips lifted. This imagery helps practitioners visualize the posture and approach it with ease and playfulness. In yogic philosophy, the posture symbolizes openness of the heart and release of emotional tension. 3. Definition of the Pose Puppy Dog Pose is a kneeling yoga posture in which the hips remain above the knees while the chest lowers toward the floor and the arms extend forward, creating a deep stretch in the shoulders and spine. Key Characteristics The posture combines spinal extension and shoulder flexion, making it a beneficial pose for improving upper body mobility. 4. Method of Practice (Step-by-Step) Starting Position Step-by-Step Practice Step 1 – Ground the Knees Press the knees and shins gently into the mat. Step 2 – Walk the Hands Forward Slowly walk both hands forward along the mat. Step 3 – Lower the Chest Allow the chest to move toward the floor while keeping the hips above the knees. Step 4 – Extend the Arms Stretch the arms fully forward with palms pressing into the mat. Step 5 – Position the Forehead or Chin Rest the forehead or chin on the floor if comfortable. Step 6 – Maintain the Pose Keep the hips stacked over the knees and hold the posture for 5–10 breaths. Step 7 – Breathing Take slow and deep breaths, expanding the rib cage. Step 8 – Release To exit the pose, slowly walk the hands back and return to the tabletop position. 5. Alignment Cues Proper alignment ensures safety and effectiveness. Hips Spine Shoulders Arms Neck 6. Preparatory Practices Certain poses prepare the body for Puppy Dog Pose by warming up the shoulders and spine. Recommended Preparatory Asanas These movements improve shoulder mobility and spinal flexibility. 7. Counterposes Counterposes restore balance after deep shoulder and spinal extension. Common Counterposes These poses gently release tension in the back and shoulders. 8. Modifications and Variations Beginner Modification Place a folded blanket under the chest for support. Shoulder-Friendly Variation Rest the forearms on the floor instead of fully extending the arms. Block Support Place a yoga block under the forehead or chest. Advanced Variation Lift the chin and deepen the backbend for a stronger heart-opening stretch. 9. Muscles Involved Primary Muscles Secondary Muscles These muscles coordinate to stabilize the spine and shoulders. 10. Kinesiology Kinesiology studies the relationship between muscles and movement. Joint Actions Shoulder joint – flexionScapula – upward rotationSpine – extensionHip joint – stabilization Muscle Contractions Isometric contractions stabilize the shoulders and hips. Eccentric muscle activity occurs as the chest lowers toward the floor. 11. Kinematics Kinematics examines motion without considering forces. Plane of Motion Movement primarily occurs in the sagittal plane. Axis of Motion The spine extends along the mediolateral axis. Segmental Movement The thoracic spine extends while the hips remain stable. 12. Biomechanics Biomechanics analyzes mechanical forces acting on the body. Shoulder Mechanics The arms move into full shoulder flexion. The scapula rotates upward to allow greater mobility. Spinal Mechanics The thoracic spine extends while the lumbar spine remains stable. Weight Distribution Weight is distributed between the knees and the hands. 13. Functional Anatomy Shoulder Complex The shoulder joint allows extensive mobility. Important structures include: Thoracic Spine The thoracic vertebrae allow moderate extension. Uttana Shishosana encourages mobility in this region. Rib Cage The rib cage expands during breathing, improving respiratory capacity. 14. Physiological Effects Musculoskeletal System Nervous System Respiratory System Circulatory System 15. Benefits Physical Benefits Therapeutic Benefits Energetic Benefits (Yogic Perspective) 16. Contraindications Medical Conditions Safety Guidelines 17. Teaching and Adjustment Techniques Verbal Instructions Teachers should guide students to: Observational Teaching Teachers should observe: Hands-On Adjustments Teachers may gently: Adjustments should always be gentle and respectful. 18. Common Mistakes and Corrections Hips Moving Backward Correction: keep the hips directly above the knees. Collapsing into the Shoulders Correction: activate the arms and press into the mat. Neck Compression Correction: maintain a neutral head position. 19. Integration in Yoga Practice Puppy Dog Pose is commonly used in: It serves as a transitional pose between gentle stretches and deeper backbends. 20. Conclusion Uttana Shishosana, or Puppy Dog Pose, is a versatile yoga posture that combines spinal extension, shoulder flexibility, and calming breath awareness. Despite its gentle appearance, the posture offers significant anatomical and physiological benefits. From a biomechanical perspective, the pose encourages thoracic

Read More »

Utkatasana – Airplane Arms (Chair Pose with Airplane Arms)

1. Introduction Yoga postures that strengthen the lower body while improving balance and posture are fundamental to developing functional movement patterns. Among these postures, Utkatasana, commonly known as Chair Pose, is one of the most powerful standing poses used in modern yoga practice. The posture is widely practiced in Hatha Yoga, Vinyasa Yoga, and Ashtanga Yoga sequences because it effectively strengthens the legs, activates the core muscles, and improves overall stability. Chair Pose simulates the action of sitting in an imaginary chair while maintaining an upright posture. This action engages several major muscle groups, including the quadriceps, gluteal muscles, hamstrings, and core stabilizers. Because the body must support its own weight in a partially squatted position, the posture develops muscular endurance and strength. The Airplane Arms variation of Chair Pose introduces an additional element of shoulder extension and upper body engagement. Instead of raising the arms overhead as in the traditional version of Utkatasana, the arms are extended backward parallel to the floor, resembling the wings of an airplane. This modification emphasizes the activation of the posterior shoulder muscles, upper back muscles, and spinal extensors, while also promoting chest expansion and improved posture. From a biomechanical perspective, this variation challenges the body’s ability to maintain balance and stability while the center of gravity shifts slightly backward due to the arm position. The arms moving behind the torso encourage shoulder extension and scapular retraction, which counteracts the common postural habit of rounding the shoulders forward. In addition to strengthening the lower body, Chair Pose with Airplane Arms improves neuromuscular coordination, postural awareness, and spinal alignment. It teaches practitioners how to distribute weight evenly across the feet while maintaining proper alignment of the knees, hips, and spine. Physiologically, the pose stimulates circulation in the lower body, strengthens the joints of the knees and ankles, and encourages diaphragmatic breathing. Because the muscles are actively engaged, the posture also improves metabolic activity and muscular endurance. 2. Word Meaning (Etymology) The Sanskrit term Utkatasana consists of two words: Utkata – Fierce, powerful, intenseAsana – Pose or posture Thus, Utkatasana can be translated as: “Fierce Pose” or “Powerful Pose.” In modern yoga practice, it is commonly referred to as Chair Pose, because the body resembles the action of sitting in a chair. The variation discussed here is Chair Pose with Airplane Arms. In this variation: • the arms extend backward• the chest opens• the shoulders retract This arm position resembles the wings of an airplane, which explains the descriptive English name Airplane Arms. 3. Definition of the Pose Chair Pose with Airplane Arms is a standing yoga posture in which the practitioner bends the knees into a squat-like position while extending the arms backward alongside the body, creating a powerful combination of lower-body strength, core engagement, and shoulder extension. The posture integrates several physical components: • knee flexion• hip flexion• spinal stabilization• shoulder extension• balance and postural control It is both a strengthening and stabilizing posture. 4. Method of Practice (Step-by-Step) Starting Position Step 1: Engage the Core Step 2: Bend the Knees Step 3: Lower the Hips Step 4: Extend the Arms Step 5: Activate the Upper Back Step 6: Maintain the Pose Hold the pose for 5–10 breaths. Step 7: Release the Pose 5. Alignment Cues Proper alignment ensures safety and effectiveness. Feet • Keep feet parallel• Distribute weight evenly Knees • Align knees with toes• Avoid knees collapsing inward Hips • Sit the hips backward Spine • Maintain a neutral spine Shoulders • Draw shoulders back Arms • Extend arms backward at shoulder height Neck • Keep neck neutral 6. Benefits 1. Strengthens the Lower Body Activates: • quadriceps• gluteus maximus• hamstrings 2. Improves Shoulder Mobility The arm position strengthens the posterior shoulder muscles. 3. Enhances Posture Encourages scapular retraction and chest opening. 4. Builds Core Strength Core muscles stabilize the torso. 5. Improves Balance Requires coordination between upper and lower body. 6. Strengthens the Knees and Ankles The squat-like position strengthens lower-body joints. 7. Increases Muscular Endurance Holding the posture develops stamina. 7. Contraindications Knee Injury Deep knee bending may aggravate pain. Lower Back Injury Avoid excessive leaning forward. Shoulder Injury Arm extension may cause discomfort. Balance Disorders Practice near a wall for support. 8. Counterposes Counterposes restore muscular balance. Standing Forward Fold Relaxes the legs. Mountain Pose Restores neutral posture. Gentle Backbend Opens the chest. 9. Preparatory Practices Squat Exercises Prepare the leg muscles. Shoulder Mobility Drills Improve arm movement. Mountain Pose Develops standing alignment. 10. Modifications Hands on Hips Reduces shoulder strain. Chair Support Sit partially on a chair. Wall Support Helps maintain balance. Reduced Knee Bend Lessens pressure on the knees. 11. Muscles Involved Primary Muscles • Quadriceps• Gluteus maximus• Erector spinae Secondary Muscles • Hamstrings• Gastrocnemius• Deltoids Stabilizing Muscles • Transverse abdominis• Obliques• Rhomboids 12. Kinesiology Kinesiology studies muscle actions. Hip Joint Movement: flexion Muscles involved: • gluteus maximus• hamstrings Knee Joint Movement: flexion Muscles involved: • quadriceps Shoulder Joint Movement: extension Muscles involved: • posterior deltoid• latissimus dorsi 13. Kinematics Kinematics studies movement patterns. Movement Type Static hold after dynamic entry. Joint Actions • hip flexion• knee flexion• shoulder extension 14. Biomechanism Biomechanics explains mechanical forces in the body. Base of Support Formed by both feet. Center of Gravity Moves backward as hips lower. Force Distribution Weight distributed across the feet. Lever System Legs function as powerful levers supporting body weight. 15. Functional Anatomy & Physiology Musculoskeletal System Strengthens lower body and shoulder muscles. Nervous System Improves balance and proprioception. Circulatory System Increases blood flow to the legs. Respiratory System Encourages controlled breathing. Metabolic System Muscle activation increases energy expenditure. 16. Teaching Methodology Step 1 Teach Mountain Pose alignment. Step 2 Introduce knee bending movement. Step 3 Add arm extension backward. Step 4 Encourage controlled breathing. 17. Common Mistakes Knees Moving Too Far Forward Encourage hips to move backward. Rounding the Back Lift the chest. Arms Dropping Keep arms active. Shoulders Rising Toward Ears Relax the neck. 18. How to Correct and Adjust While Teaching Verbal

Read More »

Utkata Konasana (Goddess Pose)

1. Introduction Goddess Pose, known in Sanskrit as Utkata Konasana, is a powerful standing yoga posture that strengthens the lower body, opens the hips, and enhances stability and balance. This pose is widely practiced in Hatha Yoga, Vinyasa Yoga, and prenatal yoga, as it develops both strength and flexibility in the hips, thighs, and pelvic region. Goddess Pose is characterized by a wide stance with the knees bent outward and the hips lowered toward the ground while the torso remains upright. The arms are often lifted or bent at the elbows, creating a strong and stable posture. The term “Goddess Pose” reflects the symbolic representation of strength, empowerment, and grounded feminine energy. In yogic philosophy, this pose is associated with the awakening of inner strength and the cultivation of stability and confidence. The wide stance and open hips encourage a sense of grounding and connection with the earth. From an anatomical perspective, Goddess Pose involves hip abduction, external rotation, knee flexion, and spinal stabilization. The posture engages several major muscle groups, including the quadriceps, gluteal muscles, inner thigh muscles, and core stabilizers. The pose also stretches the hip adductors and improves mobility in the hip joints. Biomechanically, Utkata Konasana requires coordination between multiple joints and muscle groups to maintain balance and stability. The lower body provides a strong foundation while the upper body remains upright and aligned. This integration of strength and flexibility enhances functional movement patterns and overall physical performance. Physiologically, Goddess Pose stimulates the pelvic floor muscles, improves circulation in the lower body, and enhances joint mobility. The posture also promotes deep breathing and encourages mental focus, which contributes to relaxation and stress reduction. In addition to its physical benefits, Goddess Pose cultivates confidence, resilience, and mindfulness. Holding the posture requires concentration and controlled breathing, helping practitioners develop both physical endurance and mental stability. 2. Word Meaning and Etymology The Sanskrit name Utkata Konasana is derived from three words: Utkata – Powerful, intense, or fierceKona – AngleAsana – Posture or seat Thus, Utkata Konasana can be translated as “Fierce Angle Pose” or “Powerful Angle Pose.” Symbolic Meaning The name reflects the strength and stability required to maintain the pose. In yogic symbolism, the posture represents the energy of the divine feminine, often associated with strength, nurturing power, and grounding energy. The open stance symbolizes openness and receptivity, while the bent knees represent stability and strength. 3. Definition of Goddess Pose Goddess Pose is a standing yoga posture in which the practitioner assumes a wide stance with the feet turned outward, bends the knees deeply, and lowers the hips while maintaining an upright torso and open chest. Key Characteristics The pose combines strength, stability, and hip opening. 4. Method of Practice (Step-by-Step) Starting Position Step-by-Step Instructions Step 1 – Step the Feet Wide Inhale and step the feet about 3–4 feet apart. Step 2 – Turn the Feet Outward Rotate both feet outward at approximately 45 degrees. Step 3 – Bend the Knees Exhale and bend the knees slowly while lowering the hips. Step 4 – Align the Knees Ensure that the knees track in the same direction as the toes. Step 5 – Position the Arms Lift the arms to shoulder level and bend the elbows, creating a cactus or goalpost shape. Step 6 – Engage the Core Draw the abdominal muscles inward to stabilize the torso. Step 7 – Maintain the Pose Hold the posture for 5–10 breaths. Step 8 – Release the Pose Straighten the legs and bring the feet together to return to the starting position. 5. Alignment Cues Proper alignment ensures safety and effectiveness. Feet Knees Hips Spine Shoulders 6. Preparatory Practices Recommended Preparatory Poses These poses prepare the hips, legs, and pelvis for Goddess Pose. 7. Counterposes Recommended Counterposes These poses help release tension in the hips and thighs. 8. Modifications Beginner Modification Reduce the depth of the squat. Support Variation Place hands on thighs for support. Wall Support Practice with the back against a wall for stability. Chair Variation Use a chair to support the hips. 9. Muscles Involved Primary Muscles Secondary Muscles These muscles stabilize the posture and support the movement. 10. Kinesiology Kinesiology studies the relationship between muscles and movement. Joint Actions Hip – abduction and external rotationKnee – flexionAnkle – stabilization Muscle Activation The quadriceps control knee flexion while the gluteal muscles stabilize the hips. 11. Kinematics Kinematics describes the movement of body segments. Plane of Motion Movement primarily occurs in the frontal plane. Axis of Motion The primary axis of movement is the anteroposterior axis. Segmental Movement The lower limbs move while the spine remains stable. 12. Biomechanics Biomechanics examines the forces acting on the body. Weight Distribution Body weight is distributed evenly between both legs. Joint Stability The hip and knee joints must maintain stability to prevent injury. Center of Gravity Lowering the hips shifts the center of gravity downward, enhancing stability. 13. Functional Anatomy Hip Joint The hip joint allows abduction and external rotation. Knee Joint The knee joint supports body weight during flexion. Pelvic Region The pelvis stabilizes the body during the posture. 14. Physiological Effects Musculoskeletal System Circulatory System The pose enhances blood circulation in the lower limbs. Nervous System The posture improves balance and body awareness. Respiratory System Maintaining an upright torso allows deep breathing. 15. Benefits Physical Benefits Therapeutic Benefits Mental Benefits 16. Contraindications Individuals with the following conditions should practice cautiously: Safety Considerations 17. Teaching and Adjustment Techniques Verbal Instructions Teachers should guide students to: Observational Teaching Teachers should observe: Hands-On Adjustments Teachers may gently: Adjustments should always be safe and respectful. 18. Common Mistakes and Corrections Knees Collapsing Inward Correction: press the knees outward. Leaning Forward Correction: lift the chest and engage the core. Heels Lifting Off the Floor Correction: distribute weight evenly. 19. Integration in Yoga Practice Goddess Pose is commonly included in: It also serves as a preparation for deeper hip-opening poses. 20. Conclusion Goddess Pose (Utkata Konasana) is a powerful standing yoga posture that develops strength,

Read More »

Utthan Pristhasana (Winged Dragon(Winged Dragon Pose)

1. Introduction Hip-opening postures are an essential component of yoga practice because they improve mobility in the pelvis and hips, enhance circulation, and release tension stored in the lower body. One powerful posture within this category is Winged Dragon Pose, a dynamic and deep hip-opening variation of Dragon Pose, which itself is closely related to Lizard Pose (Utthan Pristhasana). Winged Dragon Pose is commonly practiced in Yin Yoga, Vinyasa Yoga, and mobility-focused yoga styles. The posture involves stepping one foot forward into a deep lunge while the front knee opens outward and the arms extend like wings to maintain balance and expansion through the chest. The name “Winged Dragon” reflects both the strength and fluidity of the posture, as the arms resemble the wings of a dragon spreading wide while the lower body remains grounded and powerful. From a functional perspective, Winged Dragon Pose targets the hip joints, which are among the largest and most complex joints in the human body. The posture stretches the hip flexors of the back leg while simultaneously opening the hip joint of the front leg through external rotation and abduction. Modern lifestyles often involve long periods of sitting, which can lead to shortened hip flexors, reduced hip mobility, and tightness in the lower back. Winged Dragon Pose directly counteracts these issues by promoting hip flexibility and pelvic mobility. The posture also challenges balance and coordination. By widening the arms and maintaining an upright torso, practitioners must engage stabilizing muscles in the core and legs. From an anatomical perspective, the posture activates multiple muscle groups including: • hip flexors• gluteal muscles• quadriceps• hamstrings• spinal stabilizers The pose also improves joint mobility in the hips and ankles while strengthening the legs. Energetically, hip-opening postures are often associated with releasing emotional tension stored in the body. In yogic philosophy, the hip region is connected with the Svadhisthana Chakra, the energy center related to creativity, emotional expression, and fluidity. Winged Dragon Pose therefore has benefits that extend beyond the physical body. It can encourage emotional release, improved body awareness, and a sense of openness and stability. . 2. Word Meaning (Etymology) Winged Dragon Pose does not have a direct classical Sanskrit name but is derived from Dragon Pose, which itself is related to Utthan Pristhasana. Utthan Pristhasana Utthan – intense stretch or extensionPristha – back or spineAsana – posture Utthan Pristhasana is commonly translated as “Intense Back Stretch Pose.” Symbolic Meaning Dragon symbolizes power, strength, and transformation in many cultural traditions. In yoga practice, Dragon poses represent deep stretching and strong grounding through the legs. The addition of “Winged” refers to the extended arms that create expansion through the chest and shoulders. Thus, Winged Dragon Pose can be interpreted symbolically as: “A powerful grounded posture with expansive upper-body energy.” 3. Definition of the Pose Winged Dragon Pose is a deep hip-opening yoga posture performed in a low lunge position where the front knee opens outward and the arms extend laterally like wings while the torso remains upright, creating a balance between grounding in the lower body and expansion in the upper body. Key characteristics include: • deep lunge• external hip rotation• chest expansion• arm extension• core stabilization The posture is considered intermediate in intensity due to the deep hip stretch. 4. Method of Practice (Step-by-Step) Starting Position Step 1: Step the Foot Forward Step 2: Lower the Back Knee Step 3: Open the Front Knee Step 4: Lift the Torso Step 5: Extend the Arms Step 6: Maintain the Pose Step 7: Hold the Posture Step 8: Exit the Pose Step 9: Repeat 5. Alignment Cues Correct alignment ensures safety and effectiveness. Front Foot • Keep the foot firmly grounded. Front Knee • Allow the knee to move outward but avoid excessive strain. Back Leg • Extend the leg fully behind you. Hips • Lower the hips toward the floor. Spine • Maintain a long and upright spine. Arms • Extend arms evenly to both sides. Shoulders • Relax shoulders away from the ears. 6. Benefits 1. Deep Hip Opening Winged Dragon Pose stretches the hip joints and improves flexibility. 2. Strengthens the Legs The posture activates the quadriceps and gluteal muscles. 3. Improves Spinal Posture Maintaining an upright torso strengthens the back muscles. 4. Enhances Balance Extending the arms challenges balance and coordination. 5. Increases Pelvic Mobility Improved pelvic mobility supports better movement patterns. 6. Improves Circulation The posture stimulates blood flow in the lower body. 7. Releases Emotional Tension Hip-opening postures may help release stored emotional stress. 7. Contraindications Knee Injuries Avoid deep lunges if knee pain is present. Hip Injuries Modify the posture to reduce strain. Lower Back Pain Maintain core engagement to protect the spine. Pregnancy Practice gentle modifications. 8. Counterposes Counterposes help restore balance after deep hip opening. Recommended counterposes include: • Child’s Pose• Downward Facing Dog• Gentle spinal twists 9. Preparatory Practices Helpful preparatory poses include: • Low Lunge• Lizard Pose• Pigeon Pose• Hip circles 10. Modifications Use Yoga Blocks Place hands on blocks for support. Reduce Knee Opening Keep the front knee closer to the midline. Support the Back Knee Place a blanket under the knee. Keep Hands on the Floor Avoid extending arms if balance is difficult. 11. Muscles Involved Primary Muscles • Hip flexors• Gluteus maximus• Quadriceps Secondary Muscles • Hamstrings• Adductor muscles• Erector spinae Stabilizing Muscles • Core muscles• Shoulder stabilizers• Ankle stabilizers 12. Kinesiology Kinesiology examines muscle movement. Front Hip Performs external rotation and flexion. Back Hip Performs extension. Knee Joint Front knee performs flexion. Shoulder Joint Arms perform horizontal abduction. 13. Kinematics Kinematics studies body movement. Plane of Motion Movement occurs mainly in the sagittal and frontal planes. Type of Movement Combination of static lunge and dynamic upper-body expansion. 14. Biomechanism Biomechanics explains the forces acting on the body. Base of Support Formed by: • front foot• back knee Center of Gravity Located near the pelvis. Load Distribution Weight distributed between the front leg and back knee. 15. Functional Anatomy & Physiology Musculoskeletal System Strengthens

Read More »

Utkata Konasana – Namaste (Goddess Pose – Namaste)

1. Introduction Goddess Pose Variation Namaste is a powerful standing posture practiced in many styles of yoga. The pose is derived from the traditional wide-legged squat known as Utkata Konasana, commonly called Goddess Pose. In this variation, the practitioner brings the palms together in the prayer gesture (Namaste or Anjali Mudra) at the chest while maintaining the squat. The posture is characterized by a wide stance, bent knees, and an upright torso. The legs are externally rotated, and the knees bend deeply as the hips lower toward the floor. The palms pressed together at the heart center create a sense of grounding and focus. The name “Goddess Pose” reflects the symbolic connection with divine feminine energy, strength, and stability. In yogic symbolism, the posture represents empowerment, grace, and inner strength. Goddess Pose is widely used in modern yoga practice because it strengthens the legs, hips, and core while improving flexibility in the groin and inner thighs. The pose also builds endurance in the lower body and enhances balance. In many yoga sequences, this posture appears in standing flows, strength-building practices, and hip-opening sequences. The Namaste variation adds a meditative component, encouraging awareness and concentration. From a biomechanical perspective, Goddess Pose develops hip mobility, knee stability, and ankle strength. It also encourages proper alignment of the pelvis and spine. Energetically, the posture is believed to stimulate the lower energy centers of the body, especially the Muladhara Chakra and Svadhisthana Chakra, which relate to grounding, creativity, and vitality. Psychologically, Goddess Pose encourages confidence and emotional stability. The open, expansive stance can promote feelings of empowerment and courage. When practiced with proper alignment and awareness, Goddess Pose Variation Namaste becomes a powerful posture for strength, balance, and inner focus. 2. Word Meaning and Etymology The Sanskrit name Utkata Konasana contains several meaningful components. Utkata Utkata means powerful, intense, or fierce. Kona Kona means angle. Asana Asana means posture or seat. Namaste / Anjali Mudra Namaste refers to the gesture of bringing the palms together at the heart center, symbolizing respect and unity. Full Meaning Utkata Konasana can be translated as: “The Powerful Angle Pose.” The Namaste variation refers to the addition of the prayer hand gesture. 3. Definition Goddess Pose Variation Namaste is a standing wide-legged squat posture in which: The posture emphasizes hip opening, leg strength, and balance. 4. Preparatory Practices Several yoga poses prepare the body for Goddess Pose. Standing Alignment Mountain Pose develops posture awareness. Hip Opening Garland Pose prepares the hips and groin. Leg Strengthening Warrior II builds strength in the legs. Wide-Leg Preparation Wide-Legged Forward Fold stretches the inner thighs. These poses help prepare the hips and legs. 5. Method of Practice (Step-by-Step) Step 1: Starting Position Begin in Tadasana. Stand upright with feet together. Step 2: Step the Feet Wide Step the feet wide apart. Turn the toes slightly outward. Step 3: Bend the Knees Exhale and bend the knees. Lower the hips toward a squat. Step 4: Align the Knees Ensure the knees track over the toes. Avoid letting them collapse inward. Step 5: Bring Hands to Namaste Bring the palms together at the chest in prayer position. Relax the shoulders. Step 6: Lengthen the Spine Keep the spine upright. Lift the chest. Step 7: Hold the Pose Maintain the posture for 5–10 breaths. Focus on steady breathing. Step 8: Release Straighten the legs. Bring the feet together and return to Tadasana. 6. Alignment Cues Head and Neck Keep the head aligned with the spine. Gaze forward. Shoulders Relax the shoulders. Draw the shoulder blades slightly down. Spine Maintain a neutral spine. Avoid leaning forward excessively. Hips Lower the hips while maintaining stability. Knees Track the knees in line with the toes. Feet Press evenly through both feet. 7. Muscles Involved Primary Muscles Secondary Muscles Stabilizing Muscles These muscles maintain stability and balance. 8. Kinesiology Kinesiology studies how muscles produce movement. Hip Joint Movement: abduction and external rotation Knee Joint Movement: flexion Ankle Joint Movement: stabilization Spine Movement: neutral stabilization Muscles work both dynamically and isometrically. 9. Kinematics Kinematics studies movement patterns. Movements Involved Movement Type The pose involves controlled descent followed by a static hold. 10. Biomechanism Biomechanics explains how forces act in the posture. Base of Support The base of support is formed by the two feet placed wide apart. Center of Gravity The center of gravity lowers as the hips descend. Force Distribution Weight is distributed evenly between both legs. Joint Mechanics The hips rotate externally while the knees bend. 11. Functional Anatomy & Physiology Musculoskeletal System The posture strengthens the muscles of the legs and hips. Nervous System Improves balance and coordination. Circulatory System Encourages blood circulation in the lower body. Respiratory System The upright torso allows free breathing. Energetic Perspective Goddess Pose stimulates: These energy centers relate to stability and creativity. 12. Benefits Physical Benefits Physiological Benefits Mental Benefits 13. Contraindications This posture should be avoided or modified in individuals with: Students with knee pain should reduce squat depth. 14. Modifications Use a Chair Sit lightly on a chair while practicing. Reduce Squat Depth Bend the knees only slightly. Wall Support Practice with the back against a wall. Hands on Hips Instead of Namaste, place hands on hips. These modifications make the pose accessible. 15. Counterposes After practicing Goddess Pose, the following poses help release the legs and hips. These poses relax the muscles and restore balance. 16. Teaching Methodology Teaching Goddess Pose requires careful instruction. Demonstration Teacher demonstrates the wide stance and squat. Step-by-Step Guidance Explain each step clearly. Breath Awareness Encourage slow breathing during the hold. 17. Common Mistakes Knees Collapsing Inward Students may bring knees inward. Correction: track knees over toes. Leaning Forward Students may lean excessively. Correction: lift the chest. Shoulder Tension Students may raise the shoulders. Correction: relax the shoulders. 18. Adjustments and Corrections While Teaching Verbal Corrections Examples include: Visual Demonstration Teacher demonstrates the correct alignment. Hands-on Adjustments With permission, the teacher may: Adjustments must be gentle and safe. 19. Safety Considerations Teachers should

Read More »

Upavistha Jathara Parivartanasana(Seated Windshield Wiper Pose)

1. Introduction Seated Windshield Wiper Pose, traditionally referred to as Upavistha Jathara Parivartanasana, is a dynamic seated twisting posture commonly practiced in modern yoga sequences to improve hip mobility, spinal rotation, and neuromuscular coordination. The movement resembles the motion of a windshield wiper moving from side to side, which is why the pose is widely known by its descriptive English name. In this posture, the practitioner sits on the floor with the knees bent and feet placed on the ground. The legs then move together from one side to the other in a controlled rotational movement while the pelvis and spine maintain alignment. The movement emphasizes internal and external rotation of the hip joints, gentle spinal stabilization, and coordinated muscular engagement. Seated Windshield Wiper Pose is commonly incorporated into Hatha Yoga, Vinyasa Yoga, functional yoga training, and therapeutic mobility practices. Unlike static yoga postures, this movement is often performed dynamically, which helps develop joint lubrication, flexibility, and muscular control. Because modern lifestyles often involve prolonged sitting and limited hip movement, this pose can help restore functional mobility in the hip joints and lower spine. From an anatomical perspective, the posture primarily involves the hip joints, pelvis, and core muscles. The alternating movement of the legs requires coordinated action between the hip rotators, adductors, and abductors. At the same time, the spine remains relatively stable while the pelvis moves slightly with the rotation of the legs. Biomechanically, the pose emphasizes transverse plane motion through the rotation of the hips. This type of movement is essential for maintaining healthy joint function, particularly in the hips, which are designed to move in multiple directions. Physiologically, the movement can improve joint mobility, circulation, and muscular balance. It may also reduce stiffness in the hips and lower back, which are common areas of tension in sedentary individuals. Energetically, twisting and rotational movements in yoga are associated with detoxification and energy flow. The abdominal region stimulated during this movement corresponds with the Manipura Chakra (solar plexus energy center), which is linked to digestion, metabolism, and vitality. 2. Word Meaning and Etymology The Sanskrit name Upavistha Jathara Parivartanasana can be analyzed as follows: Upavistha – seatedJathara – abdomen or stomachParivartana – turning, twisting, or rotationAsana – posture Thus, the full meaning can be interpreted as “Seated Abdominal Twisting Pose.” Symbolic Meaning The name reflects the twisting action around the abdominal region, which is believed in traditional yoga practice to stimulate digestion and cleanse internal organs. The dynamic nature of the pose represents fluidity, adaptability, and coordinated movement. The English name Windshield Wiper Pose describes the movement pattern, where both legs move from side to side like the blades of a windshield wiper. 3. Definition of the Pose Seated Windshield Wiper Pose is a dynamic seated yoga movement in which both legs move together from side to side while the knees remain bent, creating rotational movement in the hips and gentle engagement of the abdominal muscles. Key Characteristics This pose is widely used to increase hip flexibility, improve spinal stability, and enhance joint mobility. 4. Method of Practice (Step-by-Step) Starting Position Step-by-Step Instructions Step 1 – Establish Upright Posture Sit tall with the spine lengthened and shoulders relaxed. Step 2 – Place Hands Behind the Body Position the hands slightly behind the hips for support. Step 3 – Activate the Core Engage the abdominal muscles gently to stabilize the spine. Step 4 – Move the Knees to One Side Slowly lower both knees toward the right side of the mat. Step 5 – Maintain Control Keep the movement slow and controlled without collapsing the torso. Step 6 – Return to Center Bring the knees back to the starting position. Step 7 – Move to the Opposite Side Lower both knees toward the left side. Step 8 – Continue Alternating Repeat the movement rhythmically from side to side. Step 9 – Maintain Steady Breathing Inhale in the center and exhale during rotation. Step 10 – End the Practice Return to the neutral seated position and relax the legs. 5. Alignment Cues Correct alignment ensures safe and effective practice. Spine Maintain a neutral and upright spine. Pelvis Allow slight pelvic rotation but avoid excessive collapsing. Knees Keep the knees bent and moving together. Feet Keep the feet grounded on the floor. Shoulders Relax the shoulders and avoid leaning excessively backward. 6. Preparatory Practices The following practices prepare the body for Seated Windshield Wiper Pose. Seated Knee Bends Improve knee and hip mobility. Gentle Hip Rotations Prepare the hip joints for rotational movement. Cat–Cow Pose Warm up the spine. Supine Knee Drops Introduce gentle spinal rotation. 7. Counterposes After practicing Seated Windshield Wiper Pose, counterposes help restore balance. Seated Forward Fold Lengthens the hamstrings and spine. Gentle Backbend Opens the front body. Supine Relaxation Allows the muscles to relax. 8. Modifications Hand Support Place hands closer to the body for additional support. Smaller Range of Motion Reduce the depth of the knee movement. Cushion Under Hips Sit on a folded blanket for better posture. Slow Movement Practice the pose slowly to improve control. 9. Muscles Involved Primary Muscles Gluteus mediusGluteus minimusHip rotatorsRectus abdominis Secondary Muscles ObliquesAdductorsErector spinaeHip flexors These muscles coordinate to control the rotational movement. 10. Kinesiology Kinesiology studies how muscles produce movement. Joint Actions Hip – internal and external rotationKnee – flexion maintainedSpine – stabilization with minimal rotation Muscle Function The hip rotators control the movement while the abdominal muscles stabilize the torso. 11. Kinematics Kinematics analyzes movement patterns without considering forces. Plane of Motion The movement occurs primarily in the transverse plane. Axis of Rotation The rotation occurs around a vertical axis through the hip joints. Movement Pattern The motion alternates rhythmically between internal and external hip rotation. 12. Biomechanics Biomechanics examines forces acting on the body during movement. Base of Support The base of support includes: Center of Gravity The center of gravity remains relatively stable due to seated positioning. Load Distribution Body weight is distributed through the pelvis and sitting bones. 13. Functional Anatomy Hip

Read More »

Urdhva Mukha Pasasana Flow(Thread the Needle Pose Flow)

1. Introduction Thread the Needle Pose Flow is a dynamic yoga movement that integrates spinal rotation, shoulder mobility, and core stabilization. In yoga terminology, it is often associated with Urdhva Mukha Pasasana Flow, a variation involving twisting and threading the arm beneath the torso while moving through a controlled sequence. The movement is frequently practiced in Vinyasa Yoga, Hatha Yoga, and therapeutic yoga programs, where it serves to improve spinal flexibility, release tension in the shoulders, and promote neuromuscular coordination. Modern lifestyles involve prolonged sitting, repetitive movements, and limited spinal rotation. As a result, many individuals experience stiffness in the thoracic spine, restricted shoulder mobility, and muscular imbalance around the neck and upper back. Thread the Needle Flow helps address these issues by introducing gentle rotational movement combined with stabilization of the core and shoulders. The flow is commonly practiced from Tabletop Pose (Bharmanasana), where one arm reaches upward and then threads underneath the body, creating a rotational stretch through the thoracic spine. When practiced as a flow, the movement alternates between thoracic extension and rotation, encouraging fluid mobility of the spine and shoulders. From an anatomical perspective, Thread the Needle Flow affects several key structures including the thoracic spine, scapulae, shoulder joint, abdominal muscles, and paraspinal muscles. The movement mobilizes the thoracic vertebrae, stretches the posterior shoulder muscles, and activates the stabilizing muscles of the trunk. From a biomechanical standpoint, the pose involves axial rotation of the spine, which is essential for maintaining spinal health. The thoracic spine is particularly designed for rotational movement due to its articulation with the rib cage. However, sedentary habits often restrict this movement, making rotational yoga poses valuable for maintaining functional mobility. Physiologically, the movement promotes improved blood circulation to the spinal muscles, enhances respiratory function by mobilizing the rib cage, and stimulates the nervous system through coordinated movement patterns. Beyond its physical benefits, Thread the Needle Flow also cultivates mind-body awareness. The coordinated movement of breath and rotation encourages practitioners to move with mindfulness and control. This contributes to stress reduction and improved body awareness. 2. Word Meaning and Etymology The Sanskrit term Urdhva Mukha Pasasana can be analyzed as follows: Urdhva – UpwardMukha – Face or facingPasa – Noose, binding, or loopAsana – Posture The term Pasasana traditionally refers to Noose Pose, which involves a twisting motion of the spine. In the context of Thread the Needle Flow, the movement resembles the action of threading a needle, where the arm passes underneath the body like a thread passing through the eye of a needle. Symbolic Meaning The symbolic meaning of threading the needle represents: In yoga philosophy, twisting poses are often associated with detoxification, spinal rejuvenation, and internal cleansing. 3. Definition of Thread the Needle Pose Flow Thread the Needle Pose Flow is a dynamic rotational yoga sequence performed from a quadruped position in which one arm reaches upward and then threads underneath the torso while the spine rotates and the shoulders stretch. Key Characteristics The pose may be practiced statically or as a flowing movement repeated several times. 4. Method of Practice (Step-by-Step) Starting Position Step-by-Step Flow Step 1 – Inhale: Reach the Arm Upward Extend the right arm upward toward the ceiling while rotating the chest open. Step 2 – Expand the Chest Allow the rib cage to open while maintaining stability in the supporting arm. Step 3 – Exhale: Thread the Arm Bring the right arm underneath the body, passing it between the left arm and left knee. Step 4 – Rotate the Spine Lower the right shoulder toward the floor while gently rotating the thoracic spine. Step 5 – Rest the Head Place the right shoulder and side of the head on the mat. Step 6 – Maintain the Position Hold the stretch for several breaths. Step 7 – Return to Starting Position Press into the supporting hand and rotate the torso back to Tabletop Pose. Step 8 – Repeat Repeat the movement 5–8 times before switching sides. 5. Alignment Cues Proper alignment enhances safety and effectiveness. Hands Shoulders Spine Hips Neck 6. Preparatory Practices Preparatory movements help warm up the spine and shoulders. Recommended Preparatory Asanas These poses increase mobility of the spine and shoulders. 7. Counterposes Counterposes help neutralize the spine after twisting. Recommended Counterposes These poses restore spinal neutrality. 8. Modifications and Variations Beginner Modification Place a yoga block under the shoulder for support. Gentle Variation Keep the threaded arm elevated instead of resting it fully on the floor. Advanced Variation Extend the top arm overhead while holding the twist. Restorative Variation Support the head with a pillow or blanket. 9. Muscles Involved Primary Muscles Secondary Muscles These muscles stabilize the spine and facilitate rotation. 10. Kinesiology Kinesiology examines the relationship between muscles and movement. Joint Actions Spine – axial rotationShoulder – horizontal adduction and rotationScapula – protraction and retraction Muscle Activity The oblique abdominal muscles create rotational force. The shoulder stabilizers maintain joint integrity. 11. Kinematics Kinematics studies movement without considering forces. Plane of Motion Primary movement occurs in the transverse plane. Axis of Motion Rotation occurs around the vertical axis of the spine. Segmental Motion The thoracic vertebrae rotate while the lumbar spine remains relatively stable. 12. Biomechanics Biomechanics analyzes forces acting on the body. Spinal Mechanics The thoracic spine allows approximately 35 degrees of rotation, making it the primary contributor to twisting movements. Shoulder Mechanics The supporting shoulder experiences compressive forces while stabilizing the body. Core Mechanics The abdominal muscles control rotational movement and prevent excessive spinal strain. 13. Functional Anatomy Thoracic Spine The thoracic vertebrae articulate with the rib cage, allowing controlled rotational movement. Shoulder Joint The shoulder is a ball-and-socket joint with a wide range of motion. Scapular Stabilization Muscles such as the serratus anterior and trapezius stabilize the scapula during the pose. 14. Physiological Effects Musculoskeletal System Nervous System Respiratory System Thoracic rotation expands the rib cage and improves breathing capacity. Circulatory System The twisting motion promotes circulation in spinal tissues. 15. Benefits Physical Benefits Therapeutic Benefits

Read More »

Urdhva Mukha Pasasana Flow Supta Baddha Konasana(Thread the Needle Pose Flow to Reclining Bound Angle Pose)

1. Introduction Yoga practice often integrates dynamic movements and restorative postures to create balance between effort and relaxation. One such effective combination is the Thread the Needle Pose Flow transitioning into Reclining Bound Angle Pose (Supta Baddha Konasana). This sequence combines spinal rotation, shoulder mobility, and hip opening with deep relaxation, making it valuable in both traditional Hatha Yoga and modern therapeutic yoga practice. Thread the Needle Pose Flow is a dynamic spinal rotation performed from a quadruped position. It gently mobilizes the thoracic spine, stretches the shoulders, and activates the core muscles. After performing this dynamic movement, practitioners may transition into Supta Baddha Konasana, a restorative posture that opens the hips and encourages deep diaphragmatic breathing. The integration of these two poses creates a balanced yoga sequence that moves from activity to relaxation. While Thread the Needle stimulates spinal mobility and muscular activation, Supta Baddha Konasana promotes parasympathetic relaxation and internal awareness. From an anatomical perspective, the sequence influences multiple body systems. Thread the Needle primarily affects the thoracic spine, scapulae, and shoulder joints, whereas Supta Baddha Konasana focuses on the hips, pelvic region, and respiratory system. Together, they enhance flexibility, circulation, and neuromuscular coordination. Biomechanically, Thread the Needle involves axial rotation of the spine, whereas Supta Baddha Konasana emphasizes hip abduction and external rotation. These contrasting movements promote balanced mobility across the body’s major joints. Physiologically, the sequence stimulates blood circulation, improves breathing efficiency, and encourages relaxation of the nervous system. The restorative nature of Supta Baddha Konasana helps calm the mind, reduce stress, and enhance mental clarity. 2. Word Meaning and Etymology Thread the Needle Pose The movement resembles the action of passing a thread through the eye of a needle. Sanskrit Association: Urdhva Mukha Pasasana Urdhva – UpwardMukha – FacePasa – Noose or bindingAsana – Posture Although Pasasana traditionally refers to a twisting pose, the threaded movement in yoga resembles the action of twisting and binding the body. Supta Baddha Konasana The Sanskrit name consists of four components: Supta – Reclining or lying downBaddha – Bound or tiedKona – AngleAsana – Posture Thus, Supta Baddha Konasana means “Reclining Bound Angle Pose.” The posture resembles a relaxed position where the soles of the feet come together and the knees fall outward. 3. Definition of the Pose Flow The Thread the Needle to Supta Baddha Konasana Flow is a yoga sequence in which the practitioner performs spinal rotational movements in a quadruped position and then transitions into a supine hip-opening posture for relaxation and breath awareness. Key Characteristics Thread the Needle Phase: Supta Baddha Konasana Phase: This combination promotes mobility followed by relaxation. 4. Method of Practice (Step-by-Step) Part 1: Thread the Needle Pose Flow Starting Position Step-by-Step Flow Step 1 – Inhale Lift the right arm toward the ceiling and rotate the chest open. Step 2 – Expand the Rib Cage Allow the thoracic spine to rotate while keeping the hips stable. Step 3 – Exhale Thread the right arm underneath the body between the left hand and left knee. Step 4 – Lower the Shoulder Bring the right shoulder and side of the head toward the floor. Step 5 – Hold Maintain the twist for 3–5 breaths. Step 6 – Return Press through the supporting hand and return to Tabletop Pose. Step 7 – Repeat Repeat 5–8 times before switching sides. Part 2: Transition to Supta Baddha Konasana Step 1 – Sit Upright Come to a seated position. Step 2 – Bring the Feet Together Join the soles of the feet and allow the knees to drop outward. Step 3 – Recline Slowly lower the torso onto the floor. Step 4 – Position the Arms Place the arms beside the body or on the abdomen. Step 5 – Relax Stay in the pose for 3–5 minutes with deep breathing. 5. Alignment Cues Thread the Needle Pose Supta Baddha Konasana 6. Preparatory Practices Recommended Preparatory Asanas These movements prepare the spine, shoulders, and hips. 7. Counterposes After Thread the Needle After Supta Baddha Konasana 8. Modifications Thread the Needle Modification Supta Baddha Konasana Modification Neck Support Restorative Variation 9. Muscles Involved Thread the Needle Pose Primary muscles: Secondary muscles: Supta Baddha Konasana Primary muscles stretched: Secondary muscles relaxed: 10. Kinesiology Kinesiology studies muscle actions during movement. Thread the Needle Spinal movement: axial rotationShoulder movement: horizontal adductionScapular movement: protraction Supta Baddha Konasana Hip movement: abduction and external rotation 11. Kinematics Kinematics describes movement patterns. Thread the Needle Plane of motion: transverse planeAxis: vertical axis of the spine Supta Baddha Konasana Plane of motion: frontal planeAxis: anteroposterior axis 12. Biomechanics Spinal Rotation The thoracic spine allows approximately 30–35 degrees of rotation. Hip Joint Mechanics The hip joint is a ball-and-socket joint, allowing wide range of motion. Load Distribution During Thread the Needle, body weight is partially supported by the hands and knees. In Supta Baddha Konasana, the body weight is evenly distributed across the back. 13. Functional Anatomy Thoracic Spine The thoracic spine supports rotational movement due to rib cage articulation. Shoulder Joint The glenohumeral joint enables wide range of arm movement. Hip Joint The hip joint allows abduction and external rotation. 14. Physiological Effects Nervous System The sequence promotes relaxation and reduces stress. Respiratory System Supta Baddha Konasana improves diaphragmatic breathing. Circulatory System Spinal movement enhances blood circulation. Digestive System The hip opening posture stimulates abdominal organs. 15. Benefits Physical Benefits Therapeutic Benefits Mental Benefits 16. Contraindications Individuals with the following conditions should practice cautiously: Pregnant individuals should modify Supta Baddha Konasana with support. 17. Teaching and Adjustment Techniques Verbal Cues Teachers should guide students to: Observational Teaching Teachers should observe: Hands-On Adjustments Teachers may gently: Adjustments must always be gentle and respectful. 18. Common Mistakes and Corrections Collapsing Shoulder Correction: engage shoulder stabilizers. Over-Twisting the Lower Back Correction: focus rotation in the thoracic spine. Knee Discomfort in Supta Baddha Konasana Correction: place blocks under the knees. 19. Integration in Yoga Practice This sequence is commonly included in: The flow effectively combines mobility and relaxation. 20. Conclusion

Read More »

Urdhva Hastasana (Palm Tree Pose)

1. Introduction Palm Tree Pose, known in Sanskrit as Urdhva Hastasana, is a fundamental standing yoga posture practiced in many schools of yoga including Hatha Yoga, Vinyasa Yoga, Ashtanga Yoga, and Surya Namaskar (Sun Salutation) sequences. Although it appears simple, this posture provides significant benefits for postural alignment, spinal elongation, breathing capacity, and body awareness. The pose involves standing upright with the arms extended overhead while maintaining stability through the feet and length through the spine. In traditional yoga practice, Urdhva Hastasana is often performed immediately after Mountain Pose (Tadasana). While Tadasana establishes grounding and alignment in the body, Palm Tree Pose introduces upward extension and expansion. This movement reflects the yogic principle of balancing grounding and elevation, where the feet root firmly into the earth while the arms and spine reach upward toward the sky. The name “Palm Tree Pose” comes from the visual similarity between the posture and the tall, upright form of a palm tree swaying gently upward. Just as a palm tree grows vertically while remaining stable at its roots, the practitioner in Urdhva Hastasana learns to maintain a strong foundation while extending upward through the spine and arms. From an anatomical perspective, Palm Tree Pose encourages spinal decompression, shoulder mobility, and engagement of the postural muscles. The pose lengthens the spine, activates the muscles of the back and shoulders, and improves coordination between the lower and upper body. Biomechanically, the posture involves shoulder flexion, spinal extension, and upward axial elongation of the spine. The feet remain grounded, providing a stable base of support, while the upper body extends vertically. The core muscles help stabilize the pelvis and spine during this movement. From a physiological standpoint, the posture encourages deep breathing and rib cage expansion, which enhances respiratory efficiency. By lifting the arms overhead, the thoracic cavity expands, allowing the lungs to fill more completely. Energetically, Palm Tree Pose is believed to stimulate the Anahata Chakra (heart center) and Vishuddha Chakra (throat center), promoting openness, vitality, and energetic balance. The upward extension also symbolizes growth, aspiration, and mental clarity. Although the posture is accessible to beginners, it still requires careful attention to alignment and breathing. Proper technique ensures that the spine lengthens safely without excessive compression in the lower back. 2. Word Meaning and Etymology The Sanskrit name Urdhva Hastasana is composed of three parts: Urdhva – upwardHasta – handAsana – posture or seat Thus, Urdhva Hastasana literally translates to “Upward Hands Pose.” Palm Tree Interpretation The English name Palm Tree Pose describes the upright, elongated posture that resembles the tall structure of a palm tree. Symbolic Meaning In yoga philosophy, the posture symbolizes: 3. Definition of Palm Tree Pose Palm Tree Pose is a standing yoga posture in which the practitioner extends the arms upward while maintaining a stable base through the feet and lengthening the spine vertically. Key Characteristics The pose emphasizes vertical alignment and expansion of the body. 4. Method of Practice (Step-by-Step) Starting Position Step-by-Step Instructions Step 1 – Ground the Feet Stand with feet hip-width apart and distribute weight evenly. Step 2 – Align the Body Lengthen the spine and relax the shoulders. Step 3 – Engage the Core Activate the abdominal muscles to stabilize the spine. Step 4 – Inhale and Raise the Arms Slowly lift both arms overhead. Step 5 – Extend the Fingers Stretch the fingers upward toward the ceiling. Step 6 – Lengthen the Spine Lift the rib cage and elongate the torso. Step 7 – Maintain Alignment Keep the neck relaxed and gaze forward or upward. Step 8 – Hold the Pose Remain in the posture for 5–10 breaths. Step 9 – Lower the Arms Exhale and slowly bring the arms down. Step 10 – Return to Mountain Pose Relax the body and return to the starting position. 5. Alignment Cues Proper alignment ensures safety and effectiveness. Feet Keep the feet grounded and parallel. Knees Maintain a slight softness in the knees. Pelvis Keep the pelvis neutral and avoid tilting forward. Spine Lengthen the spine upward without arching excessively. Shoulders Relax the shoulders away from the ears. Arms Keep the arms active and aligned with the ears. 6. Preparatory Practices Several yoga poses prepare the body for Palm Tree Pose. Mountain Pose Develops postural awareness. Shoulder Rolls Improves shoulder mobility. Standing Side Stretch Prepares the spine for extension. Gentle Backbends Improve spinal flexibility. 7. Counterposes Counterposes help restore balance after the posture. Forward Fold Relaxes the spine. Standing Relaxation Pose Allows the shoulders to rest. Child’s Pose Releases tension in the back. 8. Modifications Palm Tree Pose can be adapted for different practitioners. Hands on Hips Raise the arms only partially. Wall Support Stand with the back against a wall. Strap Between Hands Use a yoga strap to maintain arm alignment. Bent Elbows Keep the elbows slightly bent if shoulders are tight. 9. Muscles Involved Primary Muscles DeltoidsTrapeziusSerratus anteriorErector spinae Secondary Muscles Abdominal musclesGluteus mediusQuadricepsCalf muscles These muscles help maintain postural stability and upward extension. 10. Kinesiology Kinesiology examines how muscles and joints produce movement. Joint Actions Shoulder – flexionSpine – axial elongationScapula – upward rotationAnkle – stabilization Muscle Activity Shoulder muscles raise the arms while the core stabilizes the torso. 11. Kinematics Kinematics studies the motion of body segments. Plane of Motion The primary movement occurs in the sagittal plane. Axis of Motion Movement occurs around the mediolateral axis. Movement Pattern The posture involves vertical extension of the upper body. 12. Biomechanics Biomechanics studies forces acting on the body. Base of Support The base of support is formed by both feet. Center of Gravity The center of gravity remains between the feet. Force Distribution Body weight is distributed evenly through the legs. Stability Core muscles maintain spinal alignment during arm elevation. 13. Functional Anatomy Spine The spine lengthens vertically. Shoulder Joint The shoulder joint allows overhead arm movement. Rib Cage The rib cage expands during inhalation. Pelvis The pelvis stabilizes the trunk. 14. Physiological Effects Musculoskeletal System Improves posture and spinal mobility. Respiratory System

Read More »

Utkatasana on Tiptoes (Chair Pose on Tiptoes)

1. Introduction Chair Pose on Tiptoes is an advanced variation of the classical Utkatasana, where the practitioner lifts the heels and balances on the balls of the feet while maintaining the squat-like position of Chair Pose. This posture integrates strength, balance, endurance, and concentration, making it a valuable posture in both traditional yoga practice and modern functional training. This variation significantly increases the muscular engagement of the calves, ankles, thighs, and core, while also challenging the neuromuscular system responsible for balance and proprioception. In yoga teaching contexts, Chair Pose on Tiptoes is commonly used in Vinyasa flows, strength-building sequences, and balance training. From a yogic perspective, the posture stimulates energy flow in the lower chakras, especially the Muladhara Chakra and Manipura Chakra, which are associated with stability, grounding, and inner power. The posture also enhances mental focus, as maintaining stability on tiptoes requires deep concentration and controlled breathing. When practiced mindfully, it cultivates steadiness, endurance, and inner resilience. 2. Word Meaning and Etymology The name Utkatasana originates from Sanskrit. Thus, Utkatasana can be translated as “Powerful Pose” or “Fierce Pose.” When performed on tiptoes, the posture becomes an intensified variation emphasizing balance and muscular activation. Hence, Utkatasana on Tiptoes may be interpreted as: “The intense or powerful posture performed while balancing on the toes.” 3. Definition Chair Pose on Tiptoes is a dynamic standing balance posture in which the practitioner: The pose combines elements of: 4. Preparatory Practices Because the pose demands ankle mobility, leg strength, and balance, several preparatory practices are recommended. 1. Foundational Standing Postures 2. Ankle Strengthening 3. Hip and Knee Preparation 4. Core Activation 5. Method of Practice (Step-by-Step) Step 1: Starting Position Stand in Tadasana with feet hip-width apart. Step 2: Raise the Arms Inhale and raise the arms overhead. Step 3: Bend the Knees Exhale and bend the knees as if sitting on an imaginary chair. Step 4: Lift the Heels Slowly lift the heels off the floor. Balance on the balls of the feet. Step 5: Maintain Alignment Keep: Step 6: Hold the Pose Hold for 5–10 breaths. Focus on steady breathing and balance. Step 7: Release Slowly lower the heels and return to Tadasana. 6. Alignment Cues Feet Knees Hips Spine Core Arms Gaze 7. Muscles Involved Primary Muscles Secondary Muscles Stabilizing Muscles 8. Kinesiology Kinesiology studies how muscles coordinate to produce movement. In Chair Pose on Tiptoes: Knee Joint Ankle Joint Hip Joint Core Maintains spinal stability. 9. Kinematics Kinematics studies movement without considering forces. Movements involved Type of Movement 10. Biomechanism The biomechanical challenge arises from the reduced base of support. Key biomechanical factors include: 1. Center of Gravity Lowered due to knee flexion. 2. Base of Support Reduced to forefoot contact, increasing balance challenge. 3. Load Distribution Load shifts toward: 4. Force Generation Quadriceps generate force to support the body in the squat. 11. Functional Anatomy & Physiology Musculoskeletal System Strengthens: Nervous System Improves: Circulatory System Enhances blood circulation in lower limbs. Endocrine & Energy Perspective Activates Manipura Chakra, supporting inner strength and vitality. 12. Benefits Physical Benefits Physiological Benefits Mental Benefits Energetic Benefits Stimulates: 13. Contraindications This posture should be avoided or modified in individuals with: Pregnant practitioners should practice with support. 14. Modifications Beginner Modification Keep heels on the floor. Wall Support Practice with the back against a wall. Chair Support Hold a chair for balance. Block Between Knees Improves knee alignment. 15. Counterposes After practicing Chair Pose on Tiptoes, the following poses help release the muscles: These counterposes stretch the calves, hamstrings, and spine. 16. Teaching Methodology Demonstration Teacher demonstrates from the side. Verbal Instruction Clear cues for: Breath Guidance Encourage slow breathing. 17. Common Mistakes 1. Knees collapsing inward Correction: cue knee tracking. 2. Leaning too far forward Correction: lift chest. 3. Ankles collapsing Correction: activate foot arches. 4. Shoulders lifting Correction: relax shoulders. 18. Adjustments and Corrections Verbal Corrections Visual Correction Teacher demonstrates correct alignment. Hands-on Adjustment (if appropriate) Teacher may: Always ask for consent before physical adjustment. 19. Safety Considerations Teachers should monitor: Use props when needed. Encourage students to exit if they feel pain. 20. Conclusion Chair Pose on Tiptoes is a powerful and integrative posture that combines strength, stability, balance, and concentration. By challenging the practitioner’s lower-body strength and neuromuscular coordination, the posture contributes to improved physical function and body awareness.

Read More »

Virabhadrasana I Garudasana Arms(Warrior Pose I with Eagle Arms)

1. Introduction Warrior Pose I with Eagle Arms is a dynamic yoga posture that combines the strength and grounding of Virabhadrasana I (Warrior Pose I) with the shoulder-opening and upper-back stretching of Garudasana (Eagle Pose arms). This hybrid posture integrates stability in the lower body with flexibility and mobility in the upper body. Warrior Pose I is a foundational standing posture in yoga practice. It strengthens the legs, opens the hips, and builds endurance. When combined with Eagle arms, the posture becomes more complex by adding a deep stretch for the shoulders, upper back, and trapezius muscles. In modern yoga sequencing, Warrior I with Eagle Arms is often included in Vinyasa flows and therapeutic yoga sessions to improve shoulder mobility and upper back flexibility. Many practitioners experience tightness in the shoulders and upper back due to prolonged sitting, computer use, and poor posture. Eagle arms counteract this by stretching the posterior shoulder muscles. The posture also challenges coordination because the practitioner must maintain stability in the legs while creating a wrap with the arms. This dual focus enhances body awareness and balance. From an anatomical perspective, the lower body engages powerful muscles such as the quadriceps, gluteals, and hamstrings, while the upper body activates the deltoids, rhomboids, and trapezius muscles. Energetically, this posture stimulates the Manipura Chakra, associated with strength and personal power, and the Anahata Chakra, associated with emotional openness. Mentally, Warrior Pose I with Eagle Arms promotes focus, resilience, and concentration. The combination of grounding and wrapping movements encourages practitioners to remain steady while exploring new ranges of motion. When practiced regularly, this posture improves leg strength, shoulder flexibility, spinal alignment, and overall body coordination. 2. Word Meaning and Etymology Understanding the Sanskrit terminology provides deeper insight into the posture. Virabhadrasana The word Virabhadra refers to a fierce warrior created by the god Shiva in Hindu mythology. Thus, Virabhadrasana means “Pose of the Warrior Virabhadra.” Garudasana Garudasana refers to the Eagle Pose. Garudasana arms represent the wrapping motion of an eagle’s wings. Combined Meaning Warrior Pose I with Eagle Arms symbolizes strength and focus combined with flexibility and grace. 3. Definition Warrior Pose I with Eagle Arms is a standing lunge posture combined with wrapped arms, in which: The posture integrates lower-body strength with upper-body flexibility. 4. Preparatory Practices Several poses prepare the body for this posture. Standing Alignment Develops balance and posture awareness. Lunge Preparation Opens the hip flexors. Warrior Preparation Strengthens the legs. Shoulder Warm-up Prepares the shoulders. These poses warm up the hips, legs, and shoulders. 5. Method of Practice (Step-by-Step) Step 1: Starting Position Begin in Tadasana. Stand upright with feet together. Step 2: Step Back Step the left foot backward about one leg-length. Turn the back foot slightly outward. Step 3: Bend the Front Knee Bend the right knee. Ensure the knee stays above the ankle. Step 4: Square the Hips Rotate the hips forward toward the front of the mat. Step 5: Wrap the Arms Extend the arms forward. Cross the right arm over the left. Bend the elbows and wrap the forearms. Bring the palms together. Step 6: Lift the Elbows Lift the elbows to shoulder height. Step 7: Maintain the Pose Hold the posture for 5–8 breaths. Step 8: Release Unwrap the arms and step back to standing. Repeat on the opposite side. 6. Alignment Cues Head and Neck Keep the neck neutral. Gaze forward. Shoulders Lift the elbows slightly. Relax the shoulders downward. Spine Keep the torso upright. Avoid arching the lower back. Hips Square the hips toward the front. Knees Align the front knee above the ankle. Feet Press firmly through both feet. 7. Muscles Involved Primary Muscles Secondary Muscles Stabilizing Muscles These muscles stabilize the body during the posture. 8. Kinesiology Kinesiology examines how muscles produce movement. Hip Joint Movement: flexion in the front leg Knee Joint Movement: flexion in the front leg Shoulder Joint Movement: adduction and internal rotation Spine Movement: extension and stabilization 9. Kinematics Kinematics studies movement patterns. Movement Pattern Plane of Movement The posture involves movement primarily in the sagittal plane. 10. Biomechanism Biomechanics explains how forces interact with the body. Base of Support The base of support consists of both feet. Center of Gravity The center of gravity shifts toward the front leg. Joint Stability The hips and knees stabilize the posture. Muscle Engagement The core muscles maintain spinal stability. 11. Functional Anatomy & Physiology Musculoskeletal System The posture strengthens the legs and stretches the shoulders. Nervous System Enhances coordination and balance. Circulatory System Improves blood circulation. Respiratory System The upright torso supports deep breathing. Energetic Perspective The posture stimulates: These centers support vitality and emotional openness. 12. Benefits Physical Benefits Physiological Benefits Mental Benefits 13. Contraindications Avoid this posture if students have: Students with shoulder tightness should modify the arm position. 14. Modifications Use a Shorter Stance Reduce the distance between the feet. Gentle Arm Wrap Instead of full Eagle arms, hold opposite shoulders. Wall Support Practice near a wall. Use Yoga Strap Hold a strap between the hands. These modifications make the posture accessible. 15. Counterposes After practicing this posture, the following poses help release tension. These poses relax the spine and legs. 16. Teaching Methodology Teaching this posture requires clear and progressive instruction. Demonstration Teacher demonstrates the posture slowly. Step-by-Step Instruction Guide students through each stage. Breath Awareness Encourage slow breathing. 17. Common Mistakes Knee Moving Forward Correction: align the knee above the ankle. Collapsing the Chest Correction: lift the chest. Shoulders Lifting Up Correction: relax the shoulders downward. 18. Adjustments and Corrections While Teaching Verbal Corrections Examples include: Visual Demonstration Teacher demonstrates the posture again. Hands-on Adjustments With permission, the teacher may: Adjustments should always be gentle. 19. Safety Considerations Teachers should observe: Students should exit the posture if pain occurs. Props may be used when necessary. 20. Conclusion Warrior Pose I with Eagle Arms (Virabhadrasana I Garudasana Arms) is a powerful yoga posture that integrates strength, stability, and flexibility. The lower body develops endurance and grounding,

Read More »

Viparita Virabhadrasana (Reverse Warrior Pose)

Introduction Yoga asana practice integrates movement, breath, awareness, and anatomical intelligence to cultivate both physical health and mental balance. Among the many standing postures practiced in yoga, Reverse Warrior Pose (Viparita Virabhadrasana) is a dynamic and expansive posture that combines strength, flexibility, and graceful spinal movement. It is widely practiced in styles such as Hatha Yoga, Vinyasa Yoga, Power Yoga, and Ashtanga Yoga, where it often appears within standing sequences derived from Warrior II Pose. Reverse Warrior is considered a heart-opening and side-bending posture that stretches the entire side body while maintaining the strong lower-body foundation established in Warrior II. The posture develops leg strength, hip stability, spinal mobility, and shoulder openness. It also enhances breathing capacity because the side stretch expands the rib cage and intercostal muscles. The name Reverse Warrior reflects the reversal of the arm position seen in Warrior II while maintaining the same leg position. In this variation, the front arm reaches upward and backward, creating a graceful arc through the side body while the back hand rests lightly on the back leg. Despite the dramatic upper-body movement, the lower body remains strong and grounded. From an anatomical and biomechanical perspective, Reverse Warrior is particularly valuable because it integrates lower-body stabilization with upper-body mobility. The legs maintain strong engagement in the hips, knees, and ankles, while the spine moves into lateral flexion (side bending). This combination challenges the practitioner to maintain balance while creating length through the torso. The pose also plays an important role in developing functional movement patterns. It trains the body to stabilize the pelvis and legs while allowing controlled movement in the spine and rib cage. Such movement patterns are essential for daily activities like reaching, bending, and twisting. On a deeper level, Reverse Warrior Pose symbolizes strength combined with openness. The posture encourages practitioners to remain grounded through the legs while expanding through the heart and chest. This balance between stability and freedom reflects the yogic principle of “sthira and sukha”, meaning steadiness and ease. Word Meaning and Etymology The Sanskrit name Viparita Virabhadrasana consists of three components: Thus, Viparita Virabhadrasana translates to “Reversed Warrior Pose.” Mythological Background The name Virabhadra refers to a powerful warrior created by Lord Shiva in Hindu mythology. According to the legend, Shiva manifested Virabhadra from a lock of his hair to avenge the death of his beloved Sati. Virabhadra represents strength, courage, and determination. In yoga, the Warrior poses (Virabhadrasana I, II, and III) symbolize different stages of the warrior’s story and embody qualities such as focus, stability, and resilience. Reverse Warrior represents the expansive and expressive dimension of the warrior, where strength in the legs supports freedom in the upper body. Definition of Reverse Warrior Pose Reverse Warrior Pose is a standing yoga posture performed from Warrior II, in which the front arm reaches upward and backward while the back hand rests lightly on the back leg. The legs remain in the Warrior II stance while the torso moves into a lateral side bend toward the back leg. Key characteristics of the pose include: The posture combines lower-body stability with upper-body flexibility, creating a balanced and dynamic yoga pose. Method of Practice (Step-by-Step) Step 1: Starting Position Begin in Warrior II Pose. Step 2: Establish the Foundation Step 3: Reverse the Front Arm Step 4: Slide the Back Hand Down Step 5: Create a Side Bend Step 6: Lift Through the Chest Step 7: Hold the Pose Remain in the posture for 5–10 breaths while breathing deeply. Step 8: Release the Pose Alignment Cues Proper alignment ensures safety and effectiveness. Feet Front Knee Hips Spine Arms Preparatory Practices Several yoga poses prepare the body for Reverse Warrior. Warrior II Pose Develops strong leg alignment. Triangle Pose Improves side body flexibility. Side Angle Pose Enhances hip mobility. Standing Side Stretch Prepares the torso for lateral flexion. Counterposes Counterposes help balance the body after Reverse Warrior. Triangle Pose Neutralizes the side bend. Forward Fold Releases the spine and hamstrings. Mountain Pose Restores neutral posture. Modifications Reverse Warrior can be modified to suit different practitioners. Shoulder Sensitivity Keep the top hand on the hip instead of reaching upward. Balance Difficulty Shorten the stance between the feet. Knee Sensitivity Reduce the depth of the front knee bend. Neck Sensitivity Keep the gaze forward instead of upward. Benefits of Reverse Warrior Pose Reverse Warrior provides numerous physical and mental benefits. 1. Strengthens the Legs The posture strengthens the quadriceps, hamstrings, and gluteal muscles. 2. Stretches the Side Body The lateral bend stretches the intercostal muscles and obliques. 3. Improves Spinal Flexibility The side bending movement enhances spinal mobility. 4. Expands the Chest Opening the chest encourages deeper breathing. 5. Improves Balance and Coordination Maintaining stability requires strong body awareness. 6. Enhances Hip Stability The posture stabilizes the hip joints. 7. Stimulates Circulation The pose increases blood flow throughout the body. Contraindications Certain individuals should practice caution. Knee Injury Avoid deep bending of the front knee. Hip Injury Modify the stance. Shoulder Injury Avoid lifting the arm overhead. Lower Back Pain Limit the depth of the side bend. Muscles Involved Reverse Warrior activates numerous muscle groups. Leg Muscles These muscles stabilize the legs and pelvis. Core Muscles Support spinal stability. Back Muscles Assist with lateral bending. Shoulder Muscles Support the raised arm. Kinesiology Kinesiology studies muscular movement and joint actions. In Reverse Warrior Pose: Hip Joint Front hip: flexionBack hip: extension Knee Joint Front knee: flexionBack knee: extension Spine Performs lateral flexion toward the back leg. Shoulder Joint Front arm performs shoulder flexion and abduction. Kinematics Kinematics describes the movement of body parts without considering forces. Hip Movement The hips remain relatively stable. Spinal Movement The spine performs controlled side bending. Shoulder Movement The raised arm moves into overhead flexion. Biomechanics Biomechanics analyzes the forces acting on the body during movement. Base of Support The wide stance provides a strong base. Center of Gravity The center of gravity shifts slightly toward the back leg. Load Distribution Weight remains distributed through both legs. Biomechanism of the Pose Reverse Warrior functions through coordinated muscular engagement. Lower Body Stabilization Leg muscles maintain stability. Pelvic Control Core muscles stabilize the pelvis. Spinal Mobility Side bending occurs through coordinated spinal movement. Functional Anatomy and

Read More »

Vajrasana (Thunderbolt Pose)

1. Introduction Thunderbolt Pose, known in Sanskrit as Vajrasana, is one of the most fundamental seated postures in traditional yoga practice. Unlike many other seated poses that require significant hip flexibility, Vajrasana is performed by sitting on the heels with the knees bent and the spine upright. Because of its stability and simplicity, this posture is widely used for meditation, pranayama (breathing practices), and relaxation techniques in both classical Hatha Yoga and modern yoga therapy. The term “Thunderbolt Pose” reflects strength, stability, and immovability. In yogic philosophy, Vajrasana symbolizes firmness of mind and body. The posture is considered highly grounding and is often recommended after meals because it may support digestive processes. Unlike most yoga postures that should be practiced on an empty stomach, Vajrasana is traditionally known as one of the few poses safe to practice after eating. From an anatomical perspective, Vajrasana primarily involves knee flexion, ankle plantar flexion, and neutral spinal alignment. The body weight is distributed through the lower legs and feet while the spine remains vertically aligned. Although the posture appears passive, it engages several stabilizing muscles in the core, back, hips, and thighs to maintain proper posture. Biomechanically, Vajrasana creates a stable base of support by aligning the pelvis over the heels and positioning the spine vertically. This alignment promotes efficient breathing, spinal stability, and relaxation of the upper body. The posture also encourages proper alignment of the head, neck, and spine, which is essential for meditation and breathing practices. Physiologically, Thunderbolt Pose may stimulate digestive organs, improve circulation in the pelvic region, and promote relaxation of the nervous system. The upright posture facilitates diaphragmatic breathing, which can enhance respiratory efficiency and reduce stress. In therapeutic yoga, Vajrasana is often recommended for improving posture, digestion, and mental focus. Energetically, Vajrasana is associated with the root chakra (Muladhara) and the solar plexus chakra (Manipura). These energy centers are believed to influence stability, vitality, and personal power. Sitting steadily in this pose allows the practitioner to cultivate mental clarity, patience, and inner stability. 2. Word Meaning and Etymology The Sanskrit name Vajrasana is composed of two words: Vajra – Thunderbolt or diamondAsana – Posture or seat Thus, Vajrasana means “Thunderbolt Pose” or “Diamond Pose.” Symbolic Meaning In yogic philosophy, the Vajra represents strength, resilience, and indestructibility. It is also associated with a powerful spiritual weapon used by the Vedic deity Indra, symbolizing energy and illumination. Therefore, Vajrasana symbolizes steadiness, strength, and unwavering focus. 3. Definition of the Pose Thunderbolt Pose is a kneeling seated yoga posture in which the practitioner sits on the heels with the spine upright and the hands resting on the thighs. Key Characteristics The posture is widely used for meditation, breathing exercises, and relaxation. 4. Method of Practice (Step-by-Step) Starting Position Step-by-Step Instructions Step 1 – Position the Feet Place the tops of the feet on the floor with the toes pointing backward. Step 2 – Sit on the Heels Slowly lower the hips and sit on the heels. Step 3 – Align the Spine Lengthen the spine and lift the chest. Step 4 – Place the Hands Rest the hands on the thighs or knees. Step 5 – Relax the Shoulders Allow the shoulders to relax away from the ears. Step 6 – Focus on Breathing Breathe slowly and deeply. Step 7 – Maintain the Pose Hold the posture for 1–5 minutes or longer during meditation. Step 8 – Release Lean forward and gently extend the legs to come out of the pose. 5. Alignment Cues Proper alignment ensures comfort and stability. Head and Neck Spine Shoulders Hips Knees 6. Preparatory Practices The following practices prepare the body for Vajrasana. Cat-Cow Pose Improves spinal mobility. Low Lunge Stretches hip flexors. Quadriceps Stretch Releases tension in the thighs. Ankle Circles Improves ankle mobility. 7. Counterposes After practicing Vajrasana, the following poses may relieve pressure in the knees and ankles. Child’s Pose Stretches the spine and hips. Staff Pose Extends the legs forward. Gentle Knee Extensions Relieves knee tension. 8. Modifications Cushion Support Place a folded blanket between the heels and hips. Block Support Sit on a yoga block for additional height. Knee Padding Place a cushion under the knees for comfort. Wide-Knee Variation Keep the knees slightly apart. 9. Muscles Involved Primary Muscles QuadricepsTibialis anteriorErector spinaeCore stabilizers Secondary Muscles HamstringsGluteus maximusHip adductorsCalf muscles These muscles maintain stability and posture. 10. Kinesiology Kinesiology examines the relationship between muscles and joint movements. Joint Actions Knee – flexionAnkle – plantar flexionSpine – neutral extension Muscle Contractions Isometric contractions maintain the posture. 11. Kinematics Kinematics describes motion without considering forces. Plane of Movement The pose primarily occurs in the sagittal plane. Axis of Motion Knee flexion occurs around the mediolateral axis. Segmental Motion The lower limbs remain flexed while the spine remains upright. 12. Biomechanics Biomechanics analyzes the mechanical forces acting on the body. Base of Support The shins and feet provide a stable base. Center of Gravity The center of gravity is positioned over the heels. Load Distribution Body weight is distributed through the lower legs and feet. 13. Functional Anatomy Knee Joint The knee joint remains in deep flexion during the posture. Ankle Joint The ankles remain in plantar flexion. Vertebral Column The spine remains elongated and upright. Pelvic Alignment The pelvis remains neutral to support the spine. 14. Physiological Effects Digestive System The posture may stimulate digestive organs. Musculoskeletal System Strengthens postural muscles. Respiratory System Encourages diaphragmatic breathing. Nervous System Promotes relaxation and mental clarity. 15. Benefits Physical Benefits Therapeutic Benefits Mental Benefits 16. Contraindications Thunderbolt Pose should be practiced cautiously in the following conditions: Safety Guidelines 17. Teaching and Adjustment Techniques Verbal Instructions Teachers should guide students to: Observational Teaching Teachers should observe: Hands-On Adjustments Teachers may gently guide students to: Adjustments should always be respectful and consensual. 18. Common Mistakes and Corrections Slouched Spine Correction: lift the chest and lengthen the spine. Weight Shifted to One Side Correction: balance weight evenly on both heels. Tension in the Shoulders Correction: relax

Read More »

Virabhadrasana III Hasta Garudasana (Warrior Pose III with Eagle Arms)

1. Introduction Standing balancing postures are an essential part of yoga practice because they develop strength, stability, concentration, and body awareness. Among these postures, Warrior Pose III (Virabhadrasana III) is one of the most dynamic and challenging balancing poses. It requires a combination of strength, coordination, and focus to maintain stability while the body is extended horizontally. A powerful variation of this pose involves incorporating Eagle Arms (Garudasana Arms) into the Warrior III posture. This variation is commonly referred to as Warrior Pose III with Eagle Arms or Virabhadrasana III Hasta Garudasana. The addition of Eagle Arms introduces an upper-body stretch and engages the muscles of the shoulders and upper back while the lower body maintains balance and stability. Warrior III itself represents strength and determination, symbolizing the mythical warrior Virabhadra, who in yogic mythology embodies courage, discipline, and focus. The posture encourages practitioners to cultivate mental stability and physical endurance. The integration of Eagle Arms adds another layer of complexity by engaging the muscles around the shoulder blades and stretching the upper back. This arm position improves shoulder mobility and helps release tension in the trapezius and rhomboid muscles. Modern lifestyles often lead to postural imbalances such as rounded shoulders, weak core muscles, and reduced balance due to prolonged sitting and limited physical activity. Practicing postures like Virabhadrasana III Hasta Garudasana helps counteract these issues by strengthening the legs, improving spinal alignment, and enhancing neuromuscular coordination. From an anatomical perspective, this pose activates a wide range of muscles throughout the body, including the gluteal muscles, quadriceps, hamstrings, core stabilizers, and shoulder muscles. The posture requires strong engagement of the stabilizing muscles to maintain balance while the torso remains parallel to the ground. Energetically, Warrior III with Eagle Arms stimulates the Manipura Chakra (solar plexus energy center), which is associated with personal power, confidence, and determination. The pose also encourages focus and mental clarity, as balancing postures require sustained attention. 2. Word Meaning (Etymology) The Sanskrit name Virabhadrasana III Hasta Garudasana is composed of several words. Virabhadra Virabhadra is the name of a powerful warrior created by Lord Shiva in yogic mythology. Asana Asana means posture or pose. Hasta Hasta means hands or arms. Garuda Garuda refers to the eagle, the mythical bird and vehicle of Lord Vishnu. Combined Meaning Virabhadrasana III Hasta Garudasana translates to: “Warrior Pose III with Eagle Arms.” 3. Definition of the Pose Warrior Pose III with Eagle Arms is a standing balancing yoga posture in which the practitioner balances on one leg while extending the other leg backward and leaning the torso forward while the arms are wrapped in the Eagle Arm position. The posture involves: • balance on one leg• hip extension of the lifted leg• spinal elongation• shoulder protraction and stretch• core stabilization 4. Method of Practice (Step-by-Step) Starting Position Step 1: Shift the Weight Step 2: Lift the Opposite Leg Step 3: Lean Forward Step 4: Create Eagle Arms Step 5: Maintain Balance Step 6: Hold the Pose Step 7: Release Step 8: Repeat on the Other Side 5. Alignment Cues Standing Leg • Keep the knee slightly soft. Hips • Keep the hips square to the floor. Spine • Lengthen the spine forward. Shoulders • Lift the elbows slightly in Eagle Arms. Gaze • Focus the gaze on a fixed point. 6. Benefits 1. Improves Balance The pose enhances proprioception and stability. 2. Strengthens the Legs The standing leg becomes stronger. 3. Enhances Core Strength Core muscles stabilize the torso. 4. Stretches the Upper Back Eagle Arms stretch the shoulder blades. 5. Improves Posture Strengthens postural muscles. 6. Increases Concentration Balancing requires mental focus. 7. Enhances Coordination Improves neuromuscular coordination. 7. Contraindications Knee Injury Avoid balancing on an unstable knee. Shoulder Injury Avoid deep Eagle Arm wrapping. Lower Back Pain Avoid leaning too far forward. Balance Disorders Practice near a wall for support. 8. Counterposes After practicing this pose, helpful counterposes include: • Mountain Pose• Standing Forward Fold• Shoulder stretches 9. Preparatory Practices Preparatory poses include: • Warrior I• Warrior II• Eagle Arms• Standing balance poses 10. Modifications Use Wall Support Practice near a wall for stability. Keep Arms Forward Avoid Eagle Arms if shoulders are tight. Reduce the Forward Lean Maintain a higher torso position. Use a Chair Place hands on a chair for balance. 11. Muscles Involved Primary Muscles • Gluteus maximus• Hamstrings• Quadriceps Secondary Muscles • Deltoids• trapezius Stabilizing Muscles • core muscles• spinal stabilizers 12. Kinesiology Kinesiology studies muscular movement. Hip Joint Standing leg performs stabilization while the lifted leg performs extension. Shoulder Joint Performs flexion and protraction in Eagle Arms. Spine Maintains neutral extension. 13. Kinematics Kinematics describes body motion. Plane of Motion Movement occurs mainly in the sagittal plane. Type of Movement Hip extension with trunk stabilization. 14. Biomechanism Biomechanics examines forces acting on the body. Base of Support The base of support is the single standing foot. Center of Gravity Moves forward as the torso lowers. Load Distribution The standing leg bears the majority of the body weight. 15. Functional Anatomy & Physiology Musculoskeletal System The pose strengthens the legs and improves shoulder mobility. Nervous System Balancing stimulates proprioception. Circulatory System Improves circulation through muscular engagement. Respiratory System Encourages steady breathing during effort. 16. Teaching Methodology Yoga teachers should introduce the pose progressively. Step 1 Teach Eagle Arms separately. Step 2 Practice Warrior III. Step 3 Combine the arm and leg positions. 17. Common Mistakes Rotating the Hips Keep the hips square. Locking the Standing Knee Maintain a slight bend. Dropping the Chest Keep the torso active. Collapsing the Shoulders Lift the elbows slightly. 18. How to Correct and Adjust While Teaching Verbal Cues Teachers may say: • “Keep the hips level.”• “Engage the core.”• “Lift the elbows in Eagle Arms.” Hands-On Adjustments Teachers may gently: • stabilize the hips• guide the lifted leg• support shoulder alignment Use of Props Helpful props include: • yoga blocks• chairs• wall support 19. Therapeutic Applications Warrior III with Eagle Arms may help improve: • balance and

Read More »

Utthita Vajrasana (Kneeling Pose Arms Raised)

1. Introduction Kneeling Pose Arms Raised, known in Sanskrit as Utthita Vajrasana, is a foundational kneeling posture in yoga that combines stability in the lower body with upward extension of the spine and arms. This posture is derived from the classical seated yoga pose Vajrasana, often called Thunderbolt Pose or Diamond Pose. In the Utthita variation, the practitioner lifts the torso from the seated position into a kneeling stance while raising the arms overhead, creating an elongated vertical line through the body. This posture is widely used in Hatha Yoga, Vinyasa Yoga, and therapeutic yoga practices because it promotes spinal alignment, strengthens the lower body, and improves shoulder mobility. The upright kneeling position encourages proper posture while the raised arms stretch the shoulders and chest. Many modern lifestyles involve prolonged sitting, which can lead to poor posture, tight hip flexors, and reduced spinal mobility. Kneeling Pose Arms Raised helps counteract these issues by encouraging upright spinal alignment, core engagement, and chest expansion. From an anatomical perspective, the posture strengthens the quadriceps, gluteal muscles, and core muscles, while stretching the shoulders, chest, and abdominal muscles. The raised arms also activate the muscles of the upper back and shoulders. Energetically, Utthita Vajrasana stimulates the Anahata Chakra (heart center) and Manipura Chakra (solar plexus). These energy centers are associated with emotional balance, vitality, and personal power. Mentally, the posture promotes focus, grounding, and calmness. The stable kneeling position encourages mindfulness and breath awareness. When practiced regularly with correct alignment, Kneeling Pose Arms Raised improves posture, spinal flexibility, shoulder mobility, and overall body awareness 2. Word Meaning and Etymology Understanding the Sanskrit terminology provides insight into the posture. Utthita “Utthita” means extended, lifted, or raised upward. Vajra “Vajra” means thunderbolt or diamond, symbolizing strength and stability. Asana “Asana” means posture or seat. Full Meaning The name Utthita Vajrasana can be translated as: “Extended Thunderbolt Pose.” It refers to a kneeling posture derived from Vajrasana with the torso lifted and arms extended upward. 3. Definition Kneeling Pose Arms Raised (Utthita Vajrasana) is a kneeling yoga posture with arms extended overhead, in which: The posture emphasizes spinal elongation, shoulder mobility, and lower-body stability. 4. Preparatory Practices Several poses help prepare the body for this posture. Foundational Kneeling Pose Develops comfort in the kneeling position. Arm Raising Warms up the shoulders. Shoulder Opening Improves shoulder flexibility. Spinal Alignment Develops postural awareness. These poses prepare the knees, shoulders, and spine. 5. Method of Practice (Step-by-Step) Step 1: Starting Position Begin in Vajrasana. Sit on the heels with the knees together. Step 2: Lift the Torso Slowly raise the hips so that the body kneels upright. Keep the thighs vertical. Step 3: Engage the Core Gently engage the abdominal muscles. Maintain spinal stability. Step 4: Raise the Arms Inhale and lift both arms overhead. Extend the fingers upward. Step 5: Lengthen the Spine Lift the chest slightly. Lengthen the spine upward. Step 6: Hold the Pose Maintain the posture for 5–10 breaths. Step 7: Release Lower the arms slowly. Return to Vajrasana. 6. Alignment Cues Head and Neck Keep the neck neutral. Gaze forward. Shoulders Relax the shoulders away from the ears. Spine Lengthen the spine upward. Avoid arching the lower back. Hips Keep the hips aligned over the knees. Knees Keep the knees hip-width apart or together. Feet Press the tops of the feet into the floor. 7. Muscles Involved Primary Muscles Secondary Muscles Stabilizing Muscles These muscles stabilize the body during the posture. 8. Kinesiology Kinesiology examines how muscles create movement. Knee Joint Movement: flexion Hip Joint Movement: neutral stabilization Shoulder Joint Movement: flexion and elevation Spine Movement: extension and stabilization Muscles work isometrically to maintain posture. 9. Kinematics Kinematics studies movement patterns. Movement Pattern Plane of Movement The posture occurs primarily in the sagittal plane. Motion Type The posture involves static holding after initial movement. 10. Biomechanism Biomechanics explains how forces interact with the body. Base of Support The knees and shins provide a stable base. Center of Gravity The center of gravity is located above the knees. Joint Stability The knees and hips stabilize the posture. Muscle Engagement Core muscles maintain spinal alignment. 11. Functional Anatomy & Physiology Musculoskeletal System The posture strengthens the legs and improves spinal alignment. Nervous System Enhances body awareness and balance. Circulatory System Improves blood flow in the lower body. Respiratory System The raised arms expand the rib cage, improving breathing. Energetic Perspective The posture stimulates: These centers are associated with emotional openness and vitality. 12. Benefits Physical Benefits Physiological Benefits Mental Benefits 13. Contraindications Avoid or modify the posture if students have: Students with knee sensitivity should use props. 14. Modifications Use a Cushion Place a cushion between the heels and hips. Gentle Arm Lift Raise the arms halfway. Wall Support Practice with the back against a wall. Wider Knees Separate the knees for comfort. These modifications make the posture accessible. 15. Counterposes After practicing Utthita Vajrasana, the following poses help release tension. These poses relax the spine and legs. 16. Teaching Methodology Teaching this posture requires clear guidance. Demonstration Teacher demonstrates the posture slowly. Step-by-Step Instruction Explain each stage clearly. Breath Awareness Encourage slow breathing. 17. Common Mistakes Arching the Lower Back Students may compress the lumbar spine. Correction: engage the core muscles. Lifting the Shoulders Students may tense the shoulders. Correction: relax the shoulders downward. Leaning Forward Students may shift weight forward. Correction: align hips above knees. 18. Adjustments and Corrections While Teaching Verbal Corrections Examples include: Visual Demonstration Teacher demonstrates proper alignment. Hands-on Adjustments With permission, the teacher may: Adjustments should always be gentle. 19. Safety Considerations Teachers should observe: Students should exit the pose if pain occurs. Props may be used when needed. 20. Conclusion Kneeling Pose Arms Raised (Utthita Vajrasana) is a simple yet powerful yoga posture that promotes spinal elongation, shoulder mobility, and lower-body stability. The kneeling position provides a grounded foundation, while the raised arms create a sense of upward expansion. Regular practice improves posture, breathing capacity, and overall body awareness.

Read More »

Utthan Pristhasana (Lizard Pose)

1. Introduction Lizard Pose, known in Sanskrit as Utthan Pristhasana, is a deep hip-opening yoga posture widely practiced in Hatha Yoga, Vinyasa Yoga, and modern mobility-focused yoga sequences. This posture involves placing one foot forward beside the hands while the back leg extends behind the body, creating an intense stretch in the hips, groin, and lower body. The torso can remain upright or gradually lower toward the floor, depending on flexibility and practice level. Lizard Pose is recognized as one of the most effective yoga postures for improving hip flexibility, pelvic mobility, and lower-body strength. It targets areas of the body that often become tight due to prolonged sitting, such as the hip flexors, groin muscles, and inner thighs. Because modern lifestyles frequently involve sedentary habits, many practitioners experience limited hip mobility, which may contribute to lower-back discomfort and reduced functional movement. Practicing Lizard Pose can help restore mobility in the hips and pelvis. From an anatomical perspective, the posture involves deep hip flexion in the front leg, hip extension in the back leg, and external rotation in the front hip joint. The pose also requires stabilization of the pelvis and spine to maintain balance and prevent strain. Biomechanically, Lizard Pose challenges the body’s ability to distribute weight between the front leg, back leg, and upper body support. The posture shifts the center of gravity forward while maintaining stability through muscular engagement in the legs and core. Physiologically, the pose may enhance circulation in the lower body, increase flexibility in connective tissues, and stimulate the digestive and reproductive organs. The compression and stretching of the abdominal region can also encourage internal organ function. Energetically, Lizard Pose is associated with the Muladhara Chakra (root energy center) and the Svadhisthana Chakra (sacral energy center), both of which are linked to stability, grounding, and emotional balance. 2. Word Meaning and Etymology The Sanskrit name Utthan Pristhasana can be divided into three components: Utthan – intense stretch or extendedPristha – back or spineAsana – posture Thus, Utthan Pristhasana may be translated as “Intense Stretch of the Back Body Pose.” Symbolic Interpretation Although the literal meaning refers to the back body, the pose resembles the posture of a lizard resting close to the ground, which explains the commonly used English name Lizard Pose. The grounded nature of the posture symbolizes stability, patience, and connection with the earth. 3. Definition of the Pose Lizard Pose is a deep hip-opening yoga posture in which one foot is placed forward beside the hands while the back leg extends straight behind, allowing the hips to sink toward the floor while maintaining spinal alignment. Key Characteristics The posture is commonly used to increase hip mobility, improve flexibility, and strengthen the lower body. 4. Method of Practice (Step-by-Step) Starting Position Step-by-Step Instructions Step 1 – Bring One Foot Forward Step the right foot forward to the outside of the right hand. Step 2 – Lower the Back Knee Lower the left knee to the mat if practicing the beginner variation. Step 3 – Align the Front Knee Ensure the front knee stays above the ankle. Step 4 – Lengthen the Spine Lift the chest slightly to maintain spinal length. Step 5 – Lower the Torso Optionally lower the forearms to the floor or to yoga blocks. Step 6 – Sink the Hips Allow the hips to gently move toward the floor while maintaining stability. Step 7 – Maintain Breathing Take slow, deep breaths while holding the posture. Step 8 – Hold the Pose Remain in the posture for 5–10 breaths or longer. Step 9 – Release the Pose Press into the hands and step back to Downward Dog. Step 10 – Repeat on the Opposite Side Switch legs and repeat the posture. 5. Alignment Cues Proper alignment ensures safety and effectiveness. Front Knee Keep the knee aligned with the ankle. Back Leg Extend the back leg actively with the toes pointing backward. Pelvis Keep the hips square and balanced. Spine Maintain spinal length rather than collapsing the torso. Shoulders Relax the shoulders away from the ears. 6. Preparatory Practices The following poses prepare the body for Lizard Pose. Low Lunge Opens the hip flexors and quadriceps. Half Split Pose Stretches the hamstrings. Cat–Cow Pose Warms up the spine. Pigeon Pose Improves hip mobility. 7. Counterposes After practicing Lizard Pose, counterposes help restore muscular balance. Downward-Facing Dog Lengthens the spine and legs. Child’s Pose Relaxes the hips and lower back. Supine Twist Releases the lower spine. 8. Modifications Blocks Under Forearms Use yoga blocks to support the forearms. Knee Support Place a folded blanket under the back knee. Upright Variation Keep the arms straight instead of lowering to the forearms. Shortened Stance Reduce the distance between the feet. 9. Muscles Involved Primary Muscles Stretched Hip flexorsAdductorsHamstringsGluteal muscles Secondary Muscles QuadricepsCalf musclesCore stabilizersLower-back muscles These muscles contribute to hip mobility, pelvic stability, and spinal support. 10. Kinesiology Kinesiology studies the relationship between muscles and movement. Joint Actions Front hip – flexion and external rotationBack hip – extensionKnee – flexion in the front legSpine – neutral stabilization Muscle Function The muscles surrounding the hips work both to stretch and stabilize the body during the pose. 11. Kinematics Kinematics examines motion without considering forces. Plane of Motion Movement primarily occurs in the sagittal plane. Axis of Motion Hip flexion and extension occur around a mediolateral axis. Movement Pattern The pose combines static holding with gradual muscular adaptation. 12. Biomechanics Biomechanics studies the forces acting on the body. Base of Support The base of support includes: Center of Gravity The center of gravity shifts forward toward the front leg. Load Distribution Body weight is distributed between the arms and legs. 13. Functional Anatomy Hip Joint The hip joint performs flexion, extension, and rotation. Pelvis The pelvis stabilizes the hip joints during the posture. Spine The spine remains elongated to prevent compression. Connective Tissues Fascia and ligaments adapt gradually to the stretch. 14. Physiological Effects Musculoskeletal System Improves flexibility and joint mobility. Circulatory System Enhances blood circulation in the lower body. Digestive System Abdominal compression may stimulate digestion. Nervous System Encourages relaxation and body awareness. 15. Benefits Physical Benefits Therapeutic Benefits Mental Benefits

Read More »
[gravityform id="2" title=false]
Call Back Form